What's inside
As an Amazon Associate I earn from qualifying purchases. This post may contain affiliate links at no extra cost to you.
Deep voids in wood—large knots, insect damage, cracks, and missing edges—need more than ordinary wood filler. Most ready-mixed fillers shrink, crack, or fall out when packed into a cavity deeper than about 1/4 inch. Two-part epoxy filler is a better choice because it cures into a hard, bonded mass and can bridge irregular gaps without significant shrinkage.
The job is straightforward, but the preparation matters more than the brand. Epoxy will not compensate for loose fibers, trapped moisture, or a poorly supported repair. Start by removing anything soft or detached, then choose the filler and curing method based on the size and location of the void.
As an Amazon Associate we earn from qualifying purchases at no extra cost to you.



Our Top Picks
- Aqua Coat Water-Based Clear Wood Grain Filler GelPint3.55 x 3.55 x 4.2 inches1.14 PoundsCheck on Amazon
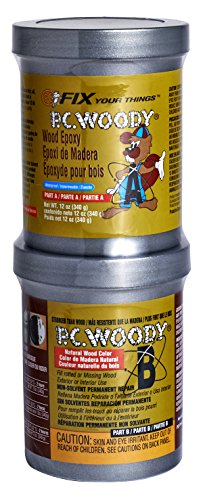 PC Products PC-Woody Wood Repair Epoxy Paste12 oz2.75 x 2.75 x 5.75 inches0.75 poundsCheck on Amazon
Choose the right epoxy filler
There are two common approaches. You can buy a pre-thickened, two-part epoxy wood filler, or mix a low-viscosity epoxy resin with a suitable thickener such as wood flour, silica, or a commercial epoxy filler powder. Pre-thickened filler is easier for small repairs. Liquid epoxy is more useful for deep cavities because it wets the wood well and can be poured in controlled lifts before being thickened or surfaced.
| Repair type | Best material | Main trade-off |
|---|---|---|
| Small holes and shallow dents | Ready-mixed wood filler | Cheap and easy, but it shrinks and is not suitable for deep voids |
| Deep knot holes and missing chunks | Two-part epoxy wood filler | Strong and low-shrink, but costs more and takes longer to sand |
| Large cavities or river-style fills | Liquid casting epoxy with filler or colorant | Good penetration and appearance, but requires careful mixing and depth control |
| Structural damage in a load-bearing part | Wood replacement or mechanical repair | More work, but safer than relying on filler alone |
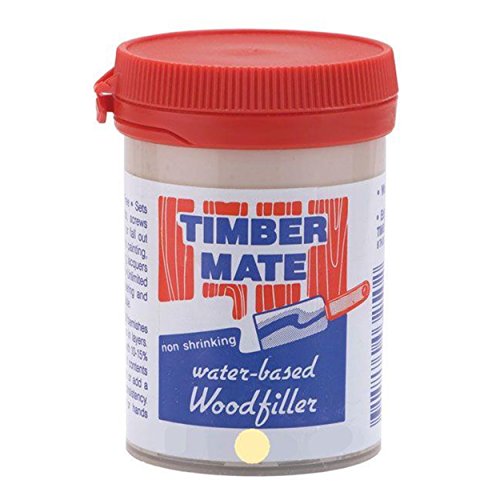
For ordinary furniture and trim, a two-part epoxy wood filler is usually the practical buy. A cheaper water-based filler is fine for nail holes, shallow dents, and gaps under 1/8 inch, especially when the repair will be painted.
Prepare the wood and the void
Remove loose bark, punky wood, dust, and old finish with a chisel, pick, or stiff brush. The cavity needs firm, clean walls. Undercut the sides slightly where possible; a narrow opening with a wider interior gives the cured epoxy a mechanical grip.
Vacuum the hole rather than blowing dust deeper into the wood. Wipe only if necessary, and allow the surface to dry completely. Wood moisture is a common cause of poor adhesion and cloudy or foamy epoxy. For indoor work, let recently machined or washed wood acclimate for at least 24 hours. Do not fill a wet outdoor board and expect a durable repair.
Protect the surrounding surface with painter’s tape, but do not rely on tape to hold back a large liquid pour. Use a dam made from plastic sheet, packing tape, thin plywood, or hot-melt glue. Test the dam with a small amount of water if the repair is large or positioned on an edge.
Mix and fill in controlled stages
Read the manufacturer’s ratio by volume or weight. These are not interchangeable instructions. Measure accurately in disposable cups and scrape the sides and bottom while mixing. Unmixed resin leaves soft spots that may remain tacky indefinitely.
For a deep void, avoid one oversized pour unless the product specifically allows it. Many epoxies generate heat as they cure. A thick mass can overheat, bubble, crack, or discolor nearby wood. A safer general limit is 1/4 to 1/2 inch per lift, though some deep-pour products allow more. Wait until the previous layer has cured to the manufacturer’s stated stage before adding the next.
Use a syringe, small spatula, or craft stick to push epoxy into corners. A short burst from a heat gun or hair dryer can bring bubbles to the surface, but keep it moving and use low heat. Too much heat thins the epoxy, drives bubbles into the wood, or scorches the surrounding finish.
If you are filling a very deep hole, pack the lower section with clean, dry wood chips or a fitted piece of scrap wood, leaving enough space for epoxy around it. This reduces cost and heat buildup. Do not use damp sawdust or random debris. A commercial epoxy filler powder can thicken resin for vertical surfaces, but too much thickener can make the mixture brittle and difficult to spread.
Allow a full cure before leveling
Keep the repair still and within the recommended temperature range, commonly around 65 to 75 degrees Fahrenheit. Cold conditions slow curing dramatically. Do not sand merely because the surface feels firm; epoxy that is still soft underneath will clog abrasive paper and pull from the cavity.
Most epoxy fillers can be shaped after roughly 6 to 24 hours, but full cure may take several days. Check the technical data sheet if the repair will be drilled, routed, or heavily loaded. A fingernail test on an exposed edge is a rough check, not a substitute for the stated cure time.
Remove the bulk with a sharp chisel, block plane, or coarse paper on a firm sanding block. Start around 80 grit, then move to 120 and 180 grit. A random-orbit sander is useful on broad panels, but it can dish out soft surrounding wood while leaving the epoxy high. Stop at 180 or 220 grit when the surface will receive paint. For a clear finish, sand the wood consistently to the same final grit; an epoxy patch often reflects light differently from the surrounding grain.
Plan the final finish before filling
Epoxy does not absorb stain like wood. A transparent or amber epoxy may look acceptable in a dark knot, but a pale patch usually stands out under stain. If the repair must blend into natural wood, test the exact epoxy, tint, stain, and topcoat on scrap first. Tinting the epoxy with compatible pigment is often more predictable than trying to stain it afterward.
For painted furniture, fill slightly proud, sand flush, and apply a suitable primer. A stain-blocking primer helps when the surrounding wood contains resin or tannin. For a clear finish, keep expectations realistic: epoxy can stabilize and fill a defect, but it will not recreate missing grain.
Wear nitrile gloves, eye protection, and provide ventilation. Use a respirator appropriate for sanding cured epoxy if dust control is poor. Clean tools before the resin cures; cured epoxy generally has to be scraped off. For large holes in chair legs, structural beams, or joinery, replace damaged wood or consult a professional rather than treating filler as a structural member.
For repeated repairs, buying a disposable epoxy mixing kit and a small digital scale can improve consistency. The inexpensive setup is worthwhile when inaccurate ratios or rushed mixing would ruin an otherwise sound piece.

0 Comments