What's inside
As an Amazon Associate I earn from qualifying purchases. This post may contain affiliate links at no extra cost to you.
Why Color Matching Fails
Most wood filler looks right in the can and wrong on the board. Two reasons for that. First, filler never stains like real wood. The binder — whether it’s calcium carbonate, nitrocellulose, or epoxy — absorbs stain differently than wood fibers, so even a product labeled “stainable” will come out lighter and flatter. Second, wood color isn’t one color. A finished oak or walnut board is a mix of heartwood, sapwood, grain lines, and pores that catch more stain. A single-color filler patch will always read as a solid spot if you try to match the average tone.
The goal isn’t a perfect average match. It’s to match the lightest base tone and then add grain back, or to choose a filler that cures to the final finished color so you don’t rely on stain at all. How you get there depends on whether you are filling before or after finishing.
Types of Filler and How They Take Color
There are three basic approaches, and they behave very differently under stain and clear finish:
| Type | How It Colors | Best For | Common Failure Mode |
|---|---|---|---|
| Water-based stainable filler | Light tan when dry, designed to accept stain | Nail holes and small cracks that will be stained later | Stain comes out blotchy and 20-30% lighter than surrounding wood; visible halo around repair |
| Solvent-based / lacquer-based filler | Darker, harder cure; less porous | Hardwoods where you need less shrinkage and better hardness | Repels oil-based stain, leaves a light spot that won’t darken no matter how long you leave stain on |
| Pre-tinted filler, epoxy, or wax stick | Already colored, does not need stain | Repairs on pre-finished or clear-coated boards | Color looks perfect wet but dries 1-2 shades lighter or darker; hard to adjust without mixing |
If you are staining the whole board after filling, stainable water-based filler is the honest workhorse. If your board is already stained and sealed, skip stainable filler entirely and use a pre-tinted option. Trying to stain a single filled nail hole to match a factory-finished floor is where most DIY patches fail.
The Only Reliable Method: A Test Board
Never match color on the project itself. Cut a 12-inch scrap from the same species — or use the underside of the board if you have no scrap — and run the exact finishing schedule you plan to use. That schedule matters. A filler patch under Minwax Provincial will look completely different than the same patch under Varathane Early American, even on the same pine.
Do this sequence:
1. Sand the test board the same way as the project, typically 120 grit, then 150 grit, then vacuum and tack. Most filler adhesion problems come from filling on a surface sanded finer than 180 — the filler has nothing to bite.
2. Apply filler in three small test patches: one filler straight from the can, one tinted slightly darker, one tinted slightly lighter. Keep each patch to about the size of a dime and press it in firmly. Overfill by about 1/32 inch. Water-based fillers shrink 5-10% as they dry; solvent-based shrink less, about 2-3%, but will still dish if you level them flush while wet.
3. Let it dry fully. Water-based needs 2-6 hours to cure depending on depth and humidity; epoxy can need 24 hours. Don’t judge color when damp — most stainable wood filler dries chalky and light and will darken slightly.
4. Sand flush with 150 grit, then 180, with a hard block. Finger-sanding rounds the patch and telegraphs through finish.
5. Stain, seal, and topcoat the test board exactly as you will the project. Apply stain, wait your planned dwell time (usually 5-10 minutes for pigment stains), wipe, let dry, then apply your clear coat. The clear coat deepens everything by roughly half a shade and is essential for a true comparison.
Compare the patches in daylight and under indoor light at eye level. The right one will disappear from 3 feet away. If none do, adjust and repeat. This 30-minute test saves you from redoing an entire top.
How to Tint Filler for a Closer Match
You will almost always need to tint. Even “natural” stainable filler is too light for dark woods like walnut or chestnut. You have two ways to do it:
For water-based filler before staining: Use universal tinting pigments, dry earth pigments, or a few drops of water-based wood stain. Add pigment sparingly — start with 2-3% by volume. Mix thoroughly on a piece of cardboard with a putty knife. Remember the cured color will be lighter than the wet mix, so mix it about 10% darker than your target. If you are mixing a large batch for a floor, measure by drops or grams so you can repeat it.
For pre-finished repairs after the finish is on: Buy a small set of tinted wood filler color mix kit or wax fill sticks in 3-4 related shades. No single color will do. Pick the lightest color that matches the board’s base, fill the void, then use a darker touch-up marker or fine artist’s brush to draw grain lines. That fake grain breaks up the solid spot and is what makes a repair invisible from a normal viewing distance. A solid dark brown fill on light maple screams repair; a light tan fill with two thin brown lines does not.
Two practical rules: First, don’t use oil-based stain to tint water-based filler — it can prevent curing and leaves a soft, crumbly patch. Second, don’t try to darken filler by globbing on a second coat of stain after the first has dried. Pigment sits on top of the sealed filler and wipes right off.
Application Tips That Affect Final Color
Color match is half chemistry, half application. A well-matched filler will still look bad if it is applied poorly.
Keep patches small. The larger the filled area, the more obvious the uniform color. For cracks wider than 1/8 inch or knots larger than a quarter, filler will always look like plastic. Consider a dutchman patch or epoxy with real wood dust instead.
Press hard and scrape clean. After pressing filler into the void, pull a flexible putty knife across the grain at a low angle to scrape excess off the surface. Thin smears around the hole trap stain differently and create a light halo that is wider than the original defect.
Sand exactly flush, no dish and no ridge. A low spot catches stain and turns dark; a ridge catches sanding dust and stays light under clear coat. Check with raking light — hold the board so light skims across the surface.
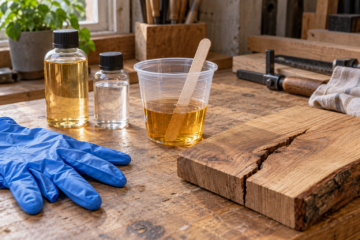
For floors and tabletops that get a hard finish, consider a two-part tinted epoxy wood filler for areas that will see impact or moisture. It costs 2-3x more than water-based, sands harder, and can’t be stained, but you can tint it precisely with epoxy pigments and it won’t shrink or crack over seasonal movement. For small nail holes in trim that will be painted or stained and rarely touched, the $8 water-based tub is fine. Don’t overspend.
When Not to Use Filler
Filler is a compromise. If you are working with a highly figured wood — curly maple, quartersawn white oak, or anything with strong pore contrast — filler will not take grain pattern no matter how well you tint it. In those cases, make a custom fill from sanding dust from that exact board mixed with clear epoxy or CA glue. It will still be slightly darker than the wood but it contains real fiber and catches light more naturally.
Also avoid filling before bleaching or using a pre-stain conditioner. Conditioner seals the wood and changes how much stain the filler absorbs, usually making the mismatch worse. If you use conditioner, apply filler first, stain second, and accept that the filler will remain lighter.
Finally, if your board is already finished with polyurethane, don’t sand through the finish to apply stainable filler. Fill on top of the finish with a colored wax or hard fill stick that matches the finished sheen, then seal the repair with a dab of clear finish. It’s a 5-minute fix that holds up well for furniture and trim, and it avoids creating a larger raw-wood spot that you then have to completely refinish.

0 Comments