What's inside
As an Amazon Associate I earn from qualifying purchases. This post may contain affiliate links at no extra cost to you.
Laminating thin wood strips is mostly a glue-selection and preparation problem. The strips may be only 1/8 to 1/4 inch thick, so they bend easily, show glue squeeze-out on their edges, and can curl or slide under pressure. The best adhesive depends on the wood species, the finished shape, moisture exposure, and how much working time your clamping setup allows.
As an Amazon Associate we earn from qualifying purchases at no extra cost to you.


Our Top Picks
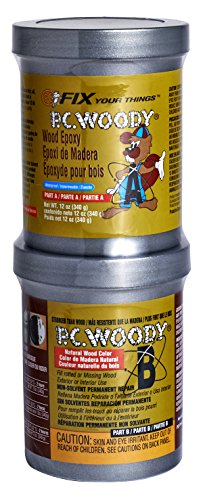 PC Products PC-Woody Wood Repair Epoxy Paste12 oz2.75 x 2.75 x 5.75 inches0.75 poundsCheck on Amazon

Choose by project conditions
For indoor furniture, boxes, trim, bent laminations, and decorative panels, a good-quality yellow or white wood glue is usually the right starting point. Look for an adhesive rated for interior woodworking and labeled Type II or Type III if you need better moisture resistance. For outdoor work or parts exposed to standing water, use a waterproof adhesive rather than assuming ordinary yellow glue will survive.
Thin strips need an adhesive that wets both surfaces without requiring a thick glue line. A glue that fills gaps is useful only when the joint cannot be made tight; it does not compensate for badly milled strips. Most laminations are strongest when the mating faces are flat, clean, and held together with firm, even pressure.
| Glue type | Best use | Main advantages | Important drawbacks |
|---|---|---|---|
| PVA wood glue | Indoor laminations and most furniture | Inexpensive, easy cleanup, strong on close-fitting wood joints | Limited open time; not ideal for prolonged wet exposure |
| Waterproof PVA | Kitchens, bathrooms, exterior parts with good protection | Water-resistant or waterproof, familiar application | More expensive; squeeze-out can be harder to remove when cured |
| Epoxy | Oily woods, small gaps, difficult or damp conditions | Excellent gap filling and moisture resistance | Messy, slower, costly, and harder to sand cleanly |
| Polyurethane glue | Exterior repairs and some difficult substrates | Water-resistant and bonds several materials | Foams, needs moisture, and the foam is not a reliable structural filler |
| Hide glue | Traditional work and reversible repairs | Long open time, easy repair, good for some bent laminations | Less convenient; liquid versions have limited heat and moisture resistance |
The best default: PVA wood glue
For most thin-strip laminations, start with interior PVA wood glue. It is cheap, strong, and forgiving. Standard yellow glue works particularly well with maple, oak, ash, walnut, cherry, pine, and other common furniture woods when the joint faces fit closely.
Use a thin, continuous coat rather than puddles. A small foam roller, glue spreader, old credit card, or stiff brush can distribute it evenly. For strips around 1/8 inch thick, excess glue adds mess without adding strength. The surfaces should look fully wetted but not have deep pools. Apply glue to both faces only when the wood is unusually thirsty, the joint is rough, or the manufacturer specifically recommends it.
Standard PVA often gives you about 5 to 10 minutes of useful assembly time, depending on temperature, humidity, glue thickness, and how absorbent the wood is. If your lamination has many strips or a complicated bending form, choose a longer-open-time adhesive or work in smaller sections. Do not spread glue across the entire assembly and then spend 20 minutes arranging parts.
When waterproof glue matters
Use Type III waterproof wood glue for outdoor furniture, boat-related components, bathroom parts, or pieces likely to experience repeated wetting. It is also sensible when the final finish will not reliably seal every edge.
Waterproof PVA is not a substitute for good design. A laminated part that traps water, exposes end grain, or repeatedly freezes while wet may still fail. Waterproof formulations can also leave more visible residue, so wipe squeeze-out carefully with a damp cloth before it skins over. On open-pored woods, pressing wet glue into the pores can create light or dark finishing marks.
When epoxy or polyurethane makes sense
Epoxy is useful for oily species such as teak, ipe, and some rosewoods, especially after careful solvent wiping and a fresh sanding scratch. It is also a good choice when the strips have small unavoidable gaps or the assembly will face substantial moisture. Choose a two-part wood epoxy adhesive with enough working time for your setup.
Epoxy costs more and creates extra finishing work. It can remain visible at the edges, clog sandpaper, and become brittle if used in a joint that flexes repeatedly. Mix exact ratios by volume or weight as directed, and do not add random sawdust unless the product instructions allow it.
Polyurethane glue is water-resistant and can bond wood to some nonporous materials, but it is often overused for ordinary wood laminations. It needs moisture to cure and expands into foam. That foam has little structural value, can push thin strips apart, and is unpleasant to clean. If you use it, apply a very thin film, lightly dampen only as directed, and clamp securely.
Prepare the strips and control the clamping
Mill or sand the mating faces flat. Sanding to about 120 or 150 grit is generally enough; polishing the faces to 220 grit can reduce mechanical keying and make glue spread less consistent. Remove dust with a vacuum or clean, dry brush. Avoid soaking the strips with water before gluing, since swollen fibers can create a weak, starved joint after they dry.
Dry-fit the entire stack before opening the glue. Mark the order and orientation of the strips, then prepare cauls, clamps, or a bending form. Wax paper or packing tape on the cauls prevents accidental bonding. For curved laminations, use enough clamps that pressure is distributed along the curve rather than concentrated at a few points.
Clamp until the adhesive manufacturer’s stated minimum time has passed, commonly 30 minutes to 2 hours for PVA. Leave the assembly undisturbed for roughly 24 hours before heavy machining. Tighten clamps until you see a small, continuous bead of squeeze-out. More pressure is not automatically better: excessive force can squeeze out too much glue, crush soft fibers, or make thin strips slide sideways.
Avoid common failures
A failed lamination often comes from one of four causes: uneven strip faces, insufficient pressure, glue that skinned before assembly, or movement during curing. Cold shops slow PVA dramatically; below about 50°F, many water-based glues become unreliable. Bring the wood, glue, and workspace to approximately 65 to 75°F when possible.
If the finished piece will be stained, remove every visible glue smear before it dries. Dried glue seals the pores and causes pale patches that stain will not penetrate. Scrape or wipe squeeze-out while it is rubbery, then sand carefully through the surrounding area. Test the complete glue-and-finish process on scrap, particularly with dark or open-grained species.



0 Comments