What's inside
As an Amazon Associate I earn from qualifying purchases. This post may contain affiliate links at no extra cost to you.
Laminating thin wood strips puts more demand on glue than a typical edge joint. Many narrow glue lines must stay closed while the strips bend or spring back, and the adhesive has to spread evenly without making the bundle slide out of alignment. The right choice depends on the wood, the curve, and whether the finished piece will face moisture or heat.
As an Amazon Associate we earn from qualifying purchases at no extra cost to you.


Our Top Picks
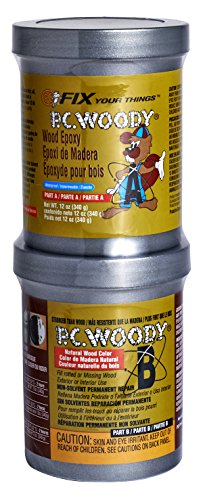 PC Products PC-Woody Wood Repair Epoxy Paste12 oz2.75 x 2.75 x 5.75 inches0.75 poundsCheck on Amazon
Start with the laminate
For a flat panel made from straight strips, ordinary woodworking glue is usually adequate. For a curved lamination, the strips exert springback force after the clamps come off. A flexible adhesive or a rigid adhesive used with enough thin plies and a reliable form may be needed. Very tight curves, oily species, exterior exposure, and visible glue lines all change the decision.
Check the wood before shopping. Strips should be uniform in thickness and free of dust, finish, and oily contamination at the bonding faces. A gap that looks small when dry can become a weak glue line, especially with a thin, fast-setting adhesive. Dry-fit the stack and check that clamps or a vacuum bag can apply pressure across its full length.
Compare common glue types
| Glue type | Best fit | Trade-offs |
|---|---|---|
| Yellow PVA woodworking glue | Interior laminations with close-fitting faces | Inexpensive, easy to spread and clean up with water before cure; limited moisture resistance and relatively short open time on some formulations. |
| Type II or Type III PVA | Projects that may see occasional or regular moisture | More water-resistant than basic interior PVA; still needs good fit and clamping, and water resistance does not make every joint suitable for immersion. |
| Urea-formaldehyde resin glue | Rigid, stable laminations and bent work where creep matters | Longer working time and low creep after cure; requires accurate mixing, careful handling, and suitable temperature and humidity during cure. |
| Epoxy | Uneven fits, difficult species, or demanding moisture exposure | Can bridge small gaps and offers useful working time; costs more, can leave a thick or visible glue line, and should not be treated as a substitute for proper clamping. |
| Polyurethane glue | Some damp or exterior jobs where its specific rating fits | Moisture-curing formulas foam as they cure. Foam is not strong gap fill; excess squeeze-out can be messy and the joint still needs close contact. |
Choose for the job, not the label
For a dry indoor project with smooth, well-matched strips, start with yellow woodworking glue. It is the economical choice for furniture parts, trim, and many small bent laminations. Buy a fresh bottle, follow its temperature range, and avoid letting glue sit open until it skins over. PVA can creep under sustained heat or load, so it is not ideal for every heavily stressed curve.
If the part may get wet, look for a product rated for the actual exposure. Type II PVA suits occasional moisture; Type III PVA offers higher water resistance for many exterior applications. Neither rating excuses a poor joint, and outdoor parts still need a finish and design that shed water. For repeated wetting, select an adhesive whose technical sheet explicitly covers that service.
For a rigid curve or a laminate that must resist springback, consider urea-formaldehyde laminating glue. It cures hard and has low creep, but is less forgiving than a ready-to-use PVA. Mix only what you can apply within its stated pot life, and do not use it below the manufacturer’s minimum temperature. If that handling is more than the project warrants, thin plies and a sturdy form can make PVA work well.
Epoxy is worth considering when the wood is difficult to bond, the fit is imperfect, or water exposure is demanding. Use a wood-compatible system and follow the specified resin-to-hardener ratio; guessing the mix can leave a soft, weak bond. For two-part epoxy adhesive, check the cure time at your shop temperature. A slow cure gives more assembly time but may require the form to stay clamped overnight or longer.
Control glue line and pressure
Spread a thin, continuous coat on each mating face if the adhesive instructions call for it. For PVA, the aim is complete coverage without puddles; too little leaves dry patches, while excess glue makes cleanup harder and may lubricate the stack so strips shift. On a stack of many plies, work in manageable stages if the open time is short. Dry-run the whole sequence first.
Use enough clamps to close the joints evenly, commonly spaced about 6 to 8 inches apart on a narrow lamination, with cauls to spread pressure. Treat that spacing as a starting point, not a fixed rule: a wide stack or stiff strips may need closer spacing. Tighten progressively from the middle outward and check both edges for gaps. Excessive pressure can squeeze out too much glue or distort thin strips; the goal is closed joints, not maximum clamp force.
Curved work needs a form that resists the clamp load. Make the form slightly tighter than the desired finished curve if springback is expected, then test a sample when accuracy matters. More, thinner plies generally bend more easily than a few thick ones. A failed curve often comes from a weak form, uneven pressure, or too few plies—not simply the wrong glue.
Avoid common failures
Respect the adhesive’s open and clamp times. Warm, dry conditions can shorten PVA working time; cold conditions slow curing and can prevent a satisfactory bond. Do not remove clamps just because the squeeze-out feels dry. Follow the label’s clamp and full-cure guidance, and allow extra time in a cool shop.
Clean squeeze-out at the right stage for the adhesive. Wet PVA can be wiped with a lightly damp cloth, but flooding the joint can dilute glue at the edge or raise wood grain. Cured glue is harder to remove and can block stain, leaving pale patches. Scrape or sand carefully after cure, then test the intended finish on an offcut. On visible work, avoid forcing glue deep into the pores and keep the bonding faces bare wood.
When uncertain, make a small test laminate from the same species and thickness, using the planned glue, form, and clamping schedule. After full cure, inspect the glue lines and try to break the sample. A sound joint often fails in the wood rather than peeling cleanly along the glue line. That inexpensive test is more useful than choosing an adhesive by its strongest-sounding claim.



0 Comments