What's inside
- Start with the pen style, not the brand
- How to choose a pen turning kit for the lathe you own
- Match the kit to your drill and blank preparation
- Decision matrix for a first purchase
- Calculate the real cost before choosing a kit
- Accessories you may need
- Durability and common beginner mistakes
- Bottom line
- Related Guides
- Start with the pen style, not the brand
- How to choose a pen turning kit for the lathe you own
- Match the kit to your drill and blank preparation
- Decision matrix for a first purchase
- Calculate the real cost before choosing a kit
- Accessories you may need
- Durability and common beginner mistakes
- Bottom line
- Related Guides
As an Amazon Associate I earn from qualifying purchases. This post may contain affiliate links at no extra cost to you.
To choose a pen turning kit, first match its tube diameter and bushing set to the pen style you want to make, then confirm that its mandrel, drill bit, blank size, and lathe accessories fit the tools you already own.
As an Amazon Associate we earn from qualifying purchases at no extra cost to you.
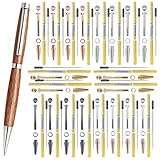


Start with the pen style, not the brand
A pen turning kit normally includes the finished pen hardware—such as the nib, center band, clip, cap, mechanism, and refill—while the wood or acrylic blank and most turning tools are purchased separately. The hardware determines the tube diameter, the finished pen’s size, and which bushings you need.
For a first project, a slimline kit is usually the easiest choice. It uses relatively small blanks, has uncomplicated hardware, and is forgiving when learning to turn accurately. A twist ballpoint, click pen, rollerball, fountain pen, and bolt-action pen can all be excellent projects, but they differ substantially in blank size, drilling requirements, and assembly pressure.
| Pen style | Typical tube outside diameter | Typical blank size before turning | Common drill size | Beginner considerations |
|---|---|---|---|---|
| Slimline twist ballpoint | Approximately 7 mm | 3/4 x 3/4 x 5 in | 7 mm | Lowest material cost; thin finished profile |
| Trimline or comfort-grip ballpoint | Approximately 8–10 mm | 3/4 x 3/4 x 5 in | Kit-specific, often 8 or 10 mm | Check the exact instructions; similar-looking parts may not interchange |
| Click pen | Approximately 8–10 mm | 3/4 x 3/4 x 5 in | Kit-specific | Requires accurate end dimensions for the click mechanism |
| Rollerball or fountain pen | Approximately 10–12 mm | 7/8 x 7/8 x 5–6 in | Kit-specific, often 10–12 mm | Larger blank and more careful assembly; premium refills cost more |
| Multi-axis or bolt-action pen | Approximately 10–12 mm or more | 7/8 x 7/8 x 5–6 in | Kit-specific | More hardware pieces and a greater need for accurate bushings |
These dimensions are common ranges rather than universal standards. A “10 mm” kit from one supplier may not use the same tube length, bushing profile, or drill size as another. Treat the manufacturer’s instruction sheet as the final authority.
How to choose a pen turning kit for the lathe you own
Mandrel size and taper
Most conventional pen mandrels use a slim steel shaft held in a lathe chuck or mounted with a Morse taper. Many entry-level systems use a mandrel shaft around 1/4 inch in diameter, although the exact mounting arrangement varies. A mandrel may also be sold as a complete assembly with a Morse taper, spacers, lock nut, and live-center support.
Check three measurements before buying:
- Headstock connection: identify whether your lathe uses a Morse taper, threaded spindle, or a chuck-mounted accessory.
- Tailstock connection: verify that the live center or mandrel support matches the lathe’s taper.
- Usable capacity: make sure the distance between centers can hold the assembled blank, spacers, and mandrel hardware.
A standard fixed-length mandrel is inexpensive and suitable for many slimline pens. An adjustable mandrel lets you expose only the length needed for a particular project, reducing unnecessary flex. This is useful if you plan to make several pen styles or already own a precision chuck. Excessive mandrel extension is a common cause of vibration and tapered blanks.
Bushings are not optional extras
Bushings sit against the pen tubes and provide a turning target for the blank. They establish the diameter where the wood meets the metal hardware. Buy bushings designed for the exact kit, not merely bushings labeled for a similar pen category.
Some kits use separate bushings for each end; others use stepped bushings or a universal system. A bushing may fit the mandrel but still be wrong for the kit’s tube diameter or hardware profile. The practical result is a pen that is either proud of the metal parts or undersized after sanding.
For frequent turning, consider dedicated bushings for each pen family. Bushings wear through sanding, especially when abrasive paper touches the metal. A simple maintenance habit is to mark each bushing set, remove dust after use, and measure suspicious bushings with calipers. Replace them when their shoulders become rounded or their diameter has noticeably changed.
Match the kit to your drill and blank preparation
A pen kit is only useful if you can drill a straight, clean hole through the blank. The drill bit must match the tube specification, not the nominal name of the pen. A 7 mm slimline kit needs a sharp 7 mm bit; a larger kit may call for a fractional, metric, or letter-size bit.
For occasional projects, a standard twist bit can work if the blank is supported and the hole is cleared frequently. A brad-point bit tends to start cleanly in wood, while a pen-making bit or long bit can be useful for deeper blanks. Acrylic and other stabilized materials may require slower drilling, backing out often to clear chips, and attention to heat buildup.
Before gluing, dry-fit the tube. The tube should slide into the hole with light resistance, not require force and not rattle loosely. If the fit is too tight, forcing the tube can split a wood blank or scrape off adhesive. If it is too loose, the adhesive layer may be uneven and weak.
Decision matrix for a first purchase
| Your situation | Best starting direction | What to prioritize | What to avoid initially |
|---|---|---|---|
| Lowest budget, one or two pens | 7 mm slimline twist kit | Included bushings, inexpensive refills, common 7 mm drill size | Buying several specialty bushing sets at once |
| Small lathe with limited center distance | Short ballpoint or click kit | Tube length under about 3 inches and a compatible mandrel | Long rollerball or fountain pen kits |
| Already own a 1/4-inch pen mandrel | Kit using your existing mandrel diameter | Correct bushings and spacer fit | Assuming every 7 mm kit uses identical hardware |
| Want thicker, more substantial pens | 10–12 mm rollerball, click, or bolt-action kit | Larger blank capacity, kit-specific drill bit, accurate finishing diameters | Using slimline bushings or undersized blanks |
| Plan to make pens regularly | A kit family with replaceable parts and reusable bushings | Refill availability, reliable mechanisms, adjustable mandrel, calipers | Choosing solely by the lowest kit price |
Calculate the real cost before choosing a kit
The hardware price is only part of the cost. Suppose a beginner buys a five-pack of slimline kits for a general market price of $15–$30, five blanks at $2–$6 each, and consumables—glue, sandpaper, finish, and refills—totaling about $10–$20. The initial batch therefore costs approximately $35–$80, or $7–$16 per completed pen before counting the lathe and reusable tools.
That calculation explains why a slightly more expensive kit can be economical if it uses common refills and bushings. A complicated mechanism that costs more but requires a special refill, extra drill bit, and dedicated bushing may have a higher ownership cost than its package price suggests.
Accessories you may need
- Pen mandrel: required unless the kit is designed for another turning method.
- Correct drill bit: one for each tube size; keep it sharp and free of resin buildup.
- Spacers and lock nut: often included with a mandrel, but confirm before ordering.
- Calipers: useful for measuring tube ends and matching the hardware precisely.
- Pen press: a dedicated press makes assembly more controlled. A drill press can sometimes be adapted, but do not rely on hand pressure for tight components.
- Tube insertion adhesive: medium or thick cyanoacrylate and two-part epoxy are common choices; follow the adhesive manufacturer’s cure instructions.
- Respiratory and eye protection: wear protection suited to your material, especially when sanding acrylic, resin, or exotic wood.
Durability and common beginner mistakes
The parts most likely to cause trouble are the mandrel, bushings, drill bit, and pen mechanism. A bent mandrel produces persistent vibration even when the lathe is correctly adjusted. Bushings gradually lose their original profile through sanding. Drill bits become dull and generate heat, while inexpensive mechanisms can develop loose clips or inconsistent clicks.
Do not sand aggressively against the bushings, and do not use a blunt chisel to force a blank to size. Turn close to the bushing diameter, then sand with progressively finer abrasives. Keep the blank supported on the mandrel, avoid excessive tailstock pressure, and stop the lathe before checking dimensions.
During assembly, press components in squarely and in the correct order. If a mechanism stops halfway, do not hammer it through; disassemble the setup if possible and identify whether the tube is damaged, the component is misaligned, or the press is applying force to a delicate part.
Bottom line
For most beginners, a 7 mm slimline twist kit with matching bushings, a compatible mandrel, a 7 mm drill bit, and blanks around 3/4 x 3/4 x 5 inches offers the simplest starting point. Choose a larger click, rollerball, fountain, or bolt-action kit when your lathe has the capacity, your drilling setup is accurate, and you are prepared to buy the kit-specific bushings and accessories. The best answer to “how to choose a pen turning kit” is therefore not the most elaborate hardware: it is the kit whose tube, bushings, mandrel, blank, and assembly method all match your existing equipment.
0 Comments