What's inside
As an Amazon Associate I earn from qualifying purchases. This post may contain affiliate links at no extra cost to you.
For exterior trim finished with a semi-transparent stain, cedar and redwood are usually the safest choices. Both resist decay better than many common softwoods and have grain that looks good under a stain that lets the wood show. If they’re unavailable or too expensive, pressure-treated pine can work, but it needs careful drying and preparation. The best choice also depends on whether the trim is sheltered, how much maintenance you’ll accept, and what the stain maker allows.
As an Amazon Associate we earn from qualifying purchases at no extra cost to you.

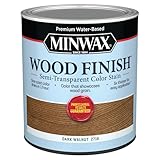

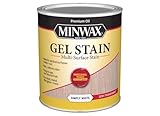
Our Top Picks
 Minwax Wood Finish Water-Based Semi-Transparent Color Stain32 Fl Oz (Pack of 1)4.25 x 4.25 x 4.88 inches2.47 poundsCheck on Amazon
 Minwax Semi-Transparent Simply White Oil-Based Gel Stain 1One Size4.3 x 4.3 x 4.9 inches0.01 PoundsCheck on Amazon
 Thompson’s WaterSeal Semi-Transparent Waterproofing Wood Stain and Sealer1 Gallon6.6 x 4.2 x 10.25 inchesCheck on Amazon

What the stain needs from the wood
Semi-transparent stain colors the surface without hiding the grain. Unlike paint or a solid-color stain, it won’t disguise knots, uneven color, end-grain differences, or patch repairs. It also offers less protection from sunlight than an opaque finish. On trim, where end grain and joints readily take up water, wood selection and installation matter as much as the stain.
Check the product label before buying lumber. Some stains are intended for siding and other broad surfaces, not fine trim; some specify particular wood types or require bare wood. A penetrating oil stain may suit cedar, while another formula may be designed for pressure-treated lumber. Don’t assume that “semi-transparent” alone tells you whether a product is suitable.
Wood choices compared
| Wood | What works well | Trade-offs | Best use |
|---|---|---|---|
| Western red cedar | Good natural decay resistance; attractive, visible grain; generally takes penetrating stain well | Soft and easy to dent; color and grain can vary; higher cost than pine | Trim where appearance and lower decay risk justify the price |
| Redwood | Decay-resistant heartwood and rich natural color | Availability and price vary; sapwood is less durable than heartwood | Decorative trim when you can select mostly heartwood |
| Pressure-treated pine | Widely available and often inexpensive; treatment helps resist decay | Can be wet, warped, or prone to checking; may stain unevenly | Budget work, provided the boards are dry and straight enough |
| Douglas fir | Strong and often easy to find in long, clear lengths | Not as naturally decay-resistant as cedar or redwood; exposed end grain needs protection | Sheltered trim with sound detailing and regular maintenance |
| Untreated pine | Low upfront cost and easy to work | More vulnerable to rot and movement outdoors | Protected locations, or jobs where frequent upkeep is acceptable |
Cedar and redwood: the strongest starting point
For visible trim, western red cedar is a practical default when the budget allows. It is relatively light, easy to cut, and commonly sold in grades suited to exterior work. Choose boards with sound edges and minimal loose knots, especially near corners and fasteners. Knots are not automatically a defect, but they can stand out under semi-transparent stain and may move or shed resin.
Redwood can be an excellent alternative, but look closely at the board. The more durable material is heartwood; pale sapwood does not share the same decay resistance. Availability is regional, so it may cost more or be harder to source in the lengths and profiles you need. Neither cedar nor redwood is maintenance-free: sun and rain still erode stain, and unsealed end grain can absorb water.
When pressure-treated pine makes sense
Pressure-treated pine is the budget option, not a guaranteed shortcut. Fresh boards may contain enough moisture to interfere with stain, causing poor penetration, blotchy color, or early peeling and flaking. Follow the stain label’s moisture requirements. If no meter is available, a common practical check is to place a few drops of water on a test area: if they bead for several minutes rather than soaking in, the surface may still be too wet or too closed to accept a penetrating stain well. This is only a screening test, not a substitute for the product instructions.
Buy the straightest, driest boards in the stack and allow wet lumber to dry with air circulating around it. Don’t stain on a calendar guess; test the actual surface. For an exposed, high-visibility trim package, cedar may save time and reduce the risk of uneven results. For lower-cost trim in a sheltered spot, dry treated pine can be a reasonable choice.
Preparation that prevents early failure
Let new wood acclimate, then sand rough or raised fibers with 80- to 120-grit paper. Avoid polishing the surface with very fine paper; a slick surface can reduce stain uptake. Remove dust, dirt, and mill glaze as directed by the stain manufacturer. If you wash the wood, give it time to dry fully before coating. Treat a hidden offcut or scrap first, because stain color on a small sample may differ from the installed trim.
Seal cuts and end grain with a compatible product if the stain system calls for it. End grain can absorb water several times faster than the face of a board, so it is a frequent route to swelling, checking, and rot. Keep trim clear of soil and standing water, use corrosion-resistant fasteners suitable for the wood and treatment, and avoid trapping water behind joints. A good stain cannot compensate for a leak-prone detail.
Apply stain only within the temperature, weather, and moisture limits on the label. Work board by board and keep a wet edge to reduce lap marks. Don’t leave pooled stain in corners or joints; excess can dry sticky or uneven. If you want to compare options, start with a semi-transparent exterior wood stain compatible with your species and exposure.
What to buy and how to plan upkeep
For the best balance of appearance and durability, choose clear or appearance-grade cedar, then use a penetrating exterior stain rated for the exposure. For a lower-cost job, choose dry, straight pressure-treated pine and test the stain on a cutoff before coating all the trim. If the trim is deeply sheltered under a porch roof, Douglas fir or untreated pine may be acceptable, but check it regularly for soft spots, open joints, and water damage.
Semi-transparent stain needs inspection more often than a film-forming paint system, especially on sunny or weather-facing elevations. Look for fading, water no longer beading, and bare patches at end grain. Maintenance timing varies with climate and product; follow the label and recoat when the finish is worn, rather than waiting for the wood to gray or split. A wood moisture meter can help assess questionable boards before staining. If visible grain is not essential and the trim takes severe weather, an opaque exterior paint or solid stain may be the more durable, forgiving finish.

0 Comments