What's inside
As an Amazon Associate I earn from qualifying purchases. This post may contain affiliate links at no extra cost to you.
Our Top Picks
 EXCEART Wooden Bunny Dolls 6 Pcs Unfinished Easter8.80X3.00X3.00CM3.46 x 1.18 x 1.18 inches0.19 PoundsCheck on Amazon
 Woodpeckers Wood Peg People SetComplete Family Set - 40 Pieces6.5 x 4.3 x 1.1 inches0.5 PoundsCheck on Amazon
 AquaCoat Water-Based White Cabinet Wood Grain Filler Gel16 Fl Oz (Pack of 1)10 x 10 x 10 inches1.2 poundsCheck on Amazon
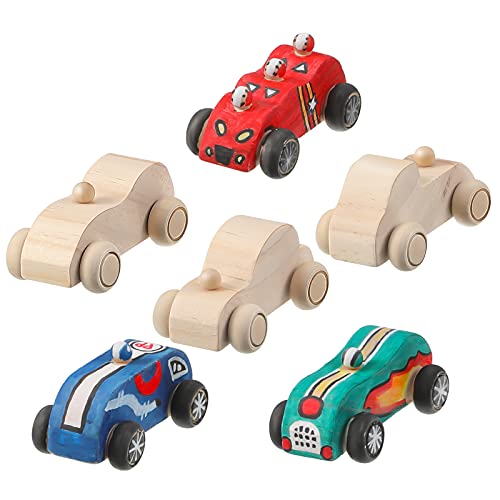
Best overall: paint-grade poplar
Poplar is usually the best wood for a painted wooden toy with a smooth surface. It is affordable, widely available, easy to cut, and has a fine, mostly uniform texture that takes primer and paint evenly. Its pale greenish-white color does not matter once the toy is fully covered.
Poplar is softer than maple, so sharp corners and thin details can dent during assembly or play. That is a manageable trade-off for most toys. Choose boards without knots, mineral streaks, splits, or fuzzy grain. For small parts, use clear, kiln-dried stock around 1/2 to 3/4 inch thick rather than warped hobby boards.
As an Amazon Associate we earn from qualifying purchases at no extra cost to you.


When buying, look for poplar craft boards or straight, clear poplar from a hardwood dealer. Big-box “project boards” can work, but inspect every edge. A board that is already cupped or twisted will not become flat through sanding.
How the main choices compare
| Wood | Paintability | Durability | Cost and drawbacks |
|---|---|---|---|
| Poplar | Excellent after primer | Good for normal indoor play | Moderate cost; dents more easily than maple |
| Maple | Very good, but can show sanding marks | Excellent | Usually expensive; harder on tools |
| Birch plywood | Good on faces; edges need extra work | Good and dimensionally stable | Affordable; exposed plies require filling |
| Basswood | Excellent and easy to shape | Fair; dents and compresses easily | Good for light-use toys and carving |
| Pine | Fair after sealing | Fair | Cheapest; knots, resin, and soft areas can telegraph through paint |
When another wood is the better choice
Choose hard maple when the toy will receive heavy daily use, has slender handles, or needs crisp edges that will resist dents. Maple produces a very smooth surface, but its tight grain can make primer adhesion less forgiving. Sand evenly and avoid polishing the surface with extremely fine abrasive before priming.
Birch plywood is a strong choice for flat toys, puzzles, cars, and signs. Use cabinet-grade Baltic birch or another plywood with multiple thin plies and few voids. Cheap construction plywood often has rough faces, internal gaps, and uneven edges. Those defects can remain visible under paint and are difficult to repair cleanly.
Basswood is easy to carve and sands quickly. It is suitable for decorative figures, blocks, and toys that will not be thrown or dragged across a floor. It is not the best choice for thin axles, pegs, or parts that will be repeatedly assembled and pulled apart.
Pine is fine when cost matters or when the toy is a quick indoor project. Select knot-free clear pine. Knots contain resin and may bleed through paint, while soft earlywood can create a rippled surface after sanding. Pine is not automatically a bad choice; it simply needs more preparation than poplar.
Preparing the wood for a smooth finish
Start with a sharp blade and a clean cut. Tear-out, crushed fibers, and router burn are much harder to hide than ordinary sanding marks. Remove pencil marks and glue squeeze-out before sanding. Dried glue will repel stain and can leave shiny patches under paint.
Sand flat faces with 120-grit paper, then move to 150 or 180 grit. For most painted toys, 180 grit is a good stopping point. Sanding to 220 grit is acceptable on hardwood, but going much finer can reduce primer grip. Round sharp toy edges with a light pass of 180-grit paper; a small radius is safer and less likely to chip than a knife edge.
Use a sanding block on flat surfaces and flexible paper by hand on curves. Do not rely on a power sander for tiny parts, where it can dish the surface or remove too much material. Vacuum the dust, then wipe with a clean, slightly damp cloth and let the wood dry. Avoid soaking end grain, which can raise fibers.
Filling pores, end grain, and defects
Poplar and basswood normally need little or no grain filler. Fill small dents and nail holes with a paintable, water-based wood filler. Apply it slightly proud of the surface, let it dry fully, and sand it flush with 180 grit. Do not use filler to compensate for deep tear-out or a loose knot; replace the part when possible.
End grain absorbs primer more quickly than face grain and can look rough after the first coat. Sand it, apply a thin first coat of primer, let it dry, and sand lightly with 220 grit. Repeat on visibly porous edges. On birch plywood, filling the edge with two or three thin applications is usually better than one thick layer.
Use a water-based wood primer made for interior wood. Primer levels color and seals uneven absorption; it does not hide major scratches. Apply two thin coats rather than one heavy coat, allowing the label’s full drying time between coats.
Choosing paint for a toy
For indoor toys, water-based acrylic or enamel paint is usually the easiest option. It has low odor, dries quickly, and cleans up with water. Apply two or three thin coats with a good synthetic brush or a small foam applicator. Thick paint can pool in corners, obscure details, and remain soft underneath even when the surface feels dry.
After the final coat has cured, a clear water-based topcoat can improve scratch resistance. It is optional for display toys and useful for handled toys. Choose a product labeled for interior use and follow its cure time; many finishes need several days before they reach full hardness. If the toy is intended for very young children, use coatings specifically labeled as toy-safe or compliant with applicable toy-finish standards, and follow the manufacturer’s instructions.
Find water-based acrylic paint for wood in small bottles if you are making one toy. Larger cans are cheaper per ounce but often dry out before a small project uses them.
Common finish failures
Raised fibers usually mean the wood was wetted and not sanded again, or the first water-based coat lifted the grain. Let the coat dry, sand lightly with 220 grit, remove dust, and apply another thin coat. Sanding through paint on edges is common, so use light pressure there.
Visible scratches after painting indicate that the surface was not inspected under primer. Primer exposes defects; it is the right time to sand and fill them. Fish-eyes, peeling, or glossy bare spots usually come from grease, silicone, or glue residue. Clean the wood before finishing and do not handle it with oily hands between coats.
For the simplest reliable build, use clear poplar, sand to 180 grit, fill only actual defects, apply two thin coats of water-based primer, and finish with two or three thin coats of toy-appropriate paint. Spend extra preparation time on edges and end grain—the places that most often separate a smooth-looking toy from a rough one.


0 Comments