What's inside
As an Amazon Associate I earn from qualifying purchases. This post may contain affiliate links at no extra cost to you.
For a painted storage chest, the best wood is usually not the most expensive hardwood. Crisp details come from stable panels, clean edges, tight joinery, and careful surface preparation. A practical chest often combines poplar or clear pine for the frame with cabinet-grade plywood or MDF for broad panels.
Paint hides color and grain, but it does not hide movement, dents, open pores, or a poorly sanded edge. Choose the material based on where the chest will live, how much abuse it will take, and whether sharp molding or routed details matter more than weight and cost.
As an Amazon Associate we earn from qualifying purchases at no extra cost to you.


Our Top Picks
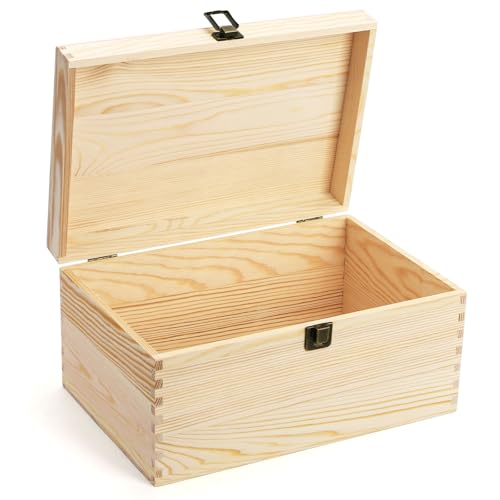 yarlung Unfinished Wooden Box with Hinged Lid11.8 x 7.9 x 5.9 inches11.8 x 7.9 x 5.9 inches1 PoundsCheck on Amazon
 Zinsser Bulls Eye Water-Base Primer & Sealer32 Fl Oz (Pack of 1)4.25 x 4.25 x 4.85 inches0 PoundsCheck on Amazon


Best wood choices for a painted chest
| Material | Best use | Advantages | Limitations |
|---|---|---|---|
| Poplar | Face frames, trim, legs, solid edging | Stable, easy to machine, fine texture, paints well | Soft; dents more easily than maple |
| Clear pine | Inexpensive frames and simple trim | Cheap, widely available, easy to cut | Knots, resin, and dents can show through paint |
| Birch plywood | Chest sides, bottom, lid, and structural panels | Strong, stable, flat, good screw-holding | Layered edges need filling or solid edging |
| MDF | Flat panels and routed decorative parts | Very smooth, uniform, inexpensive, excellent painted finish | Heavy, vulnerable to water, weak at unsupported edges |
| Hard maple | High-wear trim and premium chests | Hard, crisp edges, durable | Costly and less forgiving to machine and sand |
Poplar is the safest all-around solid wood choice. It has a fine, mostly closed grain and accepts primer evenly. Its green or gray color is irrelevant under opaque paint. Poplar also machines cleanly for rabbets, dados, chamfers, and small molding profiles. The trade-off is softness: a dropped tool or rough-moving lid can leave a dent.
Birch plywood is the best structural sheet good. Use 1/2-inch plywood for lighter panels and 3/4-inch plywood for a substantial chest, wide lid, or shelves. Avoid construction plywood. Its uneven face veneers and voids create extra filling work, and thin face veneers can sand through quickly. Look for cabinet-grade plywood with a smooth face and consistent core.
MDF gives the cleanest painted surface for flat panels and routed details. It has no grain to telegraph through the finish, and its factory faces are already smooth. However, MDF is heavy and absorbs water at exposed edges. A chest made entirely from 3/4-inch MDF can become awkward to move, and a wet floor or leaking window can swell the bottom permanently.
A practical material combination
For most indoor chests, use 3/4-inch birch plywood or MDF for the main box, poplar for the face frame and trim, and 1/4-inch plywood for a captured back or inset bottom. This combination keeps large surfaces flat while giving you solid material where screws, hinges, and decorative profiles need reliable support.
For a budget chest, clear pine is acceptable. It is the cheaper option when the piece will live in a dry bedroom, workshop, or utility room and a few dents are not important. Select boards with tight, sound knots, avoid large resin pockets, and let the lumber acclimate indoors for at least several days. Pine is a poor choice when you need ultra-crisp routed details or a furniture-grade, dent-resistant surface.
For a child’s toy chest or a heavily used entryway chest, consider poplar or maple for exposed edges. Hard maple costs more and can be overkill, but it holds a sharp arris better than pine or poplar. Ease exposed corners slightly—about 1/32 to 1/16 inch—rather than leaving knife-sharp edges that chip during use.
Joinery, glue, and movement
Paint will not compensate for a weak joint. Dados, rabbets, loose tenons, and pocket screws can all work, but pocket screws should be placed where they will be hidden or plugged. A glued butt joint can fail when end grain is involved, so add a rabbet, dowels, biscuits, or a mechanical fastener.
Use a standard interior PVA wood glue for a dry indoor chest. Apply a continuous, thin film rather than a thick bead. Clamp until the squeeze-out becomes rubbery, usually 20 to 30 minutes, then remove it carefully. Do not leave hardened glue on the surface: primer and paint often reveal it as a glossy, uncoated patch.
Solid wood panels need room to move across their grain. Do not rigidly glue a wide solid-wood lid into a plywood frame. A 12-inch-wide pine panel can move roughly 1/8 inch or more across seasons depending on moisture changes. Use buttons, figure-eight fasteners, elongated screw holes, or a floating panel construction instead.
Surface preparation for crisp paint
Start by sanding solid wood and plywood faces with 120-grit paper, then progress to 150 or 180 grit. MDF faces usually need only a light pass with 180 grit; aggressive sanding can round edges or expose the softer core. Break sharp edges lightly, but keep profiles and panel lines square.
Fill nail holes, screw holes, dents, and plywood voids with a suitable paintable wood filler. For deep defects, use two thin applications rather than one thick blob. Let it dry fully, then sand flush. On MDF edges, brush on a thin coat of primer or diluted wood glue, let it dry, and sand with 180 grit. This prevents the edge from drinking primer and looking fuzzy.
Clean off dust with a vacuum and a slightly damp, lint-free cloth. Avoid flooding MDF or plywood edges with water. If the chest contains pine knots or resinous areas, seal them with a stain-blocking primer. Without that step, yellow-brown stains can bleed through the topcoat weeks later.
Primer and paint choices
Use a high-build bonding or cabinet primer, especially over MDF edges, filler, and glossy factory plywood. Sand the first coat lightly with 220 grit after it dries. Two thin primer coats are usually better than one heavy coat because thick primer sags in corners and softens crisp molding lines.
For the topcoat, a durable waterborne cabinet or trim enamel is the easiest choice for an indoor chest. Satin hides minor surface flaws better than gloss while still cleaning easily. A dead-flat paint shows fingerprints and scuffs; high gloss highlights every sanding mark. Apply two coats, sanding lightly between coats only if the surface feels rough. Respect the recoat time on the label—painting too soon can leave a soft finish that dents for days.
Use a small microfiber or fine-foam roller on broad panels and a quality angled brush in corners. Do not overwork paint as it starts to set. If the lid will close against a painted rim, allow the finish to cure for several days before fitting tight hardware; fresh paint can stick even when it feels dry.
What to buy
Choose poplar for visible solid parts, birch plywood for stable structure, and MDF when a perfectly smooth painted panel matters more than light weight. Add a stain-blocking primer for pine knots and a durable waterborne cabinet enamel for the finish. Spend less on the wood if necessary, but do not skip flat stock, sound joinery, edge sealing, and adequate curing time. Those steps—not exotic lumber—produce crisp painted details.


0 Comments