What's inside
As an Amazon Associate I earn from qualifying purchases. This post may contain affiliate links at no extra cost to you.
Small dents are common on furniture, doors, trim, and unfinished boards. They usually come from dropped tools, clamps, or pressure against a hard edge. Before staining, the repair needs to do more than look smooth: it must absorb color at roughly the same rate as the surrounding wood. A filler that looks invisible under paint can become a dark or pale spot under stain.
As an Amazon Associate we earn from qualifying purchases at no extra cost to you.


Our Top Picks
 AquaCoat Water-Based White Cabinet Wood Grain Filler Gel16 Fl Oz (Pack of 1)10 x 10 x 10 inches1.2 poundsCheck on Amazon

Inspect the Damage Before Choosing a Repair
First, wipe the surface clean and examine the dent in strong, angled light. A shallow depression with unbroken wood fibers is a good candidate for steaming. If the fibers are crushed, torn, or missing, steam alone will not rebuild the surface. Deep dents, chipped edges, and holes need filler or a small wood patch.
Run your fingertip across the area. If you can feel a sharp rim around the depression, lightly sand the raised fibers with 180-grit paper before doing anything else. Do not aggressively sand the dent flat; that removes surrounding wood and can create a wide low spot that is harder to disguise.
Check whether the wood is bare. Steam and water-based fillers work on unfinished wood, but existing oil, wax, paint, or sealer will block moisture and stain. If the piece has a coating, strip or sand the damaged area and enough surrounding surface to create an even substrate.
Choose the Repair Method
| Damage | Best method | Staining result | Main drawback |
|---|---|---|---|
| Shallow dent, fibers intact | Moist cloth and heat | Usually best color match | Can raise nearby grain |
| Small depression with crushed fibers | Stainable wood filler | Acceptable on small areas | Often absorbs stain differently |
| Missing chip or deep gouge | Wood patch or filler | Depends on grain matching | Repair may remain visible |
| Large or prominent damaged area | Cut out and patch with matching wood | Best structural and visual result | Requires more tools and skill |
For a simple dent in pine, oak, maple, or similar solid wood, try steam first. It is inexpensive and preserves the original grain. For dents in veneer, use extreme caution: veneer is thin, and sanding through it causes more damage than the original dent. A tiny amount of moisture and brief heat may help, but filler or a veneer repair is often safer.
Raise a Shallow Dent With Steam
Place a clean, damp cotton cloth over the dent. The cloth should be wet but not dripping. Set an iron to a medium setting without steam, then press it on the cloth for about 3 to 5 seconds. Lift the iron, check the area, and repeat in short intervals. Do not leave the iron stationary for 20 or 30 seconds; that can scorch the wood or create a larger swollen spot.
The moisture turns to steam and swells compressed wood fibers back toward their original position. Hard, dense woods may need several cycles. Let the area cool and dry for at least 30 minutes before judging it. Deeper moisture can take several hours to leave the wood.
Once dry, sand the raised area by hand with 180-grit paper, followed by 220-grit if the rest of the surface will receive stain. Use a sanding block on flat work, and sand with the grain. Avoid sanding only the repair in a small circle, which can create a visible hollow or a shiny patch.
Keep steam away from glued joints, end grain, MDF, particleboard, and veneered panels unless you have tested an inconspicuous area. Water can loosen glue or swell engineered wood permanently. For valuable furniture, test the method under the piece first.
Fill Dents That Steam Cannot Repair
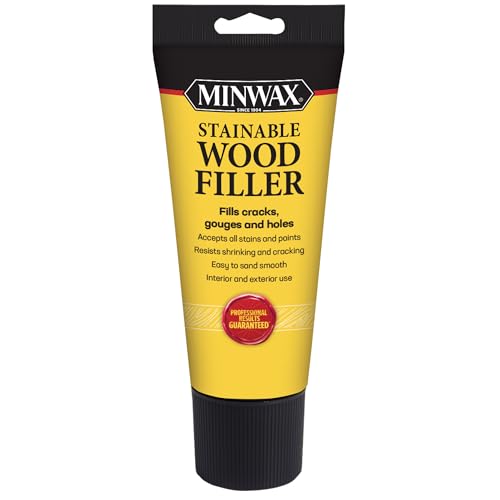
Choose a stainable wood filler for crushed fibers, small voids, and missing chips. “Stainable” does not mean invisible under every stain. Most fillers contain fine wood fibers or mineral solids, and they commonly absorb less stain, more stain, or a different color than the surrounding board.
For a shallow dent, press filler firmly into the low area with a plastic putty knife. Leave it slightly proud of the surface rather than trying to make a perfect feather edge while wet. Follow the label’s drying time; a small patch may feel dry in 30 minutes but remain soft below the surface. Filling a hole deeper than about 1/8 inch in one pass increases shrinkage and cracking, so use multiple thin applications.
After it cures, sand with 180-grit paper until level, then finish with 220 grit. Remove all dust with a vacuum and a clean, dry cloth. Avoid soaking the repair with a tack cloth or wet rag immediately before staining, because the filler and surrounding wood may react differently.
For the most predictable color, test the filler and stain combination on scrap from the same board. If no scrap is available, test under a hinge, on the back edge, or inside a cabinet. A wood grain filler is a different product: it is intended to level open pores across a broad surface, not fill a deep dent by itself.
Patch Deep Dents and Missing Wood
When a dent has lost material, cut away loose splinters with a sharp chisel or utility knife. Make the opening clean and stable, but remove as little sound wood as possible. For a repair deeper than roughly 1/4 inch, a fitted wood piece often performs better than a thick blob of filler.
Cut a patch from matching wood with similar grain direction and, ideally, the same species. Apply a thin layer of interior wood glue, press the patch into place, and clamp it without crushing the surrounding surface. Let it cure fully, then trim it flush with a sharp chisel or block plane before sanding.
Two-part epoxy filler can handle irregular gaps and edges, but it generally does not accept stain like real wood. It is useful where strength matters or where the repair will be painted. For a stained tabletop or cabinet face, a grain-matched patch is usually worth the extra work.
Sand and Prepare for Staining
Sand the entire piece consistently rather than stopping at the repaired spot. A common sequence is 120 grit to remove tool marks, 150 or 180 grit to refine the surface, and 220 grit for many hardwoods. Do not automatically sand to 320 grit; overly polished wood can accept stain unevenly, especially on soft species such as pine.
Roundovers and edges absorb stain quickly, so ease them lightly instead of leaving sharp, freshly sanded corners. Vacuum thoroughly, then wipe with a dry microfiber cloth. If the wood is blotch-prone, use a wood stain pre-conditioner or choose a gel stain. These can reduce uneven absorption, but they may also reduce color depth and make the final shade less rich.
Apply stain to a test board first, including any filler or patch. If the repaired area remains obvious, a darker stain often makes the contrast worse. A lighter color, gel stain, toner, or painted finish may disguise it better. On valuable or highly visible work, replacing the affected section is sometimes cheaper than repeatedly trying to hide a repair.

0 Comments