What's inside
- Why Wood Moisture Matters Before Finishing
- How to Check Wood Moisture Without a Meter
- Choose the Right Moisture Meter
- Prepare the Wood and Meter
- How to Measure Wood Moisture Correctly
- Reading the Meter: Scales, Species Settings, and Temperature
- How Dry Is Dry Enough?
- What to Do If the Wood Is Too Wet
- Common Testing Mistakes
- Frequently Asked Questions
- Related Guides
- Why Wood Moisture Matters Before Finishing
- How to Check Wood Moisture Without a Meter
- Choose the Right Moisture Meter
- Prepare the Wood and Meter
- How to Measure Wood Moisture Correctly
- Reading the Meter: Scales, Species Settings, and Temperature
- How Dry Is Dry Enough?
- What to Do If the Wood Is Too Wet
- Common Testing Mistakes
- Frequently Asked Questions
- Related Guides
As an Amazon Associate I earn from qualifying purchases. This post may contain affiliate links at no extra cost to you.
Wood can look dry on the surface while holding enough moisture to ruin a stain or paint job. Applying a finish too soon can cause blotchy color, peeling paint, raised grain, mildew, and slow drying. A moisture meter is the most reliable way to check, but even an inexpensive meter is only useful when you test correctly and understand the limits of the reading.
Our Top Picks

Why Wood Moisture Matters Before Finishing
Wood constantly exchanges moisture with the air. Freshly cut, pressure-treated, outdoor, or recently washed boards may contain far more water than the surface suggests. As the wood dries, it shrinks. If a coating goes on before that movement is mostly complete, the wood can pull against the finish and cause cracks, peeling, or visible joints.
For most interior staining or painting, aim for a moisture content of about 6% to 8%, or no more than roughly 10% in a humid location. Exterior wood is commonly finished around 9% to 14%, depending on the climate and season. The exact target varies by species, location, and product instructions, so check the stain, paint, or primer label first.
Pressure-treated lumber is a special case. It may be too wet to paint when purchased, even if it appears ready. Many boards need several weeks of drying, while dense or heavily treated lumber can take considerably longer.
How to Check Wood Moisture Without a Meter
A meter gives a number, but a few simple checks can tell you when wood is clearly not ready. None of these methods is precise, so treat them as warning signs rather than proof that the wood is dry.
- The water-drop test. Sprinkle a few drops of water on bare, unsealed wood. If the drops soak in within a few minutes, the surface is dry and porous enough to accept stain or primer. If they bead up or sit on the surface, the wood may still be wet, or it may carry mill glaze, an old sealer, or water repellent that needs sanding or cleaning first.
- The plastic-sheet test. Tape a square of clear plastic, about 12 by 12 inches, tightly to the wood on all four sides and leave it for 16 to 24 hours out of direct sun. Condensation or a darker patch under the plastic means moisture is still leaving the wood.
- Look and feel. Damp wood often looks darker, feels cool to the touch, and may show mildew spots, raised grain, or a sour smell. Freshly purchased pressure-treated lumber may feel wet or heavy for its size.
- Weight comparison. A board that is noticeably heavier than a similar board stored indoors for weeks is likely holding extra water.
- Time and weather. After rain or washing, many exterior coating makers suggest waiting at least two to three dry days before applying stain or paint, and longer in humid or shaded locations.
Use these checks to decide whether it is worth testing further. If you are about to paint siding, trim, or an expensive tabletop, the cost of a basic meter is small compared to stripping a failed finish.
Choose the Right Moisture Meter
A pin-type meter uses two sharp electrodes pressed into the wood. It measures electrical resistance between the pins. A pinless meter uses electromagnetic signals and can scan without making holes, but readings are more easily affected by thickness, surface conditions, and nearby metal.
| Meter type | Strengths | Trade-offs | Best use |
|---|---|---|---|
| Pin-type | Usually affordable; good depth control; useful for confirming wet spots | Leaves small holes; readings vary with pin depth and grain direction | Rough lumber, framing, trim, and spot checks |
| Pinless | Fast scanning; does not puncture finished surfaces | Can be influenced by metal, wiring, thickness, and surface coatings | Finished floors, cabinets, and large areas |
| Combination meter | Allows broad scanning and targeted confirmation | Costs more than a basic meter | Frequent renovation or finishing work |
For occasional projects, a basic pin-type wood moisture meter is usually enough. You do not need laboratory accuracy to identify a board that is clearly too wet to finish. If you regularly work on hardwood floors, cabinets, or large siding projects, a better meter with species settings and calibration checks is worth considering.
Prepare the Wood and Meter
Test the wood in the same environment where you plan to finish it. Bring interior lumber indoors for at least several days, with spacers between boards so air can circulate. Keep the stack away from direct heat and sunlight. A fan helps air movement, but aggressive heating can dry the surface faster than the center.
Remove standing water, dirt, sawdust, and loose debris from the test areas. Do not test directly over wet rags, fresh wood cleaner, condensation, or a thick puddle of finish. Surface treatments can distort readings, particularly with pinless meters.
Set the meter for the closest wood species if that option is available. Different species conduct electricity differently. A setting intended for soft pine may not give an accurate result on dense maple, oak, or exotic hardwood. If the meter has no species adjustment, use it as a comparative tool and confirm questionable readings with more test locations.
How to Measure Wood Moisture Correctly
Test at least five locations on each board or project area. Check both ends, the center, and places that dry slowly, such as knots, end grain, joints, shaded areas, and spots near the ground. On a deck or siding project, test boards from different elevations and orientations rather than checking only the easiest section.
With a pin meter, push both pins to the same depth and keep them aligned consistently. Shallow readings can represent only the surface. If your meter has longer or insulated pins, take a deeper reading as well as a surface one. Orient the pins the way your meter’s manual specifies and keep that orientation the same for every reading, and avoid placing them directly over knots or fasteners.
With a pinless meter, hold the back of the instrument flat against the wood and scan several nearby spots. Keep it away from screws, nails, metal flashing, electrical wiring, and very thin boards. Compare readings from areas that appear dry with areas that look darker or feel cooler.
Write down the results. A single low reading does not prove the entire board is ready. Look for a consistent range. If most readings are 8% but one area is 17%, that wet spot needs attention before finishing.
Reading the Meter: Scales, Species Settings, and Temperature
Most consumer wood meters display percent moisture content (MC), which is the weight of water in the wood compared with the weight of the dry wood. Some combination meters also show a relative scale or a “WME” (wood moisture equivalent) reading meant for drywall, plaster, and other non-wood materials. Make sure the meter is set to the wood mode before you record a number, because the scales are not interchangeable.
- Species or group setting. Pin meters are usually calibrated for Douglas fir or a general softwood group. Many models have a species code or group selector; choose the closest match for pine, oak, maple, cedar, or redwood.
- Temperature. Resistance-type pin meters read higher in warm wood and lower in cold wood. Better meters correct for temperature, or the manual includes a correction chart. Readings taken on a cold morning can understate the true moisture level.
- Measuring range. Many low-cost meters are least accurate at the extremes, roughly below 7% and above 30%. For finishing decisions you mainly need to know whether the wood sits in the single digits, the low teens, or above 15%, which is well within most meters’ useful range.
- Calibration check. Many meters include a check function or a calibration cap. Test it before a big job, and replace a weak battery, which can cause low or erratic readings.
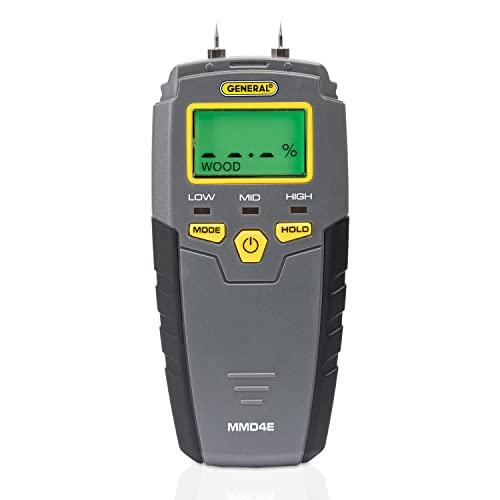
For most finishing work, a pin-type meter with interchangeable pins, a wood-species selector, and a clear display is enough. It confirms whether trim, a tabletop, or a deck board is ready and helps you find wet spots near joints and end grain.
As an Amazon Associate we earn from qualifying purchases at no extra cost to you.
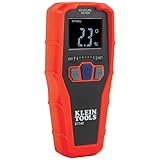
If you are checking finished cabinets, floors, or furniture where pinholes are not acceptable, a pinless meter lets you scan large areas quickly. Use it to find suspect areas and confirm unusually high readings with more measurements.
Recording a Simple Moisture Log
For a deck, fence, or full room of trim, write the date, the location of each test, and the reading. Retest the same spots every few days. Wood is ready to finish when the readings fall within the target range and stop dropping between checks. This also shows you which areas, such as boards near the ground or in shade, dry more slowly and need extra time.
How Dry Is Dry Enough?
Use these figures as practical starting points, not universal laws:
| Project | Typical target before coating | Important qualification |
|---|---|---|
| Interior trim, furniture, and cabinets | 6%–8% | Match the building’s normal indoor humidity |
| Interior framing or wall woodwork | 8%–12% | Follow building-code or manufacturer requirements |
| Exterior siding and trim | 9%–14% | Climate and seasonal humidity affect the target |
| Deck boards | About 12%–15% | Confirm the coating manufacturer’s limits |
Consistency matters as much as the exact number. A project reading between 8% and 11% is generally safer than one ranging from 6% to 18%. Wood that is still drying will continue to move, even if one surface happens to show an acceptable reading.
What to Do If the Wood Is Too Wet
Do not solve wet wood by sealing it with primer, paint, or a film-forming stain. That can trap moisture and lead to blistering, peeling, dark stains, and mildew beneath the coating. Move the wood to a dry, ventilated area and separate stacked boards with thin spacers.
Retest after several days, then continue checking until readings stabilize. Large timbers and thick slabs may take weeks or months. End grain dries quickly, so do not use an end-grain reading as proof that the center is dry.
If only one section is wet, investigate the cause. The problem may be rain exposure, a plumbing leak, soil contact, poor air circulation, or a board installed too close to another surface. Fix the source before sanding or coating.
Common Testing Mistakes
Do not rely on touch alone. Dry-feeling wood can still be too wet inside. Do not test immediately after washing a deck or using a liquid cleaner. Wait until the wood has had adequate drying time and check the weather forecast before applying exterior products.
Do not assume kiln-dried lumber is still at its original moisture content after storage. Lumber absorbs moisture from a damp garage, basement, or jobsite. Also avoid taking one measurement from one board and applying that result to the whole project.
When the readings are acceptable, sand and clean the surface as required by the finish manufacturer, then apply the coating during the recommended temperature and humidity range. Moisture is only one part of a durable finish, but checking it first prevents one of the most expensive preparation mistakes.
Frequently Asked Questions
What moisture level should wood be before painting?
For interior trim, cabinets, and furniture, aim for roughly 6% to 8% moisture content, or up to about 10% in humid regions. Exterior siding and trim are commonly painted at about 9% to 14%. Many paint and stain makers set an upper limit of 15% for exterior wood, so anything above that should be left to dry. Always check the specific product label, which takes priority over general targets.
Is 15% moisture too high to stain wood?
For outdoor decks and fences, 15% is often the upper limit that stain makers accept, so the wood is borderline rather than ideal. Waiting until readings fall into the low teens gives a better margin. For interior furniture or cabinets, 15% is too wet; the wood will keep shrinking indoors, which can cause cracks, gaps, and uneven stain absorption.
How long should wood dry after rain before painting or staining?
A common guideline is at least two to three dry days after rain for exterior wood in mild weather, and longer in cool, humid, or shaded areas. Thick boards, end grain, and wood near the ground dry slowest. Rather than relying on a set number of days, test with a meter or the water-drop method before you open the can.
Can you paint pressure-treated wood right away?
Usually not. Pressure-treated lumber often arrives wet from the treatment process and may read well above 20%. It typically needs several weeks to a few months to dry, depending on the climate and the board size. Some lumber is sold as kiln-dried after treatment (KDAT) and can be finished much sooner. Test before painting either type.
Do moisture meters work on painted or stained wood?
Pin meters can read through thin finishes because the pins penetrate into the wood, though they leave small holes. Pinless meters read through coatings too, but thick paint, metal fasteners, and surface moisture can skew results. On finished surfaces, compare suspect areas with sound areas of the same wood rather than relying on one absolute number.
How accurate are cheap moisture meters?
Budget meters are usually accurate enough to tell whether wood is clearly wet or clearly dry, which is what matters before finishing. They are less reliable at very low or very high readings and may lack species or temperature correction. Take several readings, use the closest species setting, and treat small differences of one or two percent as within normal variation.

0 Comments