What's inside
As an Amazon Associate I earn from qualifying purchases. This post may contain affiliate links at no extra cost to you.
Birch is light, smooth, and fairly inexpensive, but it is not an easy wood to stain evenly. Its dense and porous areas absorb stain at different rates, producing dark patches, streaks, and a muddy appearance. For the most consistent color, use a gel stain over a properly prepared surface, or use a wood dye when you want a cleaner, more uniform color.
As an Amazon Associate we earn from qualifying purchases at no extra cost to you.


Our Top Picks


The best stain for consistent birch color
For most furniture, cabinets, shelves, and small projects, a gel wood stain is the safest choice. Gel stain sits closer to the surface instead of soaking deeply into the wood. That limits the difference between dense and absorbent areas, which is the main cause of blotching on birch.
Gel stain also gives you more working time than thin penetrating stains. You can spread it over a panel, wipe it back evenly, and adjust the darkness with a second coat. The trade-off is that it can look less natural than a penetrating stain, especially if it is applied too heavily. It may also obscure some of birch’s subtle grain.
Choose a penetrating stain only if you are willing to use a conditioner or washcoat first and test the complete process on scrap. A standard oil stain is cheaper and can work well on small, low-visibility projects, but it is the least forgiving option.
| Stain type | Color consistency on birch | Best use | Main drawback |
|---|---|---|---|
| Gel stain | Very good | Furniture, doors, cabinets, visible panels | Can look heavy or painted if overapplied |
| Water-based dye | Excellent when applied evenly | Bright, clear, transparent color | Raises grain and can create lap marks |
| Oil-based penetrating stain | Fair without preparation | Budget projects and rustic finishes | Blotches readily on birch |
| Stain plus conditioner | Good, but variable | Traditional stain appearance | May make the color too light or uneven |
How to use gel stain on birch
Start by sanding with 120-grit paper, then 150-grit, and finish at 180 grit. On flat birch panels, 180 grit is usually enough. Sanding much finer than 220 grit can burnish the surface and reduce absorption, causing the stain to wipe unevenly. Always sand with the grain and remove dust with a vacuum followed by a clean, dry cloth.
Round over sharp edges very lightly. A crisp edge absorbs stain differently from the face and can become noticeably darker. Do not sand one area more aggressively than another; uneven sanding creates color variation that no stain can completely hide.
Apply gel stain with a lint-free cloth, foam applicator, or a good synthetic brush. Work on one manageable section at a time. Spread a thin coat, wait about two to five minutes, then wipe off excess with a clean cloth. Keep the wiping pressure and direction consistent across the entire panel.
Do not leave thick gel stain sitting in corners, along edges, or in end grain. Those areas often dry darker and may remain tacky. If you need more color, allow the first coat to dry according to the label—commonly 8 to 24 hours—then apply a second thin coat. Two light coats are easier to control than one heavy coat.
A birch stain sample board or scrap from the actual project is worth using. Birch plywood, solid birch, and edge banding can accept color differently. Test the stain, drying time, topcoat, and sanding schedule together, because clear finish usually makes the color look darker and warmer.
When a wood dye is the better choice
Water-based dye can produce a more uniform and transparent color than ordinary stain. Dye particles color the wood without relying as heavily on absorption, so the result often looks clearer on birch. Dye is a strong choice for contemporary furniture, colored plywood, and projects where you want the grain to remain visible.
The technique is less forgiving. Water raises birch’s grain, so lightly dampen the sanded surface with clean water, let it dry, and sand back the raised fibers with 180 or 220 grit before applying dye. This reduces roughness after the first coat. Apply dye quickly and evenly, avoiding overlaps that dry at different times.
For easier control, use a concentrated dye mixed weaker than the final target color. Several light applications are safer than one dark application. A clear coat can also change the apparent color, so evaluate the sample after it has dried and received at least one coat of the intended finish.
Conditioner versus a shellac washcoat
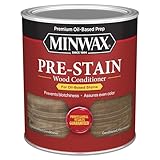
Pre-stain conditioner can reduce blotching, but it is not a guarantee of uniform color. Many conditioners partially seal the surface. The stain then becomes lighter and may look weak on the most absorbent areas. Follow the product’s timing instructions closely; applying stain too late or too soon changes the result.
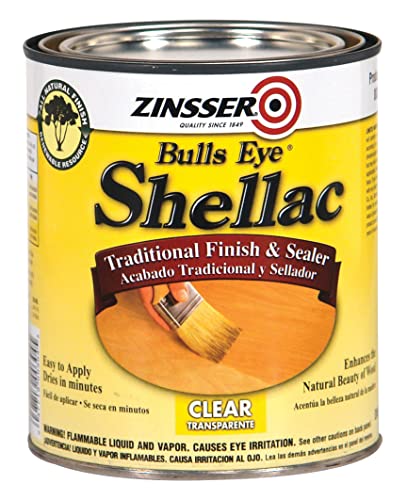
A thin washcoat of dewaxed shellac gives more predictable control. Use a dewaxed shellac wood finish diluted to roughly a 1-pound cut, then apply one thin coat. After it dries, sand lightly with 320 grit and remove the dust. This partially seals the birch so stain cannot flood the porous patches.
Use the washcoat method with a penetrating stain or dye only after testing. Too much shellac can prevent the color from entering at all, leaving a flat, weak surface color. It is more work than using gel stain, but it offers better control when matching birch to another wood or reproducing a color across multiple pieces.
Common failures and how to avoid them
Dark end grain is normal on birch. Seal end grain with a thin coat of shellac or sanding sealer, then sand it smooth before staining. Do not try to correct a dark edge by scrubbing aggressively; that can create a lighter stripe.
Lap marks usually come from stopping halfway across a panel. Keep a wet edge and work toward a natural break such as an edge or joint. On large surfaces, a second person can help with wiping, but both people must use the same cloth pressure and timing.
If the first coat is too dark, do not immediately add a lighter stain over it. Let it dry fully, then test whether mineral spirits will soften an oil-based product or whether light sanding will reduce a gel stain. Severe blotching may require stripping and starting over. The cheapest reliable improvement is usually better sanding and a full-size test panel, not a more expensive stain.

0 Comments