What's inside
As an Amazon Associate I earn from qualifying purchases. This post may contain affiliate links at no extra cost to you.
Reclaimed wood looks best when the finish protects it without filling its saw marks, dents, nail holes, and uneven grain. For most projects, the best balance is a matte hardwax oil or a matte water-based polyurethane. The right choice depends on whether you value the most natural texture or the strongest resistance to water and abrasion.
Do not treat reclaimed wood like new, uniform lumber. It may contain old paint, oil, wax, dirt, embedded metal, and areas of very soft or weathered wood. Those differences affect both appearance and adhesion. Surface preparation is more important than the brand on the can.
As an Amazon Associate we earn from qualifying purchases at no extra cost to you.


Our Top Picks
 Minwax Fast Drying Polyurethane Protective Wood Finish1/2 Pint2.9 x 2.9 x 3 inches0.45 poundsCheck on Amazon
 Minwax Fast Drying Polyurethane Spray11.5 Ounce (Pack of 1)2.7 x 2.7 x 8.15 inches0.9 poundsCheck on Amazon
 Varathane Water-Based Ultimate Matte PolyurethaneQuart (Pack of 1)9.8 x 5.5 x 6.3 inches2.2 poundsCheck on Amazon
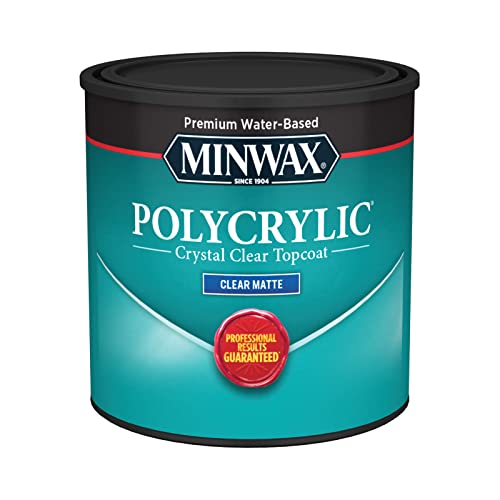

The Best Finish Options for Reclaimed Wood
| Finish | Texture and appearance | Protection | Best use |
|---|---|---|---|
| Matte hardwax oil | Most natural, low-build feel | Moderate; easy to repair | Wall shelves, tables, benches, decorative furniture |
| Matte water-based polyurethane | Clear, slightly film-forming | High resistance to water and wear | Dining tables, desks, countertops, high-use furniture |
| Danish or tung oil blend | Warm, slightly darkened appearance | Moderate to low | Low-use furniture and rustic panels |
| Paste wax | Very natural and soft-looking | Low | Decorative pieces and dry locations |
| Oil-based polyurethane | Deep amber color, more noticeable coating | High | Projects where warmth matters more than color accuracy |
Choose Hardwax Oil for the Most Natural Texture
Hardwax oil is usually the best finish when preserving texture is the main goal. It soaks into the wood and leaves a thin cured layer rather than building a thick plastic-like film. Brushed grain, weather checking, and shallow saw marks remain easy to feel.
Use a matte hardwax oil wood finish for shelves, benches, mantels, cabinet faces, and tables that receive normal household use. Apply it in very thin coats with a lint-free cloth or a short-nap applicator. After 10 to 30 minutes, wipe away every wet-looking area. Puddles left in cracks can cure glossy, sticky, or uneven.
Most products need two coats, with roughly 8 to 24 hours between coats depending on temperature, humidity, and the product instructions. A newly finished surface may feel dry before it is fully cured. Allow several days before heavy use, and longer in a cool or damp workshop.
The trade-off is water and abrasion resistance. A hardwax-oil surface can mark sooner than polyurethane, especially around a sink or on a dining table. The advantage is repairability: light wear can often be cleaned, lightly abraded, and recoated without stripping the entire piece.
Use Matte Water-Based Polyurethane for More Protection
For a reclaimed-wood dining table, desk, kitchen shelf, or other frequently handled surface, matte water-based polyurethane is the safer practical choice. It creates a more continuous protective film while keeping the color closer to the unfinished wood than oil-based products do. A quality matte or satin sheen also avoids the plastic shine that makes rough lumber look artificial.
Buy matte water-based polyurethane when resistance to spills, fingerprints, and repeated cleaning matters. Apply three thin coats rather than one heavy coat. Lightly scuff between coats with 320-grit abrasive only after the previous coat has dried. Sanding too aggressively can expose the wood on raised grain or worn edges.
Water-based polyurethane can raise the grain on the first coat, particularly on soft reclaimed pine. If the surface becomes rough, let it dry fully and sand lightly before the next coat. Do not try to eliminate every depression and nail hole; the finish will pool there if you flood the surface.
Polyurethane preserves visual texture but partially reduces tactile texture. The deeper the defects, the more noticeable the film can become inside them. For a heavily weathered board, use a rag or brush to spread the finish thinly and remove excess from holes with a dry brush.
When Oil or Wax Makes Sense
Danish oil and similar wiping oils are inexpensive, easy to apply, and forgiving on uneven reclaimed boards. They deepen the color and can make dry, gray wood look richer. That is useful when you want a warm rustic appearance, but test first: some reclaimed pine turns orange or blotchy after oil is applied.
Choose clear matte wood finish if color change is a concern. Paste wax is cheaper and gives a pleasant feel, but it is not a serious moisture barrier. Wax can also interfere with later refinishing and may show fingerprints on dark boards. It is fine for a wall sign, picture frame, or decorative panel kept away from water.
Preparation Without Erasing the Character
Start by removing nails, staples, and screws. Scan the board with a metal detector or magnet, then inspect with a bright light held at a low angle. A hidden nail can destroy a planer knife, sanding disc, or router bit. Avoid sanding old painted wood until you know the coating is not lead-based; older paint should be tested and handled under appropriate containment rules.
Clean the board with a stiff nylon brush and vacuum thoroughly. Avoid soaking reclaimed wood, because wetting can raise loose fibers and spread contaminants into cracks. Degrease suspicious areas with a suitable wood-safe cleaner, then let the piece dry completely.
Sand only as much as needed. Start around 80 or 100 grit to remove splinters and unsafe edges, then finish at 120 or 150 grit. Going to 220 grit can polish the surface and reduce absorption without improving the rustic appearance. Preserve deep saw marks and dents, but remove anything sharp enough to catch clothing or skin.
Before coating the entire piece, test the finish on an offcut or hidden section. Check color, sheen, adhesion, and how it behaves in cracks. Apply the same number of coats and wait the same amount of time as you plan to use on the finished project.
Common Failure Modes
Blotchy color usually comes from uneven porosity or oil contamination. A thin water-based finish minimizes added color, while a compatible wood conditioner may help on very soft boards.
Sticky patches indicate excess finish, trapped oil, cold conditions, or contamination. Remove all standing product during application and improve ventilation. Do not put another coat over a surface that still feels tacky.
Glossy spots form where finish pools in holes and checks. Work those areas with a dry brush or cloth before the coating sets.
Peeling or flaking usually means the surface was dirty, waxed, or inadequately scuffed. Cleaning and a small adhesion test are cheaper than refinishing the whole project.
For the most authentic feel, choose matte hardwax oil. For a working surface that must tolerate spills and regular cleaning, choose matte water-based polyurethane and apply several thin coats. In either case, restrained sanding and careful removal of excess finish preserve more reclaimed-wood character than any product choice.



0 Comments