What's inside
As an Amazon Associate I earn from qualifying purchases. This post may contain affiliate links at no extra cost to you.
Our Top Picks
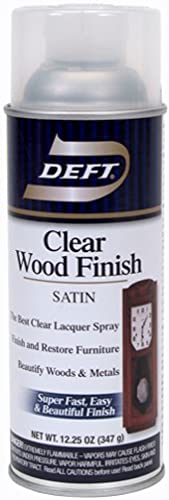 Deft Inc. Deft 037125017132 Interior Clear Wood Finish12.25 Ounce (Pack of 1)8 x 4 x 4 Inches0.1 poundsCheck on Amazon
 Wagner Spraytech Control Spray QX2 HVLP Stain SprayerQX26.25 x 8 x 11.5 inches3.4 poundsCheck on Amazon
Why Preparation Matters Before Spraying Lacquer
Spray lacquer dries quickly, which is both its main advantage and its biggest weakness. Dust, sanding scratches, glue residue, fingerprints, and uneven porosity can become permanently visible within minutes. Lacquer does not hide poor preparation; a thin sprayed film often makes defects easier to see.
Prepare the wood so it is clean, uniformly sanded, dry, and free of contaminants. Work in a well-ventilated area, wear an appropriate organic-vapor respirator, and follow the coating manufacturer’s instructions. Lacquer solvents are flammable, so remove ignition sources and do not spray near pilot lights, heaters, or sparks.
As an Amazon Associate we earn from qualifying purchases at no extra cost to you.
Inspect and Repair the Wood
Start with strong, angled lighting. Look across the surface rather than straight down at it. This reveals dents, torn grain, glue smears, machine marks, and shallow scratches that normal room lighting can hide.
Repair dents before sanding. Small dents in unfinished solid wood can sometimes be raised with a damp cloth and a controlled application of heat, but this is less predictable on veneer and can loosen veneer adhesive. Fill holes and open defects with a compatible wood filler, then allow it to dry fully. Sanded filler can absorb lacquer differently from surrounding wood, so test it on scrap if the repair will be visible.
Remove glue squeeze-out completely. Dried glue left on a joint line may look harmless, but it seals the wood and causes a light or dark patch after staining or clear coating. Scrape heavy residue with a sharp chisel held nearly flat, then sand the area. Do not rely on a solvent to remove cured wood glue; it is usually faster and safer to remove it mechanically.
Sand in Stages, Not Just With Fine Paper
Use the coarsest abrasive that removes the existing defects without creating unnecessary deep scratches. For freshly milled hardwood, 120 grit is a practical starting point. If the surface is already smooth, begin at 150 or 180 grit. Use 80 or 100 grit only when you must remove noticeable machine marks, leveling problems, or an old finish.
Sand with the grain on flat surfaces. A random-orbit sander is efficient, but keep it moving and use light pressure. Holding it still creates swirl marks or shallow depressions. On edges and profiles, hand-sand with a firm sanding block where possible. Soft sanding sponges are useful for curves, but they can round crisp edges if you press hard.
| Wood or project condition | Useful sanding sequence | Practical stopping point |
|---|---|---|
| Fresh hardwood, no stain | 120, 150, 180 | 180 grit |
| Softwood or pine | 120, 150, 180 | 150–180 grit |
| Previously finished wood being stripped | 80 or 100, 120, 150, 180 | 180 grit after all old finish is gone |
| Open-grained wood needing a very smooth clear finish | 150, 180, 220 | 180–220 grit, depending on the lacquer |
For most spray lacquer work, sanding beyond 220 grit before the first coat is unnecessary. Very fine sanding can burnish the surface and reduce absorption, especially on pine, poplar, and other soft woods. If the lacquer manufacturer specifies a different preparation range, follow that guidance.
Control End Grain and Uneven Porosity
End grain absorbs finish more rapidly than face grain. On table edges, cabinet parts, and cutouts, this can produce a darker or glossier band. Sand end grain one or two steps finer than the face, using light pressure. You can also apply a compatible washcoat or sanding sealer, but test first: a sealer changes color, sheen, and adhesion.
Open-grained species such as oak, ash, and walnut may retain visible pores under lacquer. That is not a preparation defect; it is a finish decision. If you want a glass-smooth surface, use a suitable grain filler before lacquer, then sand it level after it cures. If you prefer the wood’s natural texture, skip the filler and accept that several coats will not necessarily flatten the pores.
On blotch-prone woods such as pine, birch, maple, and cherry, lacquer alone will not prevent uneven stain absorption. If you plan to stain first, use a compatible wood conditioner for staining or a tested washcoat. A washcoat can improve color consistency, but too much will reduce stain penetration and may make the result look pale.
Remove Dust Without Adding Contamination
Vacuum the project and the surrounding area after sanding. Use a soft brush attachment or a clean, low-pressure air source to clear dust from corners and pores. If you use compressed air, avoid blowing dust around the entire shop and wear eye protection.
A tack cloth can pick up remaining dust, but some inexpensive tack cloths leave oily or waxy residue. Use a clean, lightly sticky cloth intended for finishing, and do not rub aggressively. On many projects, vacuuming followed by a clean microfiber cloth is safer. Avoid household cleaners, silicone-containing polishes, and oily rags. Silicone contamination can cause fisheyes—small circular craters where lacquer pulls away.
Before spraying, wipe the surface with the solvent recommended by the lacquer manufacturer, if one is specified. Do not automatically use mineral spirits, alcohol, or lacquer thinner. The wrong solvent can soften filler, lift stain, spread contamination, or damage veneer glue.
Decide Whether to Use Sealer
A lacquer sanding sealer is optional, not mandatory. It sands easily and can reduce the number of finish coats needed on porous wood. It is useful on large projects, end grain, and surfaces where you want predictable build. The trade-off is cost, an additional product to buy, and possible compatibility or adhesion problems if the sealer and topcoat are from different systems.
For a small indoor project made from uniform hardwood, skipping sealer and applying a properly thinned first lacquer coat is often the cheaper and simpler choice. For resinous softwood, stained surfaces, repaired areas, or mixed materials, a tested barrier coat may be worth using. Buy a lacquer sanding sealer only when its purpose matches the problem.
Make the Final Check Before Spraying
Run a clean hand over the surface. It should feel uniformly smooth, with no raised fibers, glue ridges, or gritty patches. Shine a bright light across it and mark defects with pencil; repair those areas instead of assuming the first coat will hide them.
Spray a test panel made from the same wood, sanded through the same grits and prepared with the same stain or sealer. Check color, adhesion, gloss, spray pattern, and grain raising before coating the finished piece. If the surface passes that test, wipe it down, let it dry completely, and spray thin, even coats rather than one heavy coat. Heavy lacquer coats sag, trap solvent, and increase the chance of cloudy or wrinkled finish.



0 Comments