What's inside
As an Amazon Associate I earn from qualifying purchases. This post may contain affiliate links at no extra cost to you.
Applying finish to wood that is too wet is one of the easiest ways to create a problem that appears days or weeks later. The finish may turn cloudy, peel, crack, or dry unevenly as the boards continue to lose moisture. Stain can blotch, paint can blister, and glued joints may open. A moisture meter is useful, but only if you take readings correctly and interpret them for the wood’s intended location.
As an Amazon Associate we earn from qualifying purchases at no extra cost to you.
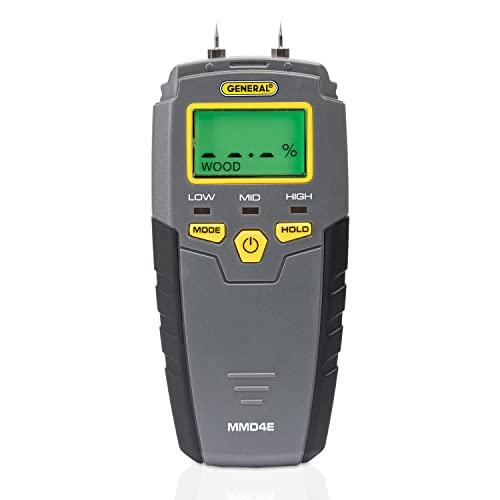
Our Top Picks

Set a target moisture content first
Moisture content is the weight of water in wood expressed as a percentage of the oven-dry weight of the wood. The correct target depends on where the finished project will live, not simply on whether the wood feels dry.
| Project or location | Typical target moisture content | Practical note |
|---|---|---|
| Heated indoor furniture and trim | 6–8% | Allow the wood to acclimate indoors before finishing. |
| Indoor flooring | 6–9% | Use the flooring manufacturer’s installation range when provided. |
| Unheated interior spaces | 8–12% | Basements, workshops, and three-season rooms vary widely. |
| Exterior projects | Usually 12–15% or less | Follow the coating and lumber supplier’s limits; local climate matters. |
These are working ranges, not universal laws. A finish manufacturer may specify a maximum of 12%, while another may allow 15%. Read that instruction before measuring. For furniture, wood near 6–8% is usually safer than wood at 12%, provided it has reached that level gradually and is not merely dry on the surface.
Choose the right moisture meter
There are two common meter types. A pin meter sends a small electrical current between two metal probes. It measures resistance, which changes with moisture. A pinless meter senses electrical properties below the surface without leaving holes.
| Meter type | Advantages | Limitations |
|---|---|---|
| Pin | Usually cheaper; measures at the probe depth; good for checking a suspicious area. | Leaves small holes; readings are affected by grain direction, temperature, and salts. |
| Pinless | Fast, non-damaging, and useful for mapping variation across a board. | Reads a zone rather than one exact depth; metal, fasteners, and thickness can distort results. |
For occasional furniture or trim work, a basic pin-type wood moisture meter is often the best value. A pinless meter is worth the extra cost when you are checking finished surfaces, large quantities of lumber, or valuable work where probe marks are unacceptable. Cheap meters can be useful for spotting wet boards, but do not treat a low-cost reading as laboratory-accurate.
Prepare the wood before measuring
Bring the lumber into the environment where it will be used. Stack boards with stickers or spacers between them so air can circulate, and leave them there for at least several days. One week is a reasonable starting point for many indoor projects; thicker stock and major climate changes may require several weeks. Keep the stack away from direct heat and sunlight.
Do not measure immediately after wiping the surface, washing the wood, applying a water-based dye, or steaming it. Surface water can produce an artificially high reading. Conversely, freshly planed or sanded wood may read differently from the interior because machining exposes a new surface. Let the wood rest before deciding that it is ready.
Keep the meter and the wood at roughly the same temperature. Cold wood can give inaccurate readings, and most meters are calibrated around normal room conditions. If the tool has settings for species, thickness, or temperature, use them. Oak, maple, pine, and many tropical species do not conduct electricity identically, so a generic setting is only an approximation.
Take several readings, not one
Inspect the board first. Avoid knots, end grain, visible stains, resin pockets, and areas directly over screws or nails. Those locations can produce misleading numbers. On a pin meter, push the pins to a consistent depth, ideally across the grain when the meter instructions recommend it. Measuring at different depths can reveal a wet core hidden beneath a dry face.
Take readings at both ends, near the middle, and at several points across the width. Check the boards that look darkest, feel coolest, or came from the bottom of the stack. Record the numbers rather than relying on memory. A practical sample is 10 readings per board for a small project, or at least 10% of the boards in a larger batch.
Look for consistency. If most readings are 7–8% but one area is 13%, do not average it away. That variation may indicate trapped moisture, a leak, or a board that was dried unevenly. For indoor work, wait until the highest readings are within your target range, not merely until the average looks acceptable.
Recognize false readings and failure modes
Metal fasteners, foil-backed insulation, conductive wood preservatives, and heavy mineral deposits can raise or confuse a reading. Pinless meters may also respond to the edge of a board or to a void beneath the surface. Very thin stock can give an incorrect result if the meter is designed for thicker material.
Species correction matters most when the reading is close to your limit. If the meter has no setting for a dense species such as ipe or ebony, use the number as a comparison between boards rather than as an exact percentage. For critical work, verify with a better meter or ask the lumber supplier for kiln-dry information.
Do not confuse moisture content with surface dryness. A board can feel dry and accept a coat of finish while its center remains wet. As that moisture moves outward, it can cause cupping, raised grain, cloudy lacquer, adhesion failure, or cracks along glued joints. Finishing also slows evaporation, trapping the problem under the coating.
What to do if the reading is too high
Keep the boards stickered in a dry, ventilated room and measure again every few days. Do not force-dry valuable lumber with a heat gun, radiator, or close-set space heater. Rapid drying can create case hardening, end checks, splits, and warping. If only one section is wet, separate that board and investigate the source.
When readings are stable and within the finish maker’s limit, sand and prepare the surface normally. After final sanding, remove dust without adding water unless the finish system specifically calls for damp wiping. Recheck the wood after any water-based raising-grain step, and allow it to dry fully before applying stain, paint, or clear finish.
For larger jobs, a pinless wood moisture meter makes it faster to scan every board, while a moisture meter calibration check accessory can help confirm that the instrument is behaving normally. The inexpensive option is fine for a small project if you take many readings and allow a sensible acclimation period. The important purchase is not the fanciest meter; it is enough information to keep wet wood from being sealed under finish.



0 Comments