What's inside
As an Amazon Associate I earn from qualifying purchases. This post may contain affiliate links at no extra cost to you.
Bare wood needs a compatible primer before enamel paint. Primer helps the finish stick, evens out absorption, and reduces stains or wood extractives bleeding through. The right choice depends on the wood, the enamel, and whether the work is indoors or outside. A careful sanding and a thin, even primer coat matter as much as the product.
As an Amazon Associate we earn from qualifying purchases at no extra cost to you.

Our Top Picks
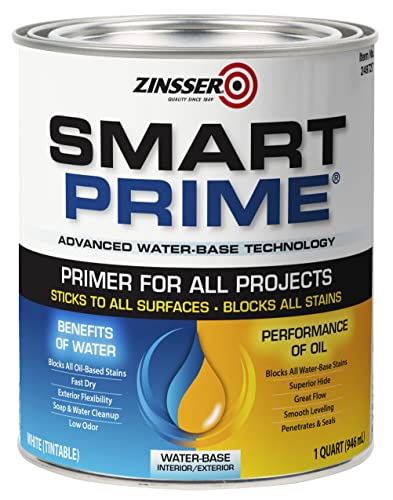
Choose a primer for the wood and enamel
For most interior trim, furniture, and other clean bare wood, a quality water-based wood primer is a practical choice. It dries quickly, has less odor, and cleans up with water. It works well beneath water-based enamel; check the primer and paint labels before using it under oil-based enamel.
Use an oil-based or shellac-based primer when the wood is resinous, knotty, or likely to bleed through a water-based coating. Knots in pine and cedar can discolor paint, sometimes weeks after painting. Shellac primer blocks stains quickly but has strong solvent odor and requires appropriate ventilation. Oil-based primer also blocks many wood stains, but usually takes longer to dry and has more odor than water-based primer.
If you do not know what is in the wood or the existing coating, test the primer on a small area and let it dry fully before proceeding. Do not assume one primer works under every enamel: follow both manufacturers’ instructions for compatibility and recoat time.
| Primer type | Best use | Trade-off |
|---|---|---|
| Water-based wood primer | Clean interior wood and compatible water-based enamel | Low odor and quick cleanup; may not block stubborn knots or stains |
| Oil-based primer | Many bare woods, knots, and stain-prone surfaces | Good stain blocking; slower drying and stronger odor |
| Shellac-based primer | Persistent knots, resin, and difficult stains | Fast, effective stain blocking; solvent odor and more demanding cleanup |
For an ordinary indoor project, a suitable water-based wood primer is often enough. For knotty or stain-prone wood, compare the label claims on shellac-based primer and oil-based alternatives instead of buying by color or brand alone.
Prepare the bare wood
Remove dirt, grease, wax, and sanding dust before priming. If the surface is greasy, clean it with a suitable degreaser and let it dry completely. Check that the wood is dry, sound, and free of loose fibers. Do not prime over damp wood, because trapped moisture can interfere with adhesion and encourage paint failure.
Sand with 120- to 150-grit paper to smooth mill marks, rough grain, and raised fibers. For a final pass, 150- to 180-grit is usually a good range for paint-grade wood. Much finer sanding can burnish some woods and reduce the primer’s grip. Sand with the grain, ease sharp edges slightly, and avoid rounding crisp corners on trim.
Fill nail holes and small defects with a filler labeled for paint, then let it dry and sand it level. Wood filler can absorb primer differently from surrounding wood, so spot-prime filled areas if the label recommends it or if they remain visibly porous. Remove dust with a vacuum and a clean, dry cloth. A tack cloth can leave residue on some surfaces, so use it only if its manufacturer approves it for paint preparation.
Apply the primer evenly
Stir primer thoroughly without whipping air into it. Pour a working amount into a tray, and use a brush for edges, profiles, and joints; a small roller can speed up broad, flat panels. Match the brush to the primer—synthetic bristles generally suit water-based products, while natural or synthetic brushes may work with oil-based products according to the label.
Apply a thin, even coat, brushing with the grain and keeping a wet edge so lap marks are less likely. Do not try to hide the wood completely with one heavy pass. Thick primer can sag on vertical trim, dry unevenly, or remain soft underneath. Brush out drips promptly, especially at corners, joints, and the underside of rails. If using a roller, finish by lightly laying off the wet surface with a brush where the enamel will be seen.
Most projects need one full primer coat. Use a second coat if bare patches remain, the wood is very porous, or the primer label calls for it. On knotty wood, one coat may not block every knot: let it dry, inspect for yellow or brown marks, and spot-prime those areas before painting.
Dry, sand, and recoat at the right time
Use the label’s drying and recoat times, not a guess based only on touch. Temperature, humidity, airflow, and coat thickness all affect drying. A coat that feels dry on top may still be soft underneath; painting too soon can cause poor adhesion, wrinkling, or slow curing. Cold or humid conditions often extend the wait.
After the primer has dried, sand lightly with 180- to 220-grit paper to remove raised grain, dust nibs, and brush ridges. The goal is a smooth surface, not to cut through to bare wood. Vacuum and wipe away the sanding dust, then apply a second primer coat only where needed. A fine sanding sponge is useful on profiles and edges where folded sandpaper is awkward.
Avoid common primer failures
If knots or brown stains show through, the primer did not block them; add a compatible stain-blocking primer over those spots and let it dry as directed. If primer beads up or peels, suspect contamination, damp wood, or incompatibility rather than simply adding another coat. If the coat is rough, sand it smooth after it dries and remove the dust before painting.
Once the primer is smooth, dry, and free of stains, apply enamel in thin coats according to its label. Two finish coats are common, but coverage and durability depend on the product and the surface. Keep ventilation going, especially with oil- or shellac-based products, and use the protective equipment specified on the label.


0 Comments