What's inside
As an Amazon Associate I earn from qualifying purchases. This post may contain affiliate links at no extra cost to you.
For a painted porch ceiling, the best wood is usually not the most rot-resistant species. It is the material that stays reasonably stable, arrives straight, has a smooth face, and can be sealed on all six sides before installation. A covered porch protects the ceiling from direct rain, but wind-driven moisture, condensation, and seasonal humidity still expose the boards to movement and paint failure.
As an Amazon Associate we earn from qualifying purchases at no extra cost to you.

Our Top Picks
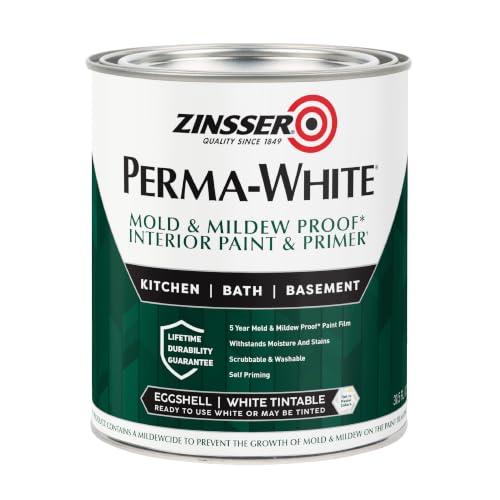 Zinsser 02774 PERMA-WHITE Mold & Mildew Proof Interior31.5 Fl Oz (Pack of 1)4.25 x 4.25 x 4.85 Inches1 poundsCheck on Amazon


Best overall choice: factory-primed pine
Factory-primed, finger-jointed pine is the practical choice for most painted porch ceilings. It is affordable, widely available, easy to cut, and commonly sold in long, straight trim-board lengths. The factory primer covers the wood more consistently than a rushed jobsite coat and reduces the amount of bare end grain you need to seal.
Finger-jointed boards are made from shorter pieces joined together, so they use less clear lumber than solid boards. Good products are stable and paint well, but the joints are potential weak points. Reject boards with open joints, soft spots, excessive filler, or visible cracks. Buy about 10 percent extra for defects and cutting waste.
Use an exterior-rated product, not interior primed pine. For a porch ceiling, 1×6 boards are a common size, although 1×8 boards install faster and create fewer seams. Wider boards can cup more noticeably if they are not properly fastened and sealed.
Browse factory-primed exterior pine boards when you want a painted, wood-grain ceiling without paying cedar prices.
Wood options compared
| Material | Strengths | Weaknesses | Best use |
|---|---|---|---|
| Factory-primed finger-jointed pine | Low cost, smooth, easy to paint, widely available | Joints can crack; must be exterior-rated | Most covered porches |
| Clear solid pine | Fewer glue joints, easy to work, economical | Knots and resin can bleed through paint | Budget projects with careful priming |
| Cedar | Lightweight, naturally decay-resistant, attractive grain | Expensive; tannins can stain paint | Damp or high-end porches |
| Douglas fir | Strong, relatively stable, good availability in some regions | Can be resinous and needs thorough sealing | Long boards and exposed locations |
| Poplar | Very smooth and easy to paint | Not naturally durable; swells and rots if wet | Well-protected, dry ceilings only |
When cedar is worth the extra cost
Cedar is a better choice than pine when the porch is unusually damp, poorly ventilated, or exposed to frequent wind-driven rain. It resists decay better than untreated pine and is relatively light, which helps with overhead installation. However, cedar is not maintenance-free. Its extractives can migrate through light-colored paint, especially when the wood gets wet.
If you paint cedar, coat every face and cut end with an exterior stain-blocking primer. An oil-based or shellac-based stain-blocking primer is generally more reliable against tannin bleed than ordinary water-based wall primer. Allow the primer to dry according to its label before applying two finish coats.
Clear cedar costs substantially more than primed pine, and its knots and grain may still telegraph through a smooth paint finish. Choose it for moisture resistance and appearance, not because it eliminates preparation.
Wood and sheet goods to avoid
Interior MDF, standard particleboard, and unsealed interior plywood are poor choices for a porch ceiling. They absorb moisture at edges and fastener holes, swell, and can lose their structure after repeated wetting. Even a covered porch can produce enough humidity for this failure, particularly near the roof edge.
Exterior plywood can work when you want large panels rather than individual boards. Use panels rated for exterior exposure, seal all edges, and expect visible seams unless you install battens or use a carefully finished joint system. Plywood is often cheaper per square foot, but its layered edge and face repairs require more finishing work.
For a traditional plank appearance, use tongue-and-groove exterior boards or square-edge boards with a planned reveal. Do not rely on tight butt joints to stay tight. Wood expands and contracts across its width, and a ceiling that looks perfect in dry weather may show gaps later.
Preparation and priming that prevents failure
Store the boards flat, supported every 24 to 36 inches, for at least several days in the same covered area where you will install them. Keep them off concrete and protect them from rain. Before installation, inspect every board for cup, twist, damaged primer, and excessive moisture.
Lightly sand rough areas with 120- or 150-grit paper. Do not aggressively sand factory primer unless the surface is glossy or contaminated; removing it exposes porous wood. Fill nail holes and small defects with an exterior-grade filler, let it dry, and sand flush.
Prime every cut end, ripped edge, and exposed fastener hole. End grain absorbs water far faster than the board face. Pay particular attention to tongue-and-groove ends, where moisture can enter behind the visible paint film.
For bare pine with knots, use a dedicated exterior stain-blocking primer. A single thin coat may not stop persistent resin. Spot-prime knots first, then prime the entire surface if the wood is mostly bare.
Installation and painting details
Fasten boards to framing, not just sheathing. For typical 1x boards, use corrosion-resistant exterior finish nails or trim-head screws long enough to penetrate the framing by roughly 1 1/2 inches. Avoid overdriving fasteners, which creates depressions that hold water and show through paint.
Leave the clearance specified by the board manufacturer at walls and trim. Wood needs room to move, and caulk is not a substitute for an expansion gap. Use a paintable, exterior-rated acrylic or polyurethane sealant at perimeter joints, but do not caulk tongue-and-groove joints that are designed to move.
Paint the boards before installation when possible, including the back and all edges. After fastening, fill holes, spot-prime repairs, and apply two finish coats of quality exterior acrylic paint. A satin or low-sheen finish hides minor surface defects better than gloss while remaining washable.
For the exterior acrylic porch paint, follow the label’s temperature and recoat limits. Painting below about 50°F, over damp wood, or before dew settles can leave the film soft or cause early peeling. The cheaper pine option is fine when the porch stays dry and you are willing to seal knots, edges, and cut ends carefully; spend more on cedar only when its moisture resistance solves a real site problem.


0 Comments