Our Top Picks

What's inside
- The Big Three Mechanisms Behind Almost Every Shop Injury
- Misconception Check: Six Beliefs Worth Throwing Out
- Woodworking Safety Tips For The Table Saw, Router, and Miter Saw
- Dust, Noise, and the Injuries You Cannot Feel Happening
- Shop Habits That Do More Than Any Single Purchase
- A Pre-Cut Sequence That Works on Any Machine
- How Long Is Too Long? Noise Exposure by Level
- Common Safety Mistakes in the Shop
- Troubleshooting Warning Signs
- Frequently Asked Questions
- Related Guides
- The Big Three Mechanisms Behind Almost Every Shop Injury
- Misconception Check: Six Beliefs Worth Throwing Out
- Woodworking Safety Tips For The Table Saw, Router, and Miter Saw
- Dust, Noise, and the Injuries You Cannot Feel Happening
- Shop Habits That Do More Than Any Single Purchase
- A Pre-Cut Sequence That Works on Any Machine
- How Long Is Too Long? Noise Exposure by Level
- Common Safety Mistakes in the Shop
- Troubleshooting Warning Signs
- Frequently Asked Questions
- Related Guides
As an Amazon Associate I earn from qualifying purchases. This post may contain affiliate links at no extra cost to you.
Most shop injuries are not caused by carelessness in the way people imagine. They happen because a machine did exactly what physics says it should, and the operator did not see it coming. That distinction matters, because the usual list of woodworking safety tips reads like a poster on a break room wall: wear glasses, stay alert, don’t rush. True, useless. Nobody gets hurt because they forgot that safety glasses exist. They get hurt because a workpiece pinched between a spinning blade and a fence, and the blade won the argument.
So here is the approach: explain the mechanism, then the fix. If you understand why a board launches back at your chest, the rule about never reaching over the blade stops being a rule and becomes obvious. Habits built on understanding survive a long day in the shop. Habits built on a checklist do not.
As an Amazon Associate we earn from qualifying purchases at no extra cost to you.




The Big Three Mechanisms Behind Almost Every Shop Injury
Woodworking machines hurt people in a small number of repeatable ways. Learn these three and you have covered most of what sends people to the emergency room.
Kickback is the workpiece becoming a projectile. On a table saw, the back half of the blade is spinning upward. If the wood contacts those rising teeth, they lift and throw it toward you at speeds people consistently underestimate. Any pinch condition creates the contact: internal stress released as the cut opens, a fence that is not parallel to the blade, a board pushed against the fence unevenly, or freehand crosscutting without a miter gauge. On a router table, the same thing happens when you feed with the rotation instead of against it, and the bit grabs the stock and throws it.
Blade or bit contact is usually the second half of a kickback event, not an independent mistake. The hand does not casually wander into the blade. It gets pulled in when the wood suddenly moves, or it follows through after a cut ends and the resistance disappears. That is why hand position matters more than concentration.
Cumulative exposure gets no drama and does the most long-term damage. Wood dust below ten microns reaches deep lung tissue, and hardwood dust in particular is a recognized carcinogen. Sound above roughly 85 decibels causes permanent, non-recoverable hearing loss with repeated exposure. A router or shop vac clears that easily. There is no pain signal telling you when it is happening.
Notice what is absent from that list: exotic freak accidents. The mechanisms are boring, which is good news, because boring problems have reliable solutions.
Misconception Check: Six Beliefs Worth Throwing Out
The following ideas are common in shops and each one is worth correcting explicitly.
| Common belief | What actually happens | What to do instead | |||
|---|---|---|---|---|---|
| “ | The riving knife and blade guard get in the way” | The riving knife keeps the kerf open behind the blade, which prevents the pinch that causes most kickback | Keep the riving knife installed for every through cut | remove the guard only when the cut requires it | |
| “ | Push sticks are for beginners” | Your hand’ | s job is feeding pressure, and a push block does it with more control and a wider contact patch | Use push blocks on the jointer always, and on narrow table saw rips | |
| “ | A dust mask handles wood dust” | A loose paper mask leaks around the edges and does nothing for fine particles | Use a fitted respirator rated for fine particulate, plus dust collection at the source | ||
| “ | Dull blades are safer because they cut slower” | Dull edges require more feed force, burn, and increase grab and kickback risk | Sharpen or replace | a sharp blade is a safety component | |
| “ | Gloves protect your hands at the saw” | Loose fabric can be caught by a blade and pull the hand in | Bare hands at spinning blades | gloves for handling rough lumber only | |
| “ | Cordless tools are low risk” | Modern brushless motors deliver high torque with no cord to yank free | Respect torque, brace the tool, and expect bind-up on hole saws and augers |
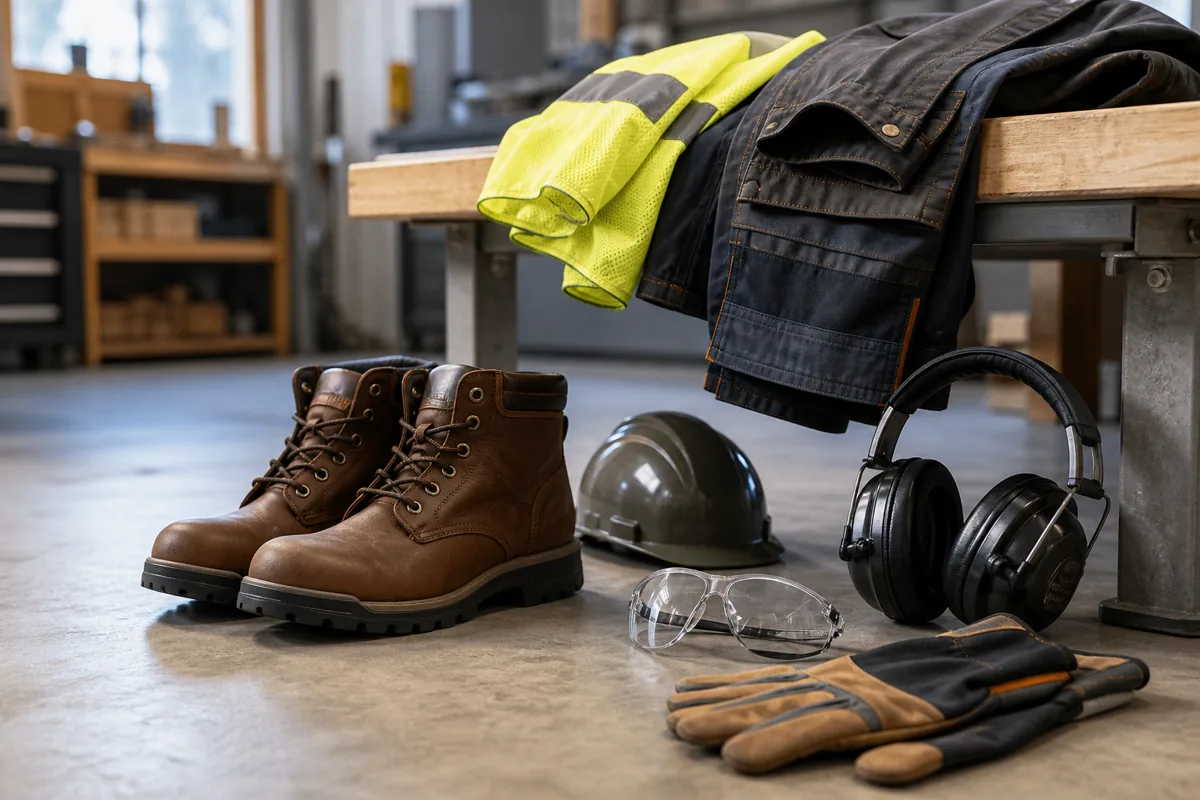
The glove item surprises people the most. Cut resistant gloves are excellent for handling sharp hardware, hand chisels, or a rough board full of splinters. They are the wrong choice near a spinning blade, because a snagged glove takes your hand with it. Match the protection to the actual mechanism, not to the general feeling of danger.
Woodworking Safety Tips For The Table Saw, Router, and Miter Saw
These three machines account for a disproportionate share of injuries, mostly because they are the ones used constantly.
On the table saw, stand out of the kickback line, meaning slightly to the left of the blade rather than directly behind the work. Set blade height so the gullets just clear the stock, roughly an eighth of an inch above the surface. Higher exposes more blade for no benefit; much lower angles the cutting force more toward the operator. Never rip freehand, never crosscut against the fence alone, and never reach past the blade to retrieve an offcut while the motor is spinning. For anything narrower than about four inches, use a push block or a purpose-built narrow rip jig.
On the router, direction is everything. Handheld, you move the router so the bit’s rotation pushes against your feed direction, which for outside edges means counterclockwise around the workpiece. Get it backwards and the router self-feeds, climbing along the edge with the bit grabbing rather than shaving. On a router table, feed right to left across the fence. Take shallow passes; a full-depth profile in one bite is where burning, chatter, and lost control begin.
On the miter saw, the classic error is crossing your arms so the left hand holds stock on the left side of the blade while the right hand pulls the trigger. Hold the workpiece well clear of the cut line, use the fence, and let the blade reach full speed before it touches wood. Wait for the blade to stop before lifting the head on a cut with a small offcut, because a stopping blade can flick loose pieces.
Table Saw Push Block and Riving Knife Setup
If you buy one safety item, make it a good push block with a rubber grip face and a solid heel. It gives you downward and forward pressure at once and keeps your hand behind the cut instead of beside it. If your saw shipped with a riving knife you removed, dig it out of the drawer; it prevents the pinch that starts most kickback events.
Dust, Noise, and the Injuries You Cannot Feel Happening
Think of your lungs like a shop vac filter you cannot change. Coarse chips fall out of the air on their own. The fine dust stays airborne for hours after you stop working, which means the cleanup pass you make with a broom stirs it right back up. That is why a shop vac with a fine filter, a cyclone separator, or a dedicated dust collector connected at the tool matters more than a mask alone. Capture beats filtration; a mask is the last line, not the first.
For hearing, the practical rule is simple. If you have to raise your voice to be heard over the tool, you are in damaging territory. Routers, planers, and shop vacs are the worst offenders, and they are also the tools people run without protection because the cut only takes ten seconds. Ten seconds, several hundred times a year, adds up.
- ✔ Dust collection at the source removes particles before they reach breathing height
- ✔ A fitted respirator handles what collection misses, including sanding dust
- ✔ Over-ear muffs are faster to put on than plugs, so they actually get used
- ✔ An air filter running after you leave clears the fine fraction that lingers
- ✘ Shop vacs alone clog fast without a separator ahead of the filter
- ✘ Beards and loose straps defeat respirator seals
- ✘ Bluetooth muffs tempt you to run tools longer than you should
- ✘ Dust masks rated only for nuisance dust give false confidence
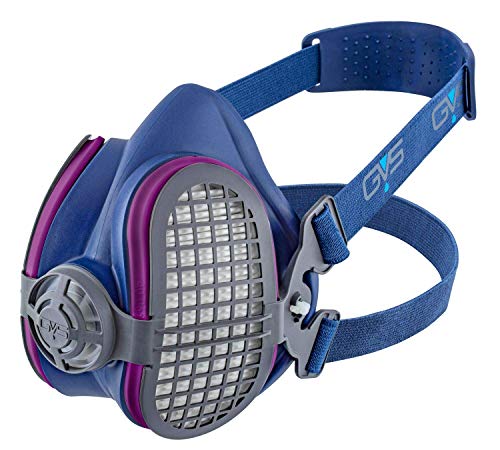
Fine Particulate Respirator and Hearing Protection
Buy protection you will actually reach for. A respirator with replaceable fine particulate cartridges and a soft silicone face seal is comfortable enough for a long sanding session, and muffs with a decent noise reduction rating beat plugs simply because they are faster to grab.
Shop Habits That Do More Than Any Single Purchase
Gear helps, but layout and routine prevent more injuries than accessories do. Keep the floor clear of offcuts and cords, because most falls in a shop happen while carrying something with both hands. Give yourself infeed and outfeed room; a board with nowhere to go gets lifted at the end of the cut, which is a kickback invitation. Unplug or remove the battery before changing blades and bits, not just switch off, since a bumped trigger with a wrench in the cut is a bad day.
Set up a pre-cut pause. Three checks, five seconds: is the fence locked, is my hand out of the blade path, and does the offcut have somewhere to fall. That single habit catches an astonishing share of near misses. Finally, respect fatigue. The last cut of the day is statistically the dangerous one, because attention drops right when you are motivated to finish. Stopping one cut early is free.
A Pre-Cut Sequence That Works on Any Machine
Good habits survive distraction better than good intentions do. The sequence below takes under a minute and applies equally to a table saw, router table, or miter saw.
- Look at the board first. Sight down its length for bow, twist, or a loose knot. A board that rocks on a flat surface will rock against a fence too.
- Set the machine, then the stock. Lock the fence, set the blade or bit height, and confirm the guard or riving knife is in place before the wood touches anything.
- Plan the exit. Decide where the offcut will go and where your hands will be at the end of the cut, not just at the start.
- Stand outside the line of fire. Position your body beside the blade path so a thrown piece passes you instead of hitting you.
- Let the tool reach full speed. Starting a cut while the blade is still spinning up invites grabbing.
- Feed steadily and finish the cut. Stopping mid-pass is when burning and binding begin.
- Wait for a full stop. Clear offcuts only after the blade has stopped turning.
How Long Is Too Long? Noise Exposure by Level
Two agencies publish exposure limits for noise, and they use different math. NIOSH sets its limit at 85 dBA over eight hours and cuts the allowed time in half for every 3 dB increase. OSHA’s enforceable limit is 90 dBA over eight hours and halves the time for every 5 dB.
| Sound level | NIOSH allowed time | OSHA allowed time |
|---|---|---|
| 85 dBA | 8 hours | Below the limit, but at the action level for hearing conservation |
| 90 dBA | About 2.5 hours | 8 hours |
| 95 dBA | About 47 minutes | 4 hours |
| 100 dBA | 15 minutes | 2 hours |
The stricter NIOSH column is the better guide for a hobby shop, since there is no employer monitoring your dose. Check the decibel rating in each tool’s manual, and remember that exposures add up across a day of routing, planing, and vacuuming.
Common Safety Mistakes in the Shop
- Raising the blade too high. Sources vary, but most place the right height between 1/8 and 1/4 inch above the stock. Extra exposed blade adds risk with no benefit.
- Using hands where a push stick belongs. One university safety procedure calls for a push stick whenever hands would pass within 4 inches of the blade.
- Treating dust as a cleanup problem. NIOSH lists an exposure limit of 1 mg/m3 for wood dust, and fine particles hang in the air long after visible chips settle.
- Skipping the unplug step. Blade and bit changes belong to a dead machine, not one that is merely switched off.
- Working past fatigue. Judgment fades before strength does, so stop when cuts start feeling rushed.
Troubleshooting Warning Signs
| What you notice | Likely cause | What to do |
|---|---|---|
| Burn marks along the cut | Dull or pitch-coated blade, or a fence not parallel to the blade | Clean or replace the blade, then recheck fence alignment |
| Wood pinches the blade during a rip | Internal stress in the board, or the kerf closing behind the cut | Stop, switch off, wait for the blade to stop, and confirm the riving knife is installed |
| Chatter or heavy vibration | Loose arbor, bent bit, or unbalanced blade | Unplug the machine and inspect before another cut |
| Stock lifts or climbs the fence | Uneven feed pressure or warped stock | Use a flatter board and add hold-down pressure |
Frequently Asked Questions
Do I really need a riving knife if I have a blade guard?
They do different jobs. The guard covers the blade to prevent contact; the riving knife rises and falls with the blade and holds the kerf open behind it so the wood cannot pinch. Kickback prevention comes from the riving knife, so it is the one to keep installed for every through cut.
Are flesh-detection table saws worth the money?
If you can afford one, the technology addresses the worst-case outcome directly, and many woodworkers consider it the single biggest safety upgrade available. It does not prevent kickback, though, so the same fence discipline, riving knife, and push block habits still apply. Budget-conscious shops get most of the practical benefit from a good riving knife, sharp blades, and better technique.
What is the first safety upgrade for a small home shop?
Dust capture at the source, then a fitted respirator, then a proper push block. Blade contact is dramatic but rare; dust exposure happens every single session. Address the daily hazard first, then the acute one.
The pattern in all of this is the same. Understand the mechanism, remove the pinch, keep your hands out of the force path, and control what you breathe. Do that and the poster-style rules become redundant, because you will already be following them for reasons that make sense.
Check prices on Amazon →

0 Comments