As an Amazon Associate I earn from qualifying purchases. This post may contain affiliate links at no extra cost to you.
You seat a bit, crank the sleeve until it clicks, pull the trigger, and the bit spins in place while the chuck jaws stay put. Or worse, the bit walks out mid-hole and chews the edge of your workpiece. A cordless drill chuck not tightening feels like a dead tool, and that is usually the moment people start shopping for a replacement drill. Most of the time they do not need one.
Here is the misconception worth killing first: people assume the chuck failed because the sleeve feels loose or the clicking stopped. In reality, the chuck body almost never breaks. What fails is the grip between three hardened jaws and a smooth steel shank, and that grip depends on clean surfaces, correct shank geometry, and a sleeve that is actually being turned to full clamp force. Understanding that changes the whole diagnosis.
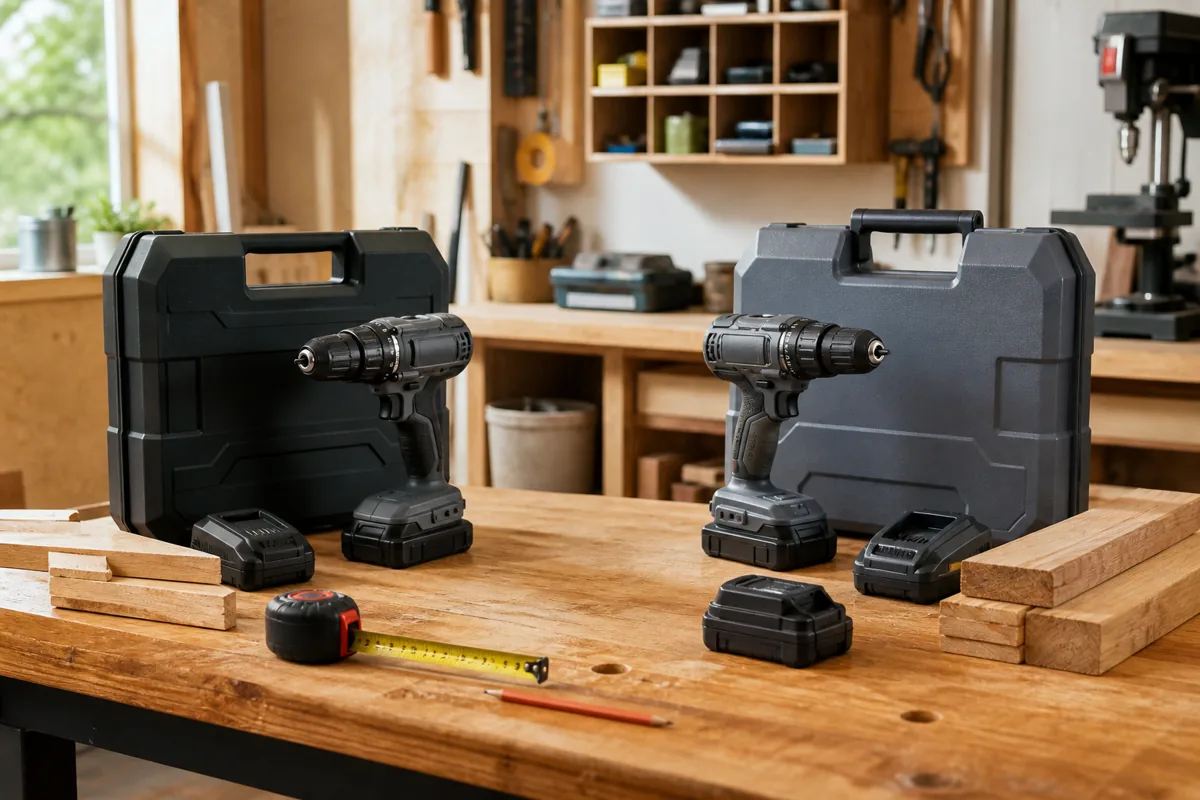
How a Keyless Chuck Actually Grips
Think of a keyless chuck as three wedges riding in angled slots inside a threaded collar. When you turn the outer sleeve, an internal nut rotates around a threaded body and drives all three jaws down their ramps at the same time. Because the ramps are angled, a small amount of sleeve rotation converts into a large amount of clamping force. That is the same trick a wood clamp screw uses: shallow angle in, big squeeze out.
The clicking you hear on most modern drills is not the chuck tightening. It is a ratcheting or locking mechanism designed to keep the sleeve from backing off under vibration and reverse torque. The click is a lock, not a tightening gauge. If you spin the sleeve until it clicks a few times but never actually loaded the jaws hard against the shank, you locked a loose chuck.
Grip also depends on friction, and friction depends on surface condition. Jaw faces are cut with fine serrations or a slight crown so they bite into the shank. Fill those serrations with sawdust, drywall powder, hardened cutting oil, or resin from pressure treated lumber, and the jaws effectively become polished pads sliding on polished steel. Nothing is broken. The bite is just gone.
| Symptom | Most Likely Cause | First Thing To Try |
|---|---|---|
| Bit spins in the jaws under load | Packed debris or oil on jaw serrations | Deep clean and dry the jaws |
| Sleeve turns forever with no resistance | Internal nut or jaw thread wear | Full clamp test on a large drill bit, then replace chuck |
| Bit walks out only in hammer or reverse | Sleeve backed off, no locking ring engaged | Retighten firmly, check for a locking collar |
| Only round shanks slip, hex bits hold | Insufficient clamp force for smooth shanks | Use a hex adapter or bear down harder on the sleeve |
| Jaws will not close on small bits | Debris at the jaw tips or bent jaw | Blow out and inspect jaw tips for chips |
| Chuck wobbles and bits run out | Chuck loose on spindle or damaged taper | Check chuck retaining screw and mounting |
Why Your Cordless Drill Chuck Is Not Tightening
Work through these in order, because the cheapest causes are also the most common.
Debris in the jaws. This is the number one cause by a wide margin. Sawdust and metal fines pack into the jaw slots and behind the jaws, so they physically cannot travel far enough down the ramps. Open the chuck all the way, point it down, and blow it out with compressed air. Then work a stiff brush or a rag corner around each jaw face. If there is old oil or resin, a light spray of brake cleaner or denatured alcohol on a rag cuts it. Let it dry completely before you reload a bit. A wet chuck slips worse than a dirty one.
Not enough clamp force. Single sleeve keyless chucks require a real grip. Hold the chuck body, set the drill in low gear, and use the motor briefly to snug the sleeve if your manual allows it, or simply put the drill against your hip and pull hard. Many people are tightening to maybe half of what the chuck can deliver, then blaming the tool.
Wrong shank for the job. A smooth round shank is asking three small jaws to resist torque with friction alone. Large diameter hole saws, spade bits, and auger bits in hardwood generate far more torque than a 3/8 in keyless chuck can hold on a polished shank. That is not a defect. That is physics. Hex shanks or a hex bit holder give the jaws flats to key against.
Worn jaws or internal threads. If the sleeve spins with almost no resistance through its whole range, or the jaws close unevenly so a bit sits visibly crooked, the wear is internal. Look closely at the jaw tips for chips and rounding. Chipped tips will never hold small bits again.
Chuck loose on the spindle. Most cordless drills use a threaded spindle with a reverse thread retaining screw inside the chuck. If the whole chuck assembly wiggles or you hear a knock under reverse, open the jaws fully, look down the bore for a screw head, and check it. That screw is usually left hand thread, so it loosens clockwise. Getting this backwards is a classic way to snap a screw head.
Replacement Keyless Drill Chucks (1/2 in, 3/8 in)
If cleaning and hard tightening did not restore grip, a replacement chuck is usually the smart move on a drill that is otherwise healthy. Match the thread spec stamped on your old chuck or listed in your manual, commonly 1/2 in by 20 UNF on full size drills and 3/8 in by 24 UNF on compact models, and pick a metal bodied unit over an all plastic sleeve. Budget replacements run in the low tens of dollars, far less than a new bare tool.
Removing and Replacing the Chuck Without Wrecking the Drill
Chuck swaps look intimidating and are mostly just leverage. Open the jaws all the way and check for a retaining screw in the bottom of the bore. If it is there, back it out clockwise, since it is almost always reverse threaded. Then clamp a stubby hex key in the jaws so a short leg sticks out, set the drill to low gear, and rap the exposed leg counterclockwise with a mallet. That shock breaks the chuck loose from the spindle threads far better than steady pressure does. Some drills instead have a spindle lock, which makes the job easier.
Threading the new chuck on is the reverse. Hand thread it, snug it with the hex key trick in the tightening direction, and reinstall the retaining screw counterclockwise if your drill uses one. Check runout by chucking a long bit and spinning it slowly. A little wobble at the tip is normal on a keyless chuck. A visible orbit means the chuck is not seated square.
- ✔ Cleaning fixes a large share of slipping chucks in under ten minutes
- ✔ Replacement chucks are inexpensive and widely available in standard threads
- ✔ Hex shank bits and adapters sidestep round shank slip entirely
- ✔ A metal bodied chuck resists impact and heat better than plastic
- ✘ Worn or chipped jaws cannot be repaired, only replaced
- ✘ Thread specs vary between brands and generations, so you must verify before ordering
- ✘ Aggressive solvents can wash grease out of the mechanism and attract dust
- ✘ Hammer drill duty accelerates chuck wear no matter the brand
When To Stop Repairing and Buy a Better Drill
There is a point where chuck trouble is a symptom rather than the problem. If the drill also bogs down in softwood, runs hot on light work, or has loose gearbox play you can feel by hand, you are propping up a tired tool. Older entry level drills tend to pair a modest brushed motor with a lightweight chuck, and both wear out around the same time.
Brushless platforms from the major lines, DeWalt XR, Milwaukee FUEL, Makita LXT, and similar, generally come with sturdier all metal ratcheting chucks and enough torque that you stop overloading round shanks in the first place. If you drive a lot of screws and mostly use hex accessories, an impact driver plus a hex drill bit set is often a better use of money than another drill, since the collet locks positively and cannot slip.
Brushless Cordless Drill Kits
Buy into the battery platform you already own if you can, because batteries and chargers are most of the long term cost. Look for a 1/2 in all metal ratcheting chuck, two speed gearbox, and a hammer mode only if you actually drill masonry. Ignore peak torque numbers in marketing copy and prioritize chuck quality and handle comfort, which is what you feel every day.
Preventing Chuck Slip In The First Place
Blow out the chuck when you blow off the tool, not once a year. Wipe bit shanks before they go in, especially after cutting treated lumber or using cutting oil. Skip the temptation to oil the outside of a chuck; light grease belongs in the mechanism and oil on the jaw faces is exactly what kills grip. Use the right bit style for the torque involved, meaning hex shanks and adapters for spade and auger work, and a corded drill or a proper right angle drill for large diameter holes. Store drills without a bit clamped tight, since long term full clamp load does the jaws no favors.
FAQ
Why does my drill bit keep slipping even when the chuck clicks? The click is a locking ratchet, not a tightening indicator. It tells you the sleeve will not vibrate loose, but it says nothing about how much clamp force you applied. Grip the chuck body and turn the sleeve much harder than feels necessary, and clean the jaw serrations, which lose bite once packed with dust or oil.
Can I repair a worn drill chuck, or do I have to replace it? Cleaning and drying the jaws restores most chucks that slip. Actual wear, meaning rounded or chipped jaw tips, stripped internal threads, or jaws that close crooked, is not repairable at a sensible cost. Replacement chucks in standard threads are inexpensive and swap out with basic hand tools.
Is the drill chuck screw really reverse threaded? On most cordless drills that use a retaining screw, yes, it is left hand thread and loosens by turning clockwise. Forcing it counterclockwise is how people snap the head off. Confirm in your model’s manual before applying real force, and use a screwdriver that fills the slot completely.
Diagnose the mechanism before you spend money. Clean the jaws, tighten like you mean it, match the shank to the torque, and only then decide whether the chuck or the whole drill has earned retirement.
Check prices on Amazon →
0 Comments