What's inside
- Why Knots Bleed Through Paint
- Which Woods and Knots Bleed the Worst
- Which Sealer Actually Stops Resin
- Preparation Before You Seal
- How to Apply Knot Sealer Correctly
- Failure Modes and How to Fix Them
- Other Knot-Sealing Options: Spray Shellac, Knotting Solution, and Aluminum Primer
- Frequently Asked Questions
- Related Guides
- Why Knots Bleed Through Paint
- Which Woods and Knots Bleed the Worst
- Which Sealer Actually Stops Resin
- Preparation Before You Seal
- How to Apply Knot Sealer Correctly
- Failure Modes and How to Fix Them
- Other Knot-Sealing Options: Spray Shellac, Knotting Solution, and Aluminum Primer
- Frequently Asked Questions
- Related Guides
As an Amazon Associate I earn from qualifying purchases. This post may contain affiliate links at no extra cost to you.
Why Knots Bleed Through Paint
Knots bleed because they are saturated with resin and pitch. In softwoods like pine, spruce, and fir, the wood around a knot can contain 5 to 10 times more resin than clear grain. That resin is not dry, even if the board feels dry to the touch. When you paint over it, heat from sunlight or even interior temperature swings softens the resin and it migrates outward. Tannins in cedar and redwood do the same thing, but faster. The result is a yellow-brown stain that comes right through latex paint, and often through oil-based primer too if it is not the right type.
You will not sand or wash this away. You have to lock it in with a sealer that resin cannot dissolve. Paint alone, even high-build acrylic enamel, will not stop it. If you can still see the dark outline of the knot after one coat of primer, it will bleed through the topcoat within weeks to months.
As an Amazon Associate we earn from qualifying purchases at no extra cost to you.

Which Woods and Knots Bleed the Worst
Not every knot needs the same level of protection. Two different things come through paint: resin (pitch) from softwood knots, and water-soluble tannins from certain species. Knowing which one you are dealing with tells you how aggressive the sealing needs to be.
| Wood | What bleeds | Risk level | Practical approach |
|---|---|---|---|
| Southern yellow pine | Heavy resin in knots and latewood | Very high | Spot-seal every knot with shellac, then full-coat shellac primer |
| Eastern white pine, knotty pine boards | Resin in knots | High | Shellac spot coats on all visible knots; two coats on dark ones |
| Douglas fir and fir plywood | Resin, plus grain raise and checking | Moderate to high | Shellac on knots and patches; oil or shellac primer on the field |
| Spruce, hemlock (common “SPF” lumber) | Light resin in knots | Moderate | Shellac spot coats; quality oil-based primer may cover small tight knots |
| Cedar and redwood | Tannins (reddish-brown extractives) | High for tannin stains | Oil-based or shellac stain-blocking primer, never a plain water-based primer |
| Poplar, maple, MDF | Little or no resin | Low | Standard primer is usually enough |
Within one board, the worst knots are the ones that look dark, glassy, or sticky, or that smell strongly of turpentine when sanded. Light, tight, dry-looking pin knots in kiln-dried stock are the least likely to cause trouble. Knots on the side of a board facing south or on exterior trim get the most heat, so they bleed sooner than identical knots indoors.
Why kiln-dried lumber still bleeds
Proper kiln schedules use temperatures high enough to “set” much of the pitch, which hardens the resin and reduces later weeping. However, not all construction lumber goes through a high-temperature schedule, and resin deep inside large knots can still soften later in hot sun or near a ceiling light. Treat kiln drying as helpful, not as a guarantee that knots will stay put under paint.
Which Sealer Actually Stops Resin
For knots, not all primers are equal. The chemistry matters more than the brand.
| Primer Type | Blocks Knot Resin? | Dry Time Before Topcoat | Best Use Case | Downside |
|---|---|---|---|---|
| Shellac-Based (white pigmented) | Yes – best available | 45-60 minutes, recoat in 1 hour | Any knot, especially pine and pitchy knots | Strong odor, alcohol cleanup, brittle if applied too thick |
| Oil-Based Stain-Blocking | Moderate – works on light knots, fails on heavy pitch | 2-4 hours, recoat in 4-8 hours | Tannin bleed on cedar, light knots | Slow dry, mineral spirits cleanup, yellows slightly |
| Water-Based (Acrylic) Stain-Blocking | Poor for knots | 1 hour, recoat in 1-2 hours | General priming, drywall, low-stain wood | Resin dissolves right through the film |
| Clear Shellac / Knot Sealer | Yes, but needs 2 coats | 15-30 minutes | Spot-sealing under clear finishes or before pigmented primer | Not a primer – poor adhesion for topcoat alone |
If you want a one-and-done solution, use a white shellac primer. It is the only type that consistently seals fresh, sappy knots in pine in a single product. Oil-based primers like Cover Stain or similar will hold on small, tight, dry knots, but on large, dark, or slightly sticky knots they will let a yellow halo appear after the first hot summer. Water-based primers, even those labeled stain-blocking, are not reliable for resin.
The cheaper option is fine when the knots are small, tight, and fully dry, and the wood has been kiln-dried and stored indoors for months. For interior trim made from clear pine with only a few pin knots, a good oil-based primer can work. For knotty pine walls, ceilings, exterior trim, or any knot that feels resinous or smells strongly, spend the extra $10-15 per quart and go straight to shellac. Repainting costs more than the primer.
Preparation Before You Seal
Sealer will fail if you trap dirt, loose resin, or contamination under it. Do the prep in order and do not skip dry time.
1. Scrape off any crystallized sap. If the knot has a raised bead of dried pitch, carefully scrape it with a putty knife or card scraper, then sand flush with 120-grit, then 150-grit. Do not gouge the wood.
2. Clean the surface. Wipe the knot and surrounding 2-3 inches with isopropyl alcohol or denatured alcohol on a rag. This removes surface oils without raising grain the way water does. Let it flash off completely, about 10 minutes.
3. Sand the whole board to your final grit before sealing knots. For paint-grade work, 120 to 150-grit is sufficient. Sanding after you seal will cut through the thin shellac film over the knot.
4. Check moisture. Wood should be below 12% moisture content for interior and below 15% for exterior. Trapped moisture pushes resin out and causes primer to peel. A $20 pin meter is worth it if you are doing a whole room of knotty pine.
5. If the knot is cracked or has a void, fill after sealing, not before. Sealer first, then filler, then spot-prime the filler. Filler applied directly to raw resin often does not bond well.
How to Apply Knot Sealer Correctly
Shellac-based primer is thin and fast-drying. Technique matters more than thickness.
Shake and stir thoroughly. Pigment settles fast. If you do not stir, the first brush load will be mostly alcohol and will not block anything.
Spot-seal the knot first. Use a small brush and dab, do not just brush over. Extend about 1/2 to 3/4 inch beyond the dark ring of the knot. For knots larger than 1-1/2 inches, or very dark/black knots, apply two spot coats. Wait at least 45 minutes between coats, longer in a cool or humid room, and follow the time on the can. Shellac primer feels dry to the touch in about 15 minutes, but give the last spot coat close to an hour before priming the whole board.
Then prime the entire board. Once the spot coats are dry, roll or brush one full coat of the same shellac-based primer sealer over the whole surface. This evens out absorption so the topcoat does not flash dull over the spots. If you only spot-prime, you will see every knot telegraph as a dull patch under semi-gloss paint.
Film thickness: two thin coats beat one heavy coat. Shellac gets brittle and can crack if you lay it on at 6+ mils wet. Aim for 2.5 to 3.5 mils wet per coat. If you see heavy orange peel or the primer is dragging, you are applying too heavy. Work in a ventilated area, 65-75F is ideal. Cold wood slows dry and can trap solvents.
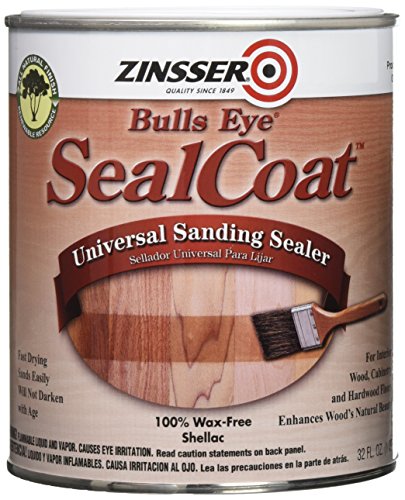
For clear shellac as a spot sealer under paint, use a 2 lb. cut clear shellac or a dedicated clear shellac knot sealer. Apply two coats to the knot only, extending slightly beyond the resin area, scuff lightly with 220-grit after 30 minutes, then prime normally with your pigmented primer. Clear shellac is useful when you want to keep the odor lower during full priming or when you already own a water-based primer you want to use for the field.
Topcoat timing matters. Latex paint can go over shellac primer in 1 hour. Oil paint needs the shellac to be fully cured, 2 hours minimum. Do not sand shellac primer aggressively. A light scuff with 220-grit to remove nibs is enough. Sanding through on the knot reopens the bleed path.
Failure Modes and How to Fix Them
Yellow-brown spot after 2-4 weeks: Film was too thin or you used water-based or oil-based primer only. Fix by spot-priming the bleed with shellac, not by adding more latex paint. Lightly scuff the bleed area with 220-grit, wipe dust, apply one to two coats of shellac primer over the stain extending 1 inch beyond it, then repaint the whole board edge-to-edge to avoid flashing.
Cracking or flaking over the knot: Primer was applied too thick or wood movement cracked the brittle shellac. Scrape loose material, sand to feather, wipe with alcohol, and reapply two thin coats.
Resin bead pushing through primer months later: The knot was actively weeping. Shellac can block stain but cannot hold back a physical bead of pitch under heat. Scrape the bead, wipe with alcohol, seal again. For exterior or knotty pine ceilings that get warm, this can take two cycles before the knot stops weeping.
If you are painting new knotty pine tongue-and-groove, prime both sides and edges before installation if possible. Sealing only the face leaves the back open to moisture swings that drive resin forward. It takes more primer, about 300-350 sq. ft. per gallon for shellac primer versus 400 for acrylic, but it is the only way to get a ceiling that stays white for more than one season.
Other Knot-Sealing Options: Spray Shellac, Knotting Solution, and Aluminum Primer
Brush-on shellac primer covers most situations, but a few other products are worth knowing about, especially for small repairs or awkward spots.
- Aerosol shellac primer. A spray can of white pigmented shellac primer is the quickest way to spot-seal a handful of knots on trim, cabinet doors, or a ceiling you have already painted. Mask around the knot, hold the can about 10 to 12 inches away, and apply two light passes rather than one wet one. Spray drifts, so cover nearby surfaces and ventilate well.
- Knotting solution. Traditional “knotting” sold in the UK and Europe is essentially shellac dissolved in alcohol, in clear (bleached) or amber (patent) versions. It is used as a spot sealer under primer, exactly like clear shellac, and needs the same two thin coats.
- Aluminum wood primer. Primers pigmented with aluminum flakes form overlapping metallic layers that slow resin and tannin migration. They are mainly used on exterior softwood joinery and resinous hardwoods, and they work under oil-based and many latex topcoats. They are slower to dry than shellac and less common in North American stores.
- Two-coat oil-based stain blocker. If shellac is not an option, two full coats of a solvent-based stain-blocking primer give much better resistance than one. It is a workable choice for small, tight knots but still less reliable than shellac on sappy pine.
For quick spot work on already-painted trim, a spray version of a white shellac-base primer saves cleaning brushes and lets you seal, dry, and touch up paint in the same afternoon.
As an Amazon Associate we earn from qualifying purchases at no extra cost to you.

Sealing knots on a ceiling that is already painted
Yellow or brown circles appearing on a new tongue-and-groove or plank ceiling a few weeks after painting is the classic sign that the knots were not sealed with shellac. Heat collects near the ceiling, so resin moves faster there than on walls. Do not keep rolling on more latex; the stain will return. Lightly scuff each stained spot with 220 grit, wipe with denatured alcohol, then spot-seal with two thin coats of shellac primer from a brush or aerosol can, extending about an inch past the stain. Once dry, roll one coat of ceiling paint over the full boards to hide the patched areas. Protect your eyes and keep the room ventilated, since overhead spraying sends mist back down.
Frequently Asked Questions
Does regular latex primer stop knots from bleeding through?
No. Standard water-based primer is permeable to the solvents in knot resin, so the yellow-brown stain migrates straight through, often within weeks. Even many water-based primers labeled “stain blocking” are designed for water stains and marker, not pine pitch. Seal knots with a shellac-based product first; after that, latex primer and latex paint can go on top without problems.
Do you fill pine knots and then apply primer?
Seal first, fill second. Spot-coat the knot with shellac so the resin is locked in, then fill any cracks or loose areas with wood filler once the shellac is dry. Sand the filler flush, spot-prime it with the same shellac primer, and then prime the whole board. Putting filler directly on raw resin often leads to poor adhesion and bleed around the patch.
How many coats of shellac does it take to seal a knot?
Two thin coats on the knot itself is the usual standard, with a third for very large, dark, or sticky knots. Follow that with one full coat of shellac primer over the entire board. Several thin layers block resin better than one heavy coat, which can crack as the wood moves.
Why are knots bleeding through my new ceiling?
Ceilings are the warmest surfaces in a room, so heat softens resin in pine or fir boards and pushes it through paint faster than on walls. If only water-based or oil-based primer was used, the knots were never fully blocked. Spot-seal each stain with shellac primer, let it dry, and repaint the full boards rather than dabbing paint over the spots.
Can you paint over sap on wood?
Not directly. Wet or sticky sap prevents primer from bonding and will keep weeping through the finish. Scrape off hardened beads, wipe the area with denatured alcohol or mineral spirits until it feels clean, let it dry, then seal with shellac. If a knot keeps weeping fresh pitch, give it time in a warm, dry place before sealing again.
Is white pine or knotty pine safe to paint without a knot sealer?
Occasionally, if it is clear stock with a few tiny, tight knots, but it is a gamble. Most knotty pine paneling, trim, and shelving will show yellow halos within months under white or light paint. Spot-sealing takes a few minutes per board and costs far less than repainting a room.



0 Comments