What's inside
As an Amazon Associate I earn from qualifying purchases. This post may contain affiliate links at no extra cost to you.
Knots are one of the hardest parts of staining pine, fir, spruce, and other resinous woods. The surrounding grain may absorb stain evenly while the knot stays pale, turns nearly black, or develops a dark ring around its edge. That ring is usually caused by a combination of resin, compressed end grain, and uneven absorption—not by a defective stain.
The most reliable solution is to prepare the knots separately from the rest of the board. Clean and seal them, then apply a test coat before staining the entire project.
As an Amazon Associate we earn from qualifying purchases at no extra cost to you.
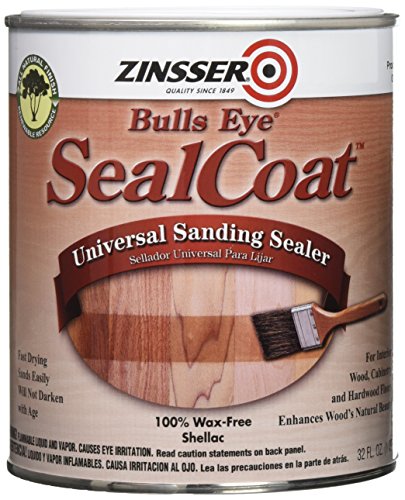


Our Top Picks
Why Knots Create Dark Rings
A knot is a branch embedded in the trunk, so its grain runs in a different direction from the surrounding wood. It is often denser, more resinous, and less absorbent. The area immediately around it may contain softer, more open grain that absorbs stain quickly. That contrast produces a halo or dark ring.
Fresh knots can also bleed resin through finishes. Resin may appear as a shiny spot, a sticky patch, or a yellow-brown discoloration several days or weeks after staining. Water-based stain can make the contrast especially obvious because it dries quickly and does not always penetrate evenly. Oil-based stain usually gives more working time, but it will not prevent a ring if the surface is poorly prepared.
Choose the Right Wood and Stain
If you have not bought the wood yet, select boards with tight, dry knots and avoid visibly wet, glossy, or cracked knots. Kiln-dried lumber is easier to finish than green or recently milled stock. For a project where uniform color matters, clear pine or poplar is generally easier than knotty pine.
| Choice | Advantages around knots | Drawbacks |
|---|---|---|
| Oil-based stain | Longer working time and relatively even penetration | Slow drying; odor; resin can still bleed |
| Water-based stain | Low odor and fast recoat time | Highlights uneven absorption and can raise grain |
| Gel stain | Sits more on the surface and reduces absorption differences | Can look muddy if applied too heavily |
| Pigmented wood conditioner | Reduces blotching on absorbent softwood | Does not reliably stop resin bleed through knots |
A conditioner can help the open grain next to a knot, but it is not a substitute for a knot sealer. If you are choosing a stain, a gel stain is often the forgiving option for pine. It is a reasonable choice for furniture and trim where a slightly less grain-enhancing appearance is acceptable.
Prepare the Surface
Sand the whole board evenly, stopping at 150 or 180 grit for most stains. Sanding much finer than 180 grit can close the surface and make the stain look lighter or patchier. Use the same grit and pressure across the knot and surrounding wood. A power sander can remove softer wood around a hard knot, creating a shallow dish that catches stain, so finish the last sanding pass by hand with the grain.
Remove loose bark and scrape away raised resin. Do not aggressively gouge a sound knot just to make it look lighter. Vacuum the dust, then wipe with a clean, dry cloth. If the knot is shiny or sticky, wipe it with a small amount of denatured alcohol or an appropriate wood-cleaning solvent, following the product label and providing ventilation. Let the wood dry completely.
Do not use water to clean a resinous knot immediately before sealing. Water can raise the surrounding grain while leaving oily resin behind, making the next step less predictable.
Seal Knots Before Staining
Apply a thin coat of dewaxed shellac-based primer or knot-sealing product to the knot and extend it about 1/2 to 1 inch into the surrounding wood. A small artist’s brush gives better control than a large brush. Two thin coats are safer than one heavy coat. Allow the first coat to dry, then apply the second according to the label—often within 30 minutes to a few hours.
For severe resin bleed, use a shellac-based wood primer. Shellac is effective because it blocks many resin stains better than ordinary water-based primer. It is not magic: a knot that is actively oozing may require scraping, solvent cleaning, drying, and another coat.
Sand the sealed spot lightly with 220 grit after it dries. Feather the edges so you do not create a visible raised patch. Avoid sanding through the sealer directly over the knot. If the spot becomes glossy or sticky again, seal it a third time rather than applying stain immediately.
Control the Color Transition
Sealing only the center of a knot can create a different halo: the sealed center stays light while the unsealed ring absorbs dark stain. To reduce that contrast, feather the sealer beyond the knot’s visible edge. You can also apply a thin coat of conditioner to the surrounding board, but keep it off areas where the sealer is still wet.
When the project needs a very uniform color, use a tinted primer or a thin washcoat over the entire face. A washcoat is typically a greatly thinned finish that partially limits absorption. Follow the finish manufacturer’s instructions; an overly heavy washcoat can prevent stain from coloring the wood at all. This approach gives up some natural grain variation, but it is more consistent than spot-treating dozens of knots.
Test Before Staining the Project
Use an offcut from the same board, including at least one knot. Prepare it exactly as you will prepare the project: same sanding grit, cleaning, sealer, stain, wiping time, and topcoat. Test at least two methods—such as unsealed, shellac-sealed, and gel-stained—and compare them after the stain has dried for 24 hours.
Apply stain in manageable sections, then wipe it off consistently. Leaving stain on a sealed knot for an extra five minutes will not make it absorb like raw wood; it may simply leave a darker surface film. If the knot still stands out, a lighter stain, a gel stain, or a tinted topcoat may look better than adding more coats of the original stain.
Common Failures to Avoid
Do not rely on wood conditioner for pine alone when knots are resinous. Do not apply polyurethane directly over a sticky knot and expect it to stop bleed; the resin can remain trapped underneath and discolor the finish. Do not use a thick blob of primer, which leaves a visible light spot and a ridge.
Also avoid sanding a stained halo aggressively. You will usually remove more color from the soft surrounding wood than from the hard knot, making the contrast worse. If the result is unacceptable, sand the entire face back evenly and repeat the preparation on a test board first.
For a small project, inexpensive shellac sealer and careful spot work are usually enough. For a large knotty-pine wall or ceiling, the time spent testing and sealing every knot may exceed the value of a perfect natural-stain look. In that case, consider paint, a darker gel stain, or a tinted finish. Those options hide variation instead of fighting the way knotty wood naturally absorbs color.



0 Comments