What's inside
As an Amazon Associate I earn from qualifying purchases. This post may contain affiliate links at no extra cost to you.
Our Top Picks
 Varathane Total Control Dark Walnut Gel StainHalf Pint (Pack of 1)2.88 x 2.88 x 2.97 inchesCheck on Amazon
 Varathane Total Control Ipswich Pine Gel StainHalf Pint (Pack of 1)2.88 x 2.88 x 2.97 Inches0.7 PoundsCheck on Amazon

Best Stain for Minimizing Blotching on Pine
Gel stain is usually the best stain type for minimizing blotching on pine. Its thicker formula sits closer to the surface instead of soaking deeply and unevenly into the soft earlywood. That gives you more working time and a more uniform color than a thin, penetrating stain.
For the most predictable result, use a light-to-medium gel stain over properly sanded pine. Very dark colors still show some variation because they require more pigment and often need multiple coats, but gel stain remains easier to control than ordinary liquid stain.
As an Amazon Associate we earn from qualifying purchases at no extra cost to you.


Why Pine Blotches
Pine has alternating bands of soft earlywood and harder latewood. The soft areas absorb stain quickly, while the harder areas absorb less. Knots, resin pockets, end grain, and areas sanded more aggressively add further differences. The result is the familiar patchy appearance: some sections turn dark and muddy while others remain pale.
Over-sanding can make the problem worse. Sandpaper removes the soft fibers faster than the hard fibers, leaving a slightly uneven surface that accepts stain inconsistently. Stopping at 180 grit is normally safer than sanding pine to an extremely smooth 220 or 320 grit. For rough construction pine, start at 100 or 120 grit, then finish with 150 or 180 grit.
Stain Types Compared
| Stain type | Blotch resistance | Best use | Main drawback |
|---|---|---|---|
| Gel stain | High | Furniture, doors, trim, pine projects | Can look muddy or streaky if overworked |
| Water-based pigment stain | Moderate | Light colors and faster drying | Raises grain and can still absorb unevenly |
| Oil-based penetrating stain | Low to moderate | Large surfaces where a traditional look is wanted | Most likely to produce dark blotches on bare pine |
| Dye stain | Low | Even, vivid color on suitable woods | Soaks rapidly and can exaggerate pine’s absorption differences |
Ordinary oil-based stain is not automatically wrong. It is often the cheaper and convenient choice for a rustic project, shelving, or a surface where variation is acceptable. Use it with a conditioner or washcoat, test it first, and choose a lighter color than you think you need. If the piece needs a clean, furniture-grade finish, gel stain is worth the extra control.
The Best Preparation Method
Sand the wood evenly through 150 or 180 grit. Use a sanding block on flat parts and avoid pressing hard. Vacuum the dust, then wipe with a clean, slightly damp cloth if the stain manufacturer permits it. Do not use a greasy household cleaner; residue can interfere with adhesion and color.
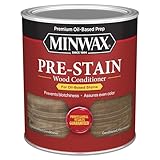
Before using a penetrating stain, apply a pre-stain wood conditioner. It partially occupies the most absorbent pores, reducing the contrast between soft and hard areas. Follow the label’s timing closely. Many conditioners have a limited window, often around 15 minutes to 2 hours, for applying stain.
A conditioner improves uniformity, but it can also make the final color lighter. It does not make every pine board identical, and it will not hide dark knots or resin. Test the entire schedule—sanding, conditioner, stain, and clear coat—on an offcut or hidden area.
Use a Washcoat for More Control
A washcoat is a very thin coat of finish applied before staining. A common approach is a compatible dewaxed shellac diluted with denatured alcohol, although the exact mix depends on the product. A ready-to-use dewaxed shellac sealer is simpler for most users.
Apply a thin, even coat, let it dry, and scuff lightly with 320-grit abrasive before staining. The washcoat reduces absorption more consistently than conditioner and is especially useful on large pine panels. The trade-off is color: because the wood absorbs less stain, you may need a second coat or a darker stain. Too heavy a washcoat can make the stain sit on top and look weak or streaky.
How to Apply Gel Stain Without Streaks
Stir gel stain thoroughly, but do not whip air into it. Apply a thin coat with a lint-free cloth, foam applicator, or brush. Work in manageable sections and keep a wet edge. After the product has sat for the label’s recommended time—commonly a few minutes—wipe off the excess in the direction of the grain.
Do not keep rubbing one spot after it begins to tack. That can leave shiny drag marks and uneven color. If more depth is needed, let the first coat dry completely and apply a second thin coat. Two controlled coats are safer than one heavy coat, which can remain soft, obscure the grain, and create dark edges.
For corners, end grain, and knots, use less stain. These areas often darken faster. End grain can be lightly sanded to 180 grit and preconditioned separately, but it will usually remain darker than the face grain.
When Paint Is the Better Choice
If the goal is a completely uniform color, paint is more reliable than stain. Pine’s grain, knots, and resin are difficult to erase with stain. Sand, apply a stain-blocking primer over knots and resinous areas, then use two finish coats. A tinted wood primer can provide a wood-toned appearance while avoiding the worst blotching.
For a stained appearance with maximum consistency, consider a gel stain followed by a compatible clear finish. Test compatibility first, especially when layering oil-based and water-based products. Let each coat dry fully; trapped solvent or moisture can cause a soft finish, wrinkling, or poor adhesion.
Practical Recommendation
For most pine furniture and trim, sand evenly to 180 grit, apply a thin coat of conditioner or washcoat, and use a medium-colored gel stain in two light coats. Choose ordinary oil-based stain with conditioner when cost matters and some natural variation is acceptable. Skip penetrating dye on pine unless you have tested it extensively. Whatever product you buy, make the test board before touching the finished project—the test is cheaper than stripping a blotchy one.



0 Comments