What's inside
As an Amazon Associate I earn from qualifying purchases. This post may contain affiliate links at no extra cost to you.
Knotty pine needs a primer that blocks resin, not just one that helps paint stick. The knots and surrounding wood can release sap and discoloring compounds through a finished coating, sometimes weeks or months after painting. For most painted knotty-pine paneling, a solvent-based shellac primer is the most reliable choice for sealing knots. Water-based stain-blocking primers are easier to clean up and can work on sound, well-sealed boards, but they’re a less dependable bet on resinous knots.
As an Amazon Associate we earn from qualifying purchases at no extra cost to you.



Our Top Picks
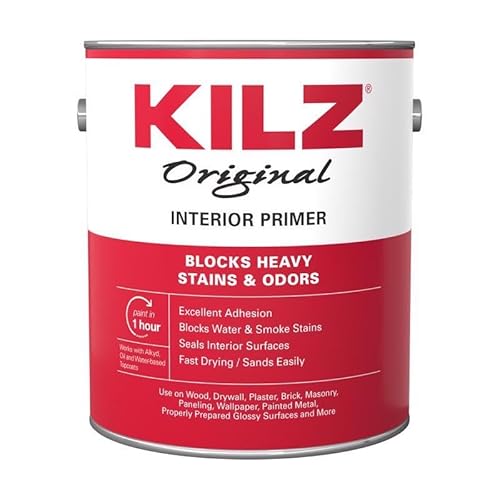 KILZ Original White Flat Oil-Based Primer 1 Gal.32 Fl Oz (Pack of 4)13.75 x 13.75 x 7.88 Inches44.28 poundsCheck on Amazon
 Masterchem 10042 Kilz Odorless Interior Oil Based Sealer32 Fl Oz (Pack of 1)4.25 x 4.9 x 4.25 inches0.6 poundsCheck on Amazon
 KILZ Original White Flat Oil-Based Aerosol Primer/Sealer 1313 Ounce (Pack of 12)11.2 x 8.4 x 8.7 inchesCheck on Amazon

Choose primer for the knots, not just the paint
Look for a primer labeled as a stain blocker and suitable for knots or resin. Shellac-based primer is a strong spot treatment because it dries quickly and forms an effective barrier against many knot stains. Use it over every visible knot, resin pocket, and pitch streak; on heavily knotted walls, priming the whole surface is often more consistent than spot-priming alone.
Oil-based stain-blocking primer is another option, particularly for broad coverage, but it usually takes longer to dry and has stronger solvent odor. Water-based primer is more pleasant to use and clean up, but ordinary drywall or general-purpose primer may let tannin or resin stains bleed through. A product being labeled “high hiding” doesn’t necessarily mean it blocks stains.
Compare the label’s listed uses and cleanup requirements before buying. For shellac products, plan for denatured alcohol cleanup where specified, ventilation, and the fire-safety precautions on the label. Don’t assume one primer chemistry can go over every existing coating: test adhesion and follow the manufacturer’s directions.
| Primer type | Best use on knotty pine | Main trade-off |
|---|---|---|
| Shellac-based stain blocker | Knots, resin spots, and walls with a history of bleed-through | Strong odor, fast drying, and solvent-based cleanup |
| Oil-based stain-blocking primer | Broad coverage when a slower-drying solvent primer is practical | Longer drying time and solvent cleanup |
| Water-based stain-blocking primer | Lower-odor projects with sound, relatively stable wood and limited staining risk | May not seal stubborn knots as reliably |
Inspect and prepare the paneling
First check whether the wall is bare wood, stained and clear-coated, or already painted. A clear finish can prevent primer from bonding, so scuff-sand glossy surfaces rather than painting directly over them. Remove loose paint and dirt, then clean the panels and let them dry. If cleaning leaves a residue, rinse or wipe as directed for the cleaner; primer won’t fix poor adhesion caused by grease or dust.
Sand bare pine lightly with 120- to 150-grit paper to smooth rough spots and remove raised fibers. On intact clear-coated paneling, use about 150- to 180-grit paper to dull the sheen without sanding through the finish. The aim is a clean, evenly dull surface, not bare wood everywhere. Wear a dust mask and vacuum the grooves and joints; leftover sanding dust can leave a gritty finish.
Pay attention to loose knots, cracks, and sap. Scrape away loose resin and let fresh sap harden before removing it. Don’t prime over a wet, sticky pitch pocket and expect the coating to hold. If a board is actively weeping, repeated coating may fail; repair or replace that section if practical. For product guidance, a shellac-based stain-blocking primer is the usual choice for knot treatment.
Apply primer without missing the grooves
Stir primer thoroughly and follow its label for temperature, coverage, recoat time, and ventilation. Brush primer into knots, checks, and panel grooves first, then roll the broad faces. A small angled brush helps reach narrow grooves; a roller alone can bridge over them and leave bare recesses where stains later show. Apply a thin, even coat rather than flooding joints, where excess primer can collect and dry as ridges.
For many walls, one coat of shellac primer on knots followed by a full coat over the paneling is a practical starting point. If the knots remain visible through the dried primer or the label calls for another coat, apply a second. Let the primer dry fully before judging coverage: wet primer can hide stains temporarily. If discoloration appears through the dry coat, spot-prime those areas again before painting.
Use a small angled brush for panel grooves and a suitable roller cover for the flat faces. Choose the cover nap based on how rough the boards are; a very thick nap can leave an uneven texture on smooth paneling. Keep a wet edge where possible, but don’t keep brushing primer once it starts setting. Fast-drying shellac can drag if overworked.
Paint, then check for bleed-through
After the primer has cured for the time stated on its label, lightly sand rough nibs if needed and remove the dust. Apply a compatible topcoat, usually two thin coats rather than one heavy coat. Paint can look even while wet, so inspect it after it dries and again after a few days. Brown or amber marks centered on knots are a sign of bleed-through, not simply inadequate paint coverage.
If stains return, let the paint dry, seal the affected spots with an appropriate stain-blocking primer, and repaint. Adding more water-based paint over a leaking knot rarely solves the cause. On a lightly knotted wall with no prior staining, a quality water-based stain-blocking primer may be a reasonable lower-odor, easier-cleanup choice. On heavily knotted pine, or where an earlier paint job has already developed brown spots, the extra care of shellac or oil-based stain blocking is usually worth it.


0 Comments