What's inside
As an Amazon Associate I earn from qualifying purchases. This post may contain affiliate links at no extra cost to you.
Pine knots contain resin that can bleed through paint as yellow, brown, or glossy stains. The problem is worst with fresh knots, large knots, and boards that are not fully dry. Ordinary water-based primer often looks fine at first, then develops discolored spots after several days or weeks. Sealing the knots before general priming creates a barrier between the resin and the paint film.
As an Amazon Associate we earn from qualifying purchases at no extra cost to you.
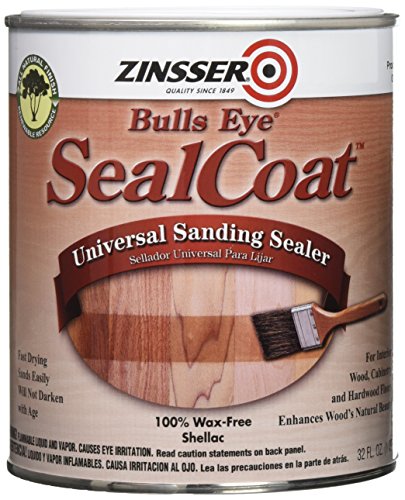

Our Top Picks
 Zinsser Cover-Stain Oil-Base Primer-Sealer Spray13 Ounce (Pack of 1)2.63 x 2.63 x 7.88 inches0.2 poundsCheck on Amazon
Why Pine Knots Bleed Through Paint
A knot is the base of a branch that grew into the trunk. Its wood is denser than the surrounding board and packed with resin (pitch), along with natural oils and colored extractives. Several things make that resin show up in a paint film:
- Solvents and water carry it. Many solvents in oil paints soften resin, and water-based coatings can draw out water-soluble extractives, so stains migrate into the wet film before it dries.
- Heat moves it. Resin softens in warm conditions. Knots on a sunny wall, a door, or trim near a heater can start bleeding months after painting even if they looked fine at first.
- Light paint shows it. White and pale colors reveal the yellow-brown halo that darker paints may hide.
- Wet or poorly dried lumber. Construction-grade pine that was not kiln-dried at temperatures high enough to set the pitch tends to bleed more.
Remove Surface Sap Before You Seal
Sealer bonds poorly to sticky or glossy resin, so deal with active sap first:
- Scrape hardened beads. Let liquid sap harden, then lift it with a sharp scraper or putty knife. Cold weather makes beads brittle and easier to chip off.
- Dissolve the residue. Wipe the knot with a rag dampened with mineral spirits or denatured alcohol (test first on a hidden spot), then let the solvent evaporate completely, usually at least an hour with good ventilation.
- Draw out stubborn sap with heat, carefully. On bare, unfinished wood, some painters warm a weeping knot with a heat gun on a low setting to bring resin to the surface, let it harden, then scrape and wipe it off. Keep the gun moving, stay well away from finishes and flammable solvents, and never use an open flame.
- Sand lightly. Sand the knot with 120 to 150 grit to remove the glossy skin. Change paper often, because resin clogs abrasives quickly.
If a knot is still oozing fresh sap after cleaning, the board may not be dry. Let it acclimate longer indoors, or consider replacing it on highly visible work.
Inspect and prepare the pine
Start with clean, dry wood. Remove dust, dirt, grease, and any loose bark or resin. A vacuum followed by a clean, lint-free cloth works for most interior boards. If the pine is greasy or has fingerprints, wipe it with a suitable wood-safe cleaner and let it dry completely.
Look closely at every knot. A sound, dry knot that is level with the surrounding wood needs sealing. A knot that is soft, cracked, sunken, or actively leaking resin needs more preparation. Scrape away loose material with a putty knife, then sand the edges smooth. Fill deep cracks or depressions with a compatible wood filler, allow it to dry, and sand it flush. Do not use filler as the only sealer; resin can still migrate through many fillers.
Sand the surrounding pine with 120- or 150-grit paper, followed by 180 grit if you want a smoother painted surface. Do not polish the knot with very fine abrasive before sealing. A slightly abraded surface gives the sealer a better grip. Remove sanding dust thoroughly before applying anything.
Choose the right knot sealer
The main choice is between a shellac-based stain-blocking primer, an oil-based stain-blocking primer, and a water-based stain-blocking primer. They do not perform equally on resinous knots.
| Sealer type | Best use | Advantages | Limitations |
|---|---|---|---|
| Shellac-based primer | Persistent knots and visible resin bleed | Fast drying and highly effective at blocking stains and resin | Strong solvent odor, flammable, and usually more expensive |
| Oil-based stain-blocking primer | Interior trim and moderate knot bleed | Good penetration and stain resistance; often cheaper than shellac | Slow drying and requires solvent cleanup |
| Water-based stain-blocking primer | Lightly knotted, dry pine with low bleed risk | Low odor, quick cleanup, and easy recoating | Can fail on fresh or resin-heavy knots |
For difficult knots, a shellac-based stain-blocking primer is usually the safest choice. Shellac dries quickly and forms a strong barrier, but it is not a good option for poorly ventilated rooms or surfaces that will be exposed to constant moisture.
An oil-based stain-blocking primer is a sensible cheaper option for ordinary interior pine trim. It can block knots well when applied in thin coats, but allow the primer to dry according to its label. Rushing the topcoat over soft or partially cured primer can cause wrinkling, poor adhesion, or lingering odor.
Water-based products are convenient, but choose one specifically labeled for heavy stains or knots rather than a general-purpose drywall primer. They are fine when the pine is old, dry, and the knots are small, especially for a low-cost project where minor touch-up is acceptable.
Apply the sealer
Work in temperatures within the product label’s range, commonly around 50 to 90 degrees Fahrenheit. Avoid sealing cold, damp wood. Moisture trapped in the board can slow drying and may contribute to later paint failure.
Stir the primer gently instead of shaking it, which can introduce bubbles. Use a small disposable brush to coat each knot, extending at least 1 inch beyond its edge. Brush on a thin, even film rather than a heavy puddle. Thick spots take longer to cure and can leave a raised edge under the finish paint.
For a large knot, seal the entire knot and any surrounding resin-darkened area. If the board will be painted opaque white or a pale color, apply two thin coats to troublesome knots. The first coat may show slight discoloration as it traps the resin; that does not necessarily mean it failed. Let it dry fully, then apply the second coat.
Shellac products may be ready for another coat in roughly 30 to 60 minutes, while oil primers commonly need several hours or overnight. These are only starting points—cool conditions, thick application, and poor ventilation extend the time. Check the surface by touch and follow the label rather than painting by the clock.
Spot-Sealing With Spray, Brush, or Knotting Solution
There are three practical ways to get sealer onto individual knots before the full primer coat:
| Method | Good for | Notes |
|---|---|---|
| Aerosol shellac-based primer | Many small knots, touch-ups, and repairs on already-painted boards | Fast and even; mask surrounding areas, ventilate well, and apply light passes rather than one heavy coat |
| Brushed shellac or oil-based stain blocker | Large knots and resin-darkened streaks | Easy to control the margin around the knot; use a small, disposable brush |
| Traditional knotting solution | Joinery and trim, especially in the UK and Europe | A shellac-based liquid made for knots; often applied in two thin coats before primer |
For a room full of knotty trim or shelving, a spray can of shellac-based stain-blocking primer is often the quickest way to spot-seal each knot. Hold the can at the distance shown on the label, extend the spray an inch or so past the knot, and let each pass dry before the next.
As an Amazon Associate we earn from qualifying purchases at no extra cost to you.

How Many Coats Does a Knot Need?
Small, dry knots in older pine often need just one spot coat plus the full primer coat. Large, dark, or freshly sawn knots usually need two thin spot coats. A simple test helps: after the first coat dries, brush a dab of your finish paint or primer over one sealed knot on a scrap or inconspicuous area and wait 24 to 48 hours. If a yellow tint appears, add another sealer coat before priming the whole board.
Interior vs. Exterior Pine
Shellac is excellent for interior spot sealing but is not intended as a stand-alone exterior primer. On exterior siding, fascia, or doors, spot-seal knots with a product rated for exterior use, or use shellac only as a small spot coat followed by an exterior oil-based or acrylic primer and paint over the entire surface, as the primer label allows. Sunlight and heat drive resin harder outdoors, so a light-colored exterior paint can still show some bleed over time.
Prime and paint the board
Once the knot sealer is dry, lightly sand rough edges with 220-grit paper. Sand only enough to remove dust nibs and brush ridges; sanding through the sealed patch can reopen the resin path. Wipe away the dust.
Apply one full coat of a compatible primer over the entire board, not just the knots. This evens out absorption and gives the finish paint a consistent surface. If you used shellac or oil primer, confirm that the product is compatible with your intended water-based or oil-based topcoat. Most modern primers accept either type after proper drying, but the label takes priority.
Apply two thin finish coats rather than one heavy coat. Lightly sand between coats with 220 grit if the finish feels rough, then remove the dust. Keep the paint film reasonably thin around the sealed knots; excessive paint can highlight an edge or sag.
Troubleshoot knot bleed
If yellow or brown marks appear through the primer, do not simply add more finish paint. Allow the surface to dry, clean it if necessary, lightly sand the affected area, and spot-seal it again with shellac-based or oil-based stain blocker. Extend the patch beyond the visible stain, then re-prime and repaint.
Bleed-through can also come from resin on the face of the board rather than from the knot itself. Glossy, sticky spots should be scraped and cleaned before sealing. If knots continue bleeding after two properly dried coats, the wood may be unusually resinous or still releasing sap. In that case, use a stronger sealer and allow extra curing time.
For exterior pine, use an exterior-rated primer and paint system, seal end grain, and do not rely on an interior shellac primer as the complete weather barrier. The cheaper water-based option is acceptable for dry interior shelving or utility trim; for visible doors, cabinets, and white-painted knotty pine, spending more on a reliable stain-blocking sealer is usually cheaper than repairing bleed-through later.
Frequently Asked Questions
Do you fill pine knots and then apply primer?
If a knot is cracked, sunken, or has a hole, fill it first with a compatible wood filler or epoxy, let it dry, and sand it flush. Then spot-seal the knot and the filled area with a shellac-based or oil-based stain blocker, and finally prime the whole board. Filler alone does not stop resin, so the sealer step should not be skipped.
Can you use wood glue to prime or seal knots?
Diluted PVA wood glue is sometimes used as a cheap sizing coat, but it is not a reliable knot sealer. PVA is water-based and does not block resin or tannin bleed well, and it can leave a slick surface that affects paint adhesion. A shellac-based or oil-based stain-blocking primer is a far more dependable choice for pine knots.
Will water-based primer stop knots from bleeding?
Ordinary water-based primer usually does not stop resin-heavy pine knots, and some bleed may appear within days. Water-based stain blockers labeled for knots and tannins can work on small, dry knots, especially with two coats. For fresh, large, or dark knots under white paint, shellac-based primer remains the most dependable option.
How long should knot sealer dry before painting?
Shellac-based sealers are typically ready for recoating in under an hour in warm, dry conditions, while oil-based stain blockers often need several hours or overnight. Cool temperatures, high humidity, and thick coats lengthen drying time. Follow the label and make sure the sealed spot is hard and not tacky before priming or painting.
Can you seal knots over existing paint where bleed has appeared?
Yes. Clean the stained area, lightly scuff it with 220-grit paper, and remove the dust. Spot-apply a shellac-based stain blocker over the discoloration and slightly beyond it, let it dry, add a second coat if the stain still shows, then repaint. Painting over the stain without a blocker usually lets it bleed through again.
Is it better to use clear shellac or a pigmented primer on knots?
Under paint, a pigmented shellac-based primer is usually better because it both blocks resin and hides the dark knot color, reducing the number of paint coats needed. Clear dewaxed shellac is a good choice when the pine will receive a clear or translucent finish, since it seals the knot without hiding the grain.


0 Comments