What's inside
- Quick picks by woodworking situation
- Discs, sheets, and belts compared
- Which grit should a beginner buy?
- Backing materials: paper, cloth, film, or mesh?
- Decision matrix for buying abrasives
- Cost per use: why the cheapest pack may not be cheapest
- How to make abrasives last longer
- Common beginner mistakes
- Bottom line
- Quick picks by woodworking situation
- Discs, sheets, and belts compared
- Which grit should a beginner buy?
- Backing materials: paper, cloth, film, or mesh?
- Decision matrix for buying abrasives
- Cost per use: why the cheapest pack may not be cheapest
- How to make abrasives last longer
- Common beginner mistakes
- Bottom line
As an Amazon Associate I earn from qualifying purchases. This post may contain affiliate links at no extra cost to you.
The best sanding abrasives for beginners are aluminum-oxide sheets for hand sanding, ceramic or aluminum-oxide discs with the correct hole pattern for random-orbit sanders, and narrow aluminum-oxide belts for fast stock removal; the right choice depends more on grit, backing, and dust extraction than on brand.
As an Amazon Associate we earn from qualifying purchases at no extra cost to you.

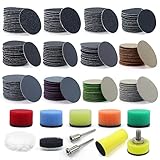
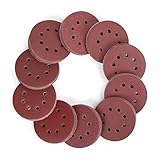
Quick picks by woodworking situation
| Situation | Best abrasive type | Useful grit range | Backing to choose | Why it suits beginners |
|---|---|---|---|---|
| Small repairs and hand sanding | Aluminum-oxide sheets | 80, 120, 180, 220 | Paper for light work; cloth for edges and profiles | Inexpensive, easy to cut, and simple to control |
| Large panels and general furniture work | Random-orbit sanding discs | 80, 120, 150, 180, 220 | Hook-and-loop paper or film | Fast coverage with easy grit changes |
| Paint removal or leveling rough boards | Ceramic or premium aluminum-oxide discs | 40, 60, 80, 100 | Film or heavy paper | Sharper grains resist rapid dulling |
| Curves, moldings, and detail work | Mesh sheets or flexible abrasive strips | 120, 180, 220, 320 | Cloth, mesh, or flexible film | Conforms to shapes and is less likely to crease |
| Wide, flat stock on a belt sander | Aluminum-oxide or ceramic belts | 60, 80, 100, 120 | Heavy cloth | Handles heat, pressure, and continuous cutting |
Discs, sheets, and belts compared
Random-orbit sanding discs
Discs are usually the best all-purpose option for a beginner who owns a random-orbit sander. The tool does the repetitive motion while the abrasive removes material across a broad, circular area. Hook-and-loop discs are easier to change than pressure-sensitive adhesive discs and can be lifted occasionally to clear dust from the pad.
Choose discs by diameter first. Common sizes are 125 mm (5 inches) and 150 mm (6 inches). A 125 mm sander is lighter and easier to control; a 150 mm model covers more surface per pass and is useful for tabletops, doors, and cabinet panels.
Hole patterns must match the sander’s pad. A disc with the wrong holes may still stick to the pad, but dust extraction will be poor. That causes abrasive loading, hotter operation, and faster wear. If the tool uses a proprietary multi-hole pattern, buy discs specifically listed for that pattern rather than relying only on diameter.
For unfinished softwood, aluminum oxide is a sensible economical choice. Ceramic grain generally cuts more aggressively and stays effective longer when leveling hardwood, removing finishes, or sanding across difficult end grain. Premium film-backed discs often cost more but are less likely to tear at the edge.
Hand-sanding sheets
Sheets are the most versatile and lowest-cost abrasive format. A standard 230 x 280 mm sheet can be folded, cut into smaller pieces, or wrapped around a sanding block. Use a flat block on panels; sanding with loose fingers tends to create shallow hollows around soft areas and leaves uneven edges.
Paper-backed sheets are suitable for ordinary finish sanding. Cloth-backed sheets cost more but tolerate flexing, folding, and work around profiles. Waterproof or latex-backed sheets are useful for fine sanding between coats when the finish manufacturer permits it, but wet sanding should not be assumed safe for every coating or wood product.
Mesh abrasives allow dust to pass through much more of the surface instead of only through fixed holes. They are especially useful on random-orbit sanders and for hand sanding resinous wood or materials that clog conventional paper. Their higher purchase price can be worthwhile when the abrasive can be shaken or vacuum-cleaned and reused.
Sanding belts
Belts are the fastest option for removing material, but they are also the easiest to misuse. A belt sander can flatten an edge, remove too much from a panel, or leave deep scratches in seconds. Beginners should reserve coarse belts for stock removal and switch to a random-orbit sander or hand block for refinement.
Common belt sizes include 75 x 533 mm (3 x 21 inches), 75 x 457 mm (3 x 18 inches), and 100 x 610 mm (4 x 24 inches). The size must match the tool exactly. Install the belt so the directional arrows agree with the sander’s rotation, if arrows are printed on it. A belt installed backward can have a joint that fails prematurely.
Heavy cloth backing is preferable for a belt sander because belts experience continuous tension and heat. Ceramic belts are appropriate for aggressive work on hardwood or for removing coatings; aluminum-oxide belts are usually the better value for routine preparation and softwood.
Which grit should a beginner buy?
Grit is not a measure of how much abrasive is present; it describes particle size. Lower numbers cut faster and leave deeper scratches. Higher numbers remove less material but produce a smoother surface.
- 40–60 grit: Removing paint, glue, heavy mill marks, or substantial unevenness. Use with restraint.
- 80 grit: Leveling rough boards and removing moderate defects.
- 100–120 grit: General preparation after machining or coarse sanding.
- 150–180 grit: Refining scratches before many paints, oils, and clear finishes.
- 220 grit: Final dry sanding for many projects and light sanding between finish coats.
- 320 grit and higher: Fine finish work, only when the coating or project calls for it.
A practical beginner assortment is 80, 120, 180, and 220 grit. Add 60 grit for rough reclaimed lumber and 320 grit for fine finish preparation. Do not routinely jump from 80 directly to 220. The finer abrasive may polish the surface while leaving coarse scratches underneath.
Backing materials: paper, cloth, film, or mesh?
| Backing | Strength | Flexibility | Typical use | Ownership trade-off |
|---|---|---|---|---|
| Paper | Low to medium | Medium | Flat hand sanding and economical discs | Lowest cost, but edges tear more easily |
| Cloth | High | High | Belts, profiles, and hand sanding edges | Durable, but usually more expensive |
| Film | Medium to high | Medium | Premium discs and fine finishing | Even surface and tear resistance; higher cost |
| Mesh | Medium | High | Dust extraction and clog-prone materials | Often reusable, but needs a compatible pad and costs more initially |
Decision matrix for buying abrasives
| Your priority | Recommended purchase | Avoid |
|---|---|---|
| Lowest initial budget | Paper sheets and aluminum-oxide 125 mm discs | Buying a complete premium-grit assortment before knowing your projects |
| Frequent furniture projects | Multi-hole hook-and-loop discs plus mesh or film finishing discs | Single-hole discs on a multi-hole extraction pad |
| Limited workshop ventilation | Mesh abrasives, compatible dust extraction, and a sanding block with extraction where available | Continuing to sand clogged discs, which creates heat and airborne dust |
| Mostly reclaimed or hardwood stock | Ceramic 60–100 grit for removal, aluminum oxide 120–220 grit for refinement | Using a fine disc to remove heavy defects |
| Occasional DIY use | Small packs of 80, 120, 180, and 220 grit | Large bulk packs that may age or collect moisture unused |
Cost per use: why the cheapest pack may not be cheapest
Compare abrasives by usable sanding time, not just pack price. Suppose a 10-pack of standard discs costs $8 and each disc provides about 20 minutes of effective cutting before loading. That is approximately $0.04 per useful minute. A 10-pack of premium discs costing $18 that provides 45 minutes per disc costs about $0.04 per useful minute as well, while reducing disc changes.
These figures vary with wood species, pressure, dust extraction, and grit. The calculation still helps: divide pack price by the number of discs, then divide by realistic effective minutes per disc. If an abrasive stops cutting but appears intact, it has already become expensive; continuing to press harder can damage the workpiece and the sander.
How to make abrasives last longer
- Start with the coarsest grit that can solve the defect, not automatically with the lowest number.
- Use light, even pressure. Excess pressure bends the sander’s pad, traps dust, increases heat, and crushes abrasive grain.
- Keep the tool moving. Holding a random-orbit sander still can create circular marks and localized depressions.
- Use dust extraction whenever possible. Empty the dust container before airflow becomes weak and check that the hose is not blocked.
- Replace discs when they stop cutting or begin producing excessive heat. A discolored disc or scorched wood is a warning, not a reason to press harder.
- Clean reusable mesh abrasives by lifting them from the pad and gently shaking or vacuuming them. Do not scrape aggressively across the abrasive face.
- Store unused abrasives flat and dry. Humidity can curl paper, weaken adhesive, and reduce hook-and-loop reliability.
Common beginner mistakes
The most frequent mistake is skipping grits. A finer abrasive cannot efficiently erase deep scratches from a coarse one. Another is using the sander’s edge as a cutting tool; this wears one portion of the disc and can round over the workpiece. Sand with the pad flat.
Do not use a belt sander as a finishing tool unless you have substantial control and a clear reason. Its aggressive action is valuable for flattening, but a random-orbit sander is safer for the transition to finish-ready surfaces. Finally, do not assume a higher grit always produces a better finish. Some coatings need a particular tooth for adhesion, so follow the coating maker’s preparation guidance.
Bottom line
For most beginners, start with aluminum-oxide sheets in 80–220 grit and hook-and-loop random-orbit discs matched to the sander’s diameter and hole pattern. Add ceramic discs or belts when you regularly remove material from hardwood or old finishes, and choose mesh or film when dust control, clog resistance, and longer service life matter more than the lowest pack price. The best abrasive is the one that matches the defect, tool, dust system, and next finishing step.
0 Comments