What's inside
As an Amazon Associate I earn from qualifying purchases. This post may contain affiliate links at no extra cost to you.
Sanding dust is hardest to remove from open-grain woods such as oak, ash, walnut, mahogany, and elm. The dust does not sit only on the surface; it packs into the pores and can remain there after a quick wipe. If it is left behind, stain may turn muddy or blotchy, and clear finishes can trap pale dust in the grain.
The safest method is to remove dust in stages: vacuum the surface, loosen dust from the pores, vacuum again, and then wipe with a suitable cloth or solvent. The right final step depends on whether you are applying stain, water-based finish, oil finish, or paint.
As an Amazon Associate we earn from qualifying purchases at no extra cost to you.

Our Top Picks
Let the Dust Settle Before Cleaning
Do not start wiping immediately after sanding. Fine dust can remain suspended in the air and settle back onto the workpiece. Wait at least 10 to 20 minutes after sanding, or longer if the room has poor ventilation. Keep fans from blowing directly across the project, since they can redistribute dust into the grain.
Use a properly fitted dust mask or respirator while cleaning. Fine wood dust is an inhalation hazard, and some species, including walnut and exotic hardwoods, can cause stronger skin or respiratory reactions than others.
Vacuum Before Wiping
A vacuum is the best first tool because it removes loose dust without pushing it deeper into the pores. Use a vacuum with a fine-dust filter and, ideally, a dust separator or cyclone. A shop vacuum without an appropriate filter can exhaust very fine dust back into the room.
Fit the hose with a soft brush attachment or a clean floor-brush head. Hold the nozzle just above the surface rather than dragging a hard plastic end across the wood. Move with the grain and make several slow passes. Pay special attention to routed edges, end grain, joints, and the area around screw holes.
A shop vacuum with a fine-dust filter is worth buying if you sand regularly. For one small project, a household vacuum with a clean filter can be adequate, but do not use a vacuum that may contain grit from a garage or workshop floor.
Brush Dust Out of the Open Grain
After vacuuming, use a soft, clean brush to lift dust from the pores. A soft nylon detailing brush, clean paintbrush, or dedicated woodworking dusting brush works well. Brush lightly with the grain, then vacuum again. On heavily textured oak or ash, a few passes may be necessary.
A stiff wire brush is not appropriate for finished-quality preparation. It can scratch softer earlywood, enlarge pores, and leave metal particles that later stain the finish. Even a stiff plastic brush can mark soft pine or cedar.
For a larger surface, a soft woodworking dusting brush is a useful, inexpensive purchase. A clean, unused paintbrush is usually just as effective on a small board.
Choose the Final Wipe Carefully
The final wipe should remove the remaining film without depositing lint, water, oil, or wax. The best choice changes with the finish you plan to apply.
| Next finish | Recommended final cleaning | Main caution |
|---|---|---|
| Oil-based stain or oil finish | Clean, lint-free cloth; mineral spirits only if compatible with the product | Too much solvent can wet the wood unevenly or delay drying |
| Water-based stain or finish | Vacuum and a dry lint-free cloth; use a lightly dampened water-compatible cloth only when allowed | Water can raise the grain and change the color |
| Shellac or lacquer | Dry cloth or vacuum; follow the coating manufacturer’s instructions | Some solvents can soften or contaminate the surface |
| Paint or primer | Vacuum, then a clean damp microfiber cloth if the surface can dry fully | Do not paint over moisture or sanding residue |
A clean microfiber cloth is generally better than an old rag. Wash it without fabric softener and inspect it for trapped grit before use. Fold the cloth into sections and turn to a clean section frequently. Do not press hard; pressure can force dust into the pores you are trying to clear.
Use Tack Cloths With Care
Tack cloths can pick up the last loose particles, but they are not always the best choice for open-grain wood. Many contain a sticky resin that can remain in pores, attract dust, or interfere with water-based finishes. They can also leave an oily film that causes fisheyes or uneven stain absorption.
If you use one, choose a clean, commercially made tack cloth and use very light pressure. Do not scrub the surface. Avoid tack cloths entirely when the finish manufacturer says the surface must be free of silicone, wax, or oil. For many projects, a final vacuum followed by a clean dry microfiber cloth is safer.
Use Compressed Air Only in Controlled Conditions
Compressed air can clear stubborn dust from deep pores, carvings, and joints, but it is easy to misuse. A strong blast can drive dust deeper into open grain and spread it across the shop. It also creates an airborne dust cloud.
If you use air, set the pressure around 20 to 30 psi, hold the nozzle several inches away, and blow across the surface rather than directly into it. Vacuum immediately afterward. Wear eye protection and respiratory protection, and avoid using compressed air in an occupied room.
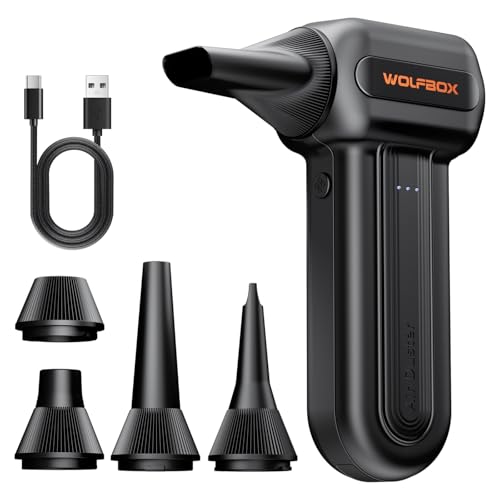
An air compressor is not necessary for most flat panels. A low-pressure electric air duster can be more convenient, but it still spreads dust unless you work beside active extraction.
Avoid These Common Mistakes
Do not use a wet rag as the first cleaning step. It turns loose dust into slurry and can push it into pores. Do not use household furniture polish, silicone sprays, or oily dusting products; they can cause adhesion failures and fisheyes.
Do not sand again with a coarse abrasive just to remove embedded dust. If the surface feels rough, use the same or a slightly finer grit that produced the finish, then clean it properly. For most furniture work, sanding through 150 or 180 grit and finishing with 180 or 220 grit gives a good balance between smoothness and stain absorption. Always test the complete cleaning and finishing process on scrap from the same board.
Make a Final Inspection
View the wood under strong light held at a low angle. Dark pores that contain pale dust will show as small gray or white flecks. Wipe the surface with a clean hand or gloved fingertip; if it feels gritty, clean it again rather than applying finish.
On open-grain wood, patience is cheaper than stripping a failed finish. Vacuum twice, brush gently, use only a compatible final wipe, and allow any moisture or solvent to evaporate completely before staining or coating.



0 Comments