What's inside
As an Amazon Associate I earn from qualifying purchases. This post may contain affiliate links at no extra cost to you.
Our Top Picks

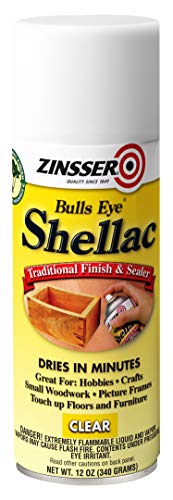
What shellac does as a sanding sealer
Shellac is a fast-drying resin dissolved in alcohol. As a sanding sealer, it binds loose wood fibers and helps prevent stain or finish from soaking unevenly into the surface. It is especially useful on softwoods, end grain, and woods that tend to blotch. Once dry, it can be sanded smooth before you apply a compatible topcoat.
Shellac is not the only way to prepare wood, and it is not always the right one. It can affect stain color, and some finishes do not adhere reliably over a heavy or poorly sanded coat. Use it when you want a thin, quick-drying barrier—not as a substitute for careful sanding or a product specified by your topcoat manufacturer.
As an Amazon Associate we earn from qualifying purchases at no extra cost to you.
Choose the right shellac
For most furniture and interior projects, dewaxed shellac is the safer choice under other finishes. Waxed shellac may cause adhesion problems with some water-based finishes and other coatings. Check the topcoat label before buying; if compatibility is uncertain, use dewaxed shellac or test the complete finish schedule on scrap.
You can buy ready-to-use shellac or mix flakes with denatured alcohol. Premixed shellac is convenient for an occasional job, but check the container date: shellac can lose its ability to cure properly with age. Fresh flakes and alcohol offer better control over batch size and strength, but take extra measuring and mixing. A dewaxed shellac sanding sealer is a straightforward starting point; buy flakes and alcohol if you want to mix your own.
Shellac strength is commonly described in “pound cuts,” referring to pounds of shellac dissolved in one gallon of alcohol. For a sanding-sealer coat, a 1- to 2-pound cut is usually easier to spread thinly than a heavier mix. Follow the product directions for premixed sealer, and thin only if the label allows it.
When to use shellac—and when not to
| Situation | Shellac can help | Watch for |
|---|---|---|
| Softwood or blotch-prone wood | Limits uneven absorption before finishing | A full coat can make stain too pale or uneven |
| End grain | Reduces excessive soaking | End grain may still look darker than face grain |
| Raised or fuzzy fibers | Binds fibers so they can be sanded off | Too much sanding can cut through the sealer |
| Exterior work or a finish with uncertain compatibility | Usually not the first choice | Choose a sealer approved for the topcoat and conditions |
If you plan to stain, test first. Shellac seals the wood, so a full-strength coat can prevent stain from penetrating. A thin, diluted washcoat may reduce blotching while still allowing some color in, but the result depends on the wood, stain, and application. If you want a predictable stain color, use offcuts from the same board and test the whole sequence.
Prepare the wood
Sand the surface evenly, removing glue spots, scratches, and mill marks before applying shellac. For many projects, finish sanding at 150 or 180 grit; going much finer can reduce stain absorption and may make the surface slick. Follow the stain or topcoat manufacturer’s recommended grit when it differs. Vacuum the dust, then wipe with a clean, dry cloth. Avoid leaving oily residue from tack cloths or handling.
Work in a ventilated area away from flames, pilot lights, sparks, and smoking. Alcohol-based shellac and its vapors are flammable. Wear eye protection and gloves, and follow the product label for ventilation and safe storage. Keep the container closed when not in use.
Apply and sand the sealer
Stir premixed shellac gently; avoid shaking in bubbles. Apply a thin, even coat with a clean natural-bristle brush, pad, or suitable sprayer. A small natural-bristle finishing brush works for small surfaces, while a pad can be easier to control on broad, flat panels. Load the applicator lightly and work quickly: shellac dries fast, and brushing back over a section that has started to tack can leave ridges or drag marks.
Let the coat dry until it feels hard, not merely dry to the touch. At typical indoor conditions, a thin coat may be ready to sand in about 30 to 60 minutes, but cool, humid conditions and heavier application can extend that time. Check the label and test a small area. If sandpaper gums up or rolls the finish, wait longer.
Sand lightly with 220- to 320-grit paper or a fine sanding sponge to knock down raised fibers and nibs. Use a sanding block on flat surfaces, and take care at edges and corners, where it is easy to cut through. You are smoothing the sealer, not removing it. Vacuum the dust before the next coat or topcoat. A second thin coat is useful if the first was absorbed unevenly or left bare patches; sand it lightly once dry.
A 220-grit sanding sponge is inexpensive and handy for small projects. For larger flat surfaces, ordinary 220-grit paper on a firm block gives better control and is often the cheaper practical choice.
Common problems and fixes
Streaks or brush marks: The coat was too heavy, or you kept brushing as it began to dry. Let it harden, level it gently with fine paper, and apply a thinner coat with fewer passes.
Stain looks weak or patchy: The sealer blocked too much absorption, or it was uneven. Do not add stain blindly; test a compatible approach on scrap. For a new attempt, use a lighter washcoat or skip shellac and use a stain conditioner recommended for that wood and stain.
Topcoat peels or beads: Wax in the shellac, contamination, or poor compatibility may be responsible. Remove the failed finish where practical, prepare a test panel, and use dewaxed shellac or a sealer approved by the topcoat maker. Sanding alone does not guarantee adhesion.
Shellac works best as a thin, controlled layer. Test the complete finish on scrap, especially when staining or switching between water-based and solvent-based products. That small test is cheaper than stripping a finished project.



0 Comments