What's inside
As an Amazon Associate I earn from qualifying purchases. This post may contain affiliate links at no extra cost to you.
Flattening a wood panel is mostly a matter of controlling the sanding pattern, not buying the most aggressive disc. A random-orbit sander can remove glue squeeze-out, mill marks, finish ridges, and small high spots. It will not reliably flatten a badly cupped or twisted panel; that job belongs to a planer, drum sander, router sled, or hand plane. Used within its limits, the right disc makes a panel flatter without leaving deep scratches that reappear under stain or paint.
As an Amazon Associate we earn from qualifying purchases at no extra cost to you.
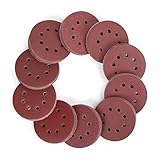


Our Top Picks


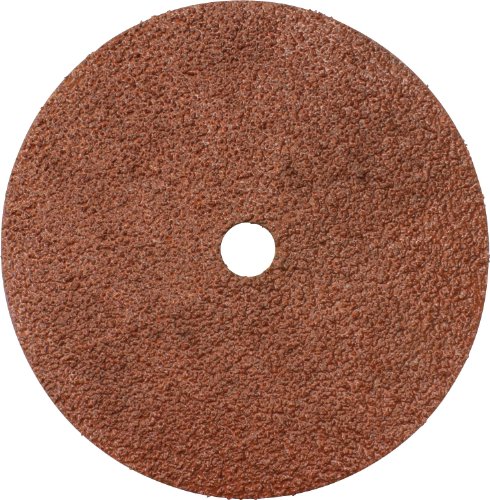

What to Look for in a Flattening Disc
For bare wood, aluminum oxide is the sensible baseline. It is inexpensive, cuts predictably, and is available in every useful grit. Ceramic abrasive generally cuts faster and stays sharp longer, especially on hard maple, oak, and end grain, but costs more. It is most useful when removing a lot of material rather than performing a final smoothing pass.
Disc construction matters as much as the abrasive. Paper-backed discs are cheap and work well on clean, flat wood. Their weakness is tearing at the edge or when the sander catches a corner. Film-backed discs are tougher and tend to leave a more consistent scratch pattern. Mesh discs resist loading and run cooler, which helps when sanding resinous pine or a panel with partially cured glue, but they cost more and require a backing pad with a matching hook-and-loop surface.
For most panel work, buy 5-inch hook-and-loop aluminum oxide discs in a complete grit range. A 5-inch sander is easier to control near edges. A 6-inch random-orbit sander removes material faster and covers large panels more efficiently, but replacement discs usually cost more.
Disc Types Compared
| Disc type | Best use | Advantages | Limitations |
|---|---|---|---|
| Paper aluminum oxide | General bare-wood sanding | Low cost, predictable cutting, widely available | Loads faster and tears more easily |
| Ceramic | Heavy stock removal and hard woods | Fast cutting and long useful life | Higher price; unnecessary for light finish sanding |
| Mesh | Glue residue, resinous wood, dusty work | Better dust flow and less clogging | More expensive; needs a compatible pad |
| Film-backed | Fine finishing and consistent scratch depth | Flexible, durable, uniform abrasive surface | Costs more than ordinary paper discs |
Choosing the Grit Sequence
Start with the finest grit that will remove the defect. On a panel that is already fairly even, begin with 80 grit. Use 60 grit only for stubborn planer ridges, hardened glue, or noticeable high spots. Starting at 40 grit can remove material quickly, but it leaves deep scratches that may require several later steps to erase.
A practical sequence is 80, 120, and 150 grit for a panel that will be painted. For clear finish or stain, use 80, 120, 150, and 180 grit. Some woods benefit from stopping at 150 grit: sanding soft pine or spruce much finer can burnish the surface and reduce stain absorption. Hard maple and birch can usually be taken to 180 grit without becoming excessively polished.
Do not skip more than one grit. Moving from 80 directly to 180 often leaves 80-grit scratches visible in raking light, even when the panel feels smooth. Change discs when the abrasive stops cutting. A worn disc generates heat, encourages excess pressure, and can make a panel uneven.
Best Choices by Job
For occasional projects: a mixed pack of paper aluminum oxide discs is the economical choice. Look for a pack containing 80, 120, 150, and 180 grit, with clear grit labeling and dust holes that match your sander. The cheaper option is fine when you are sanding a small tabletop or cabinet side and can replace a disc after it loads.
For glue squeeze-out and difficult spots: use a ceramic 80-grit disc or a mesh 80-grit disc. First scrape thick glue with a sharp scraper. Sanding a raised bead of glue wastes discs and can create a shallow hollow around it. Mesh is especially useful when the glue is smeared across a wide area, but it is not a substitute for removing heavy glue mechanically.
For large panels: 6-inch ceramic random-orbit discs offer faster coverage and longer life. They make sense for multiple cabinet panels, hardwood countertops, or repeated shop work. For one small project, their added cost rarely pays back.
For the final finish: film-backed finishing discs are a good upgrade if you can see uneven scratch marks after staining or applying a clear coat. They do not flatten a panel faster; they simply leave a more uniform surface with less risk of torn edges.
How to Flatten Without Making Waves
Mark the surface lightly with pencil lines before sanding. Use the sander at full speed, keep the pad flat, and move at roughly 1 to 2 inches per second. Do not press down. Excess pressure stops the pad from orbiting freely and makes the tool cut unevenly, often creating a shallow dish in the middle.
Sand in overlapping passes, first moving with the grain and then making a second set of passes at about 45 degrees when leveling a broad panel. Finish each grit with several straight, grain-aligned passes. Keep the tool moving before lowering it onto the wood and lift it only after the pad has cleared the surface; dropping or lifting a spinning sander can leave circular divots.
Check flatness with a reliable straightedge across the panel in several directions. Use pencil marks to identify remaining low areas, but do not chase every low spot with a random-orbit sander. If a 36-inch panel has more than about 1/16 inch of twist or cup, stop and use a flattening method that references the whole panel. Otherwise, you may make the surface locally smooth while leaving it structurally uneven.
Dust Control and Common Failures
Connect the sander to a vacuum whenever possible. Dust extraction keeps the abrasive cutting, reduces airborne fine dust, and makes it easier to inspect the scratch pattern. Wear eye protection and a properly fitted respirator rated for fine particulate; a dust bag alone is not adequate protection in a closed shop.
Watch for three failure signs: a shiny disc surface means the abrasive is loaded, dark burn marks mean too much pressure or a dull disc, and a repeating circular pattern means you are dwelling in one place. Stop, replace the disc, clean the surface, and resume with lighter pressure. Before applying stain or finish, vacuum the panel and wipe it with a clean, dry cloth. Water or solvent wiping can raise grain or move contaminants, so test the preparation method on an offcut first.



0 Comments