What's inside
As an Amazon Associate I earn from qualifying purchases. This post may contain affiliate links at no extra cost to you.
Choosing between shellac and sanding sealer before a clear coat depends on what problem you are trying to solve. Shellac is a versatile barrier coat that can lock in odors, resin, stains, and contaminated surfaces. Sanding sealer is usually a modified version of the clear finish itself, designed to sand easily and reduce friction on large or porous surfaces.
Neither product is automatically the “best” first coat. For clean, freshly sanded wood, applying clear finish directly is often cheaper and produces a harder, less complicated finish. Use a sealer when it solves a specific problem or makes the job substantially easier.
As an Amazon Associate we earn from qualifying purchases at no extra cost to you.
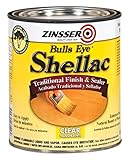

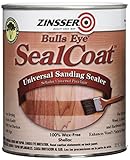

Our Top Picks
 Varathane Water-Based Ultimate Gloss PolyurethaneHalf Pint (Pack of 1)3 x 3 x 3 inches1.22 PoundsCheck on Amazon

What Shellac Does Before Clear Coating
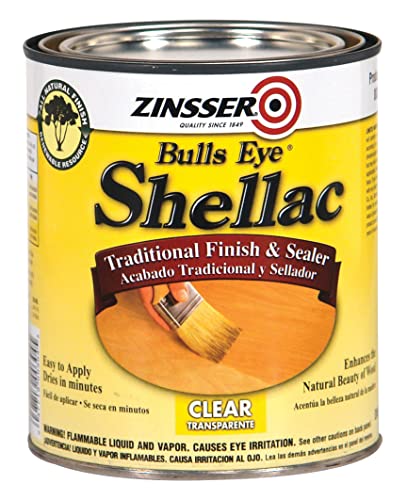
Shellac dries quickly, sticks to most properly prepared surfaces, and forms an effective barrier between the wood and the next finish. Dewaxed shellac is the safer choice under polyurethane, water-based clear coats, lacquer, and many other finishes. Shellac containing natural wax can interfere with adhesion, particularly under water-based products and some urethanes.
Shellac is especially useful for pine knots, sap pockets, smoke odor, animal odor, crayon marks, oily contamination, and unknown old finishes. It can also reduce blotching by partially sealing very absorbent wood before staining, although a dedicated pre-stain conditioner may be more predictable for that particular task.
Use a dewaxed shellac sealer when you need a general-purpose barrier coat. Apply a thin coat, let it dry for roughly 30 minutes, and sand lightly with 320-grit paper or a fine abrasive pad. Shellac can be recoated quickly, but do not confuse surface dryness with complete solvent evaporation. Heavy coats can remain soft underneath.
What Sanding Sealer Does
Sanding sealer is made to be easy to level. It commonly contains lubricants or softening additives that make sanding faster and reduce paper loading. Some products are lacquer sanding sealers; others are designed for water-based finishes or specific solvent systems. They are not interchangeable simply because both cans say “sanding sealer.”
On a large project such as a cabinet, tabletop, or several doors, sanding sealer can save time. It fills minor grain irregularities, sands more easily than the final finish, and may reduce the number of clear coats needed to achieve an even surface. It is also helpful when the first clear coat raises loose fibers or exposes uneven absorption.
The trade-off is film strength. Sanding sealer is generally softer and less resistant to moisture, abrasion, and chemicals than the finish that goes over it. A thick layer can reduce the durability of the complete finish. Follow the label’s compatibility instructions, and avoid putting a lacquer sealer under a water-based polyurethane unless the manufacturer specifically permits it.
Shellac vs. Sanding Sealer
| Feature | Dewaxed shellac | Sanding sealer |
|---|---|---|
| Best use | Blocking odors, resin, stains, and unknown contamination | Fast leveling and easier sanding under a compatible finish |
| Drying speed | Very fast in thin coats | Usually fast, but depends heavily on the solvent system |
| Adhesion | Excellent on many clean, difficult surfaces | Good within its specified finishing system |
| Durability | Moderate; protected when top-coated | Usually lower than the final clear coat |
| Main risk | Waxed shellac or excessive build causing compatibility problems | Using the wrong type or applying an unnecessarily soft layer |
| Cost advantage | Worthwhile when sealing a problem surface | Often unnecessary on small, clean projects |
Which One Should You Buy?
Choose dewaxed shellac when the wood has knots, pitch, smoke odor, water stains, marker, or a questionable existing coating. It is also the better choice when you need a reliable tie coat between an old surface and a new clear finish. For a clean project made from new hardwood, shellac is usually not needed just because you are applying polyurethane.
Choose sanding sealer when you are using a compatible production finishing system and want easier sanding over a large area. It is particularly useful under lacquer, where the products are commonly designed to work together. If you are finishing one small shelf or a simple pine project, the cheaper option may be to skip sealer and apply the clear finish directly.
For a water-based polyurethane project, a manufacturer-approved water-based sanding sealer can be convenient. Do not assume that any solvent-based sanding sealer is suitable. Read the label for the exact top coat, especially when mixing brands.
How to Apply Either Sealer
Start with clean, dry wood sanded to about 180 grit for most furniture. Sanding much finer than 220 grit can reduce absorption and make some finishes look uneven. Remove dust with a vacuum and a clean, dry cloth; avoid leaving oily residues from household cleaners.
Apply one thin, even coat. Brushing, wiping, or spraying may all work, but avoid repeatedly brushing as the material begins to set. After the stated drying time, sand only enough to remove raised fibers, nibs, and roughness. A light pass with 320 grit is commonly sufficient. Do not sand through a barrier coat over a knot or stain, or the defect may bleed into the clear finish.
Apply the clear coat in multiple thin coats rather than one heavy coat. Many water-based finishes need two or three coats over a sealed surface; solvent-based polyurethane may need three coats or more for furniture subjected to regular wear. Follow the product’s recoat window. Sanding too soon can gum the abrasive, while waiting too long may require a more thorough scuff for adhesion.
Common Failure Modes
Peeling usually indicates contamination, an incompatible sealer, or insufficient scuff sanding. Cloudiness can result from moisture, heavy application, or trapped solvent. Fish-eyes often point to silicone, wax, polish, or oil contamination rather than a failure of the sealer itself.
Bleeding knots are another common mistake. One thin coat may not be enough; apply additional shellac to the knot after the first coat dries, then inspect it under good light. If the defect still telegraphs through, do not bury it under repeated clear coats. Sand back locally and seal it again.
Finally, test the complete schedule on scrap from the same wood. Test both adhesion and appearance after 24 to 48 hours. A small sample can reveal blush, color change, poor bonding, or unexpected grain darkening before it affects the finished project.



0 Comments