What's inside
As an Amazon Associate I earn from qualifying purchases. This post may contain affiliate links at no extra cost to you.
Our Top Picks
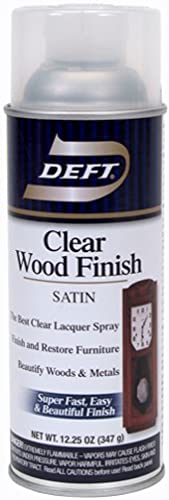 Deft Inc. Deft 037125017132 Interior Clear Wood Finish12.25 Ounce (Pack of 1)8 x 4 x 4 Inches0.1 poundsCheck on Amazon

What sanding sealer does
Sanding sealer is a first coat formulated to make bare wood easier to sand before a clear finish. Many versions contain zinc stearate, a lubricant that helps sandpaper glide and keeps it from clogging. Others are simply a compatible, fast-drying sealer without that sanding aid. The label matters: “sanding sealer” is not one universal formula.
Under lacquer, it can help seal porous wood and make a smooth base coat. It is optional, though. Lacquer itself can seal wood, and on a small project or a tight-grained species such as maple, skipping sealer may save time without hurting the result. Sealer is most useful when the wood is open-pored, the surface needs leveling, or you want a coat that sands quickly.
As an Amazon Associate we earn from qualifying purchases at no extra cost to you.
Check compatibility before you start
Use a sealer specifically labeled as compatible with your lacquer system. Nitrocellulose lacquer, waterborne lacquer, and other lacquer formulations do not always behave alike, and products from different manufacturers may not layer reliably. Follow the product label for application, recoat, and sanding times; a generic rule can lead to poor adhesion or a finish that stays soft.
If the wood has stain, first confirm that both the stain and sealer are compatible and that the stain is fully dry. A solvent-based coat can lift or smear some stains. Test the complete stack—stain, sealer, and lacquer—on an offcut or hidden spot. If the sample wrinkles, stays tacky, or shows color bleeding, stop and change the product or process before coating the whole piece.
For a straightforward setup, compare a lacquer sanding sealer with the lacquer maker’s recommended sealer rather than choosing by the word “sealer” alone. The manufacturer’s matching product is often the safer choice; a compatible generic can be fine when its label clearly permits the topcoat you plan to use.
Gather supplies and work safely
You will need the sealer, lacquer, suitable brush or spray equipment, clean tack cloth or lint-free cloth, and sandpaper—usually 320 grit, with 400 grit useful for a final light pass. A 320-grit sanding paper is a sensible starting point for flattening a dry sealer coat. Use a sanding block on flat surfaces so you do not leave finger-shaped dips.
Lacquer solvents are highly flammable and produce harmful vapors. Work outdoors or with effective ventilation, away from flames, pilot lights, sparks, and smoking. Wear the respirator specified by the product’s safety data sheet; a dust mask does not protect against solvent vapor. Keep the container closed when not in use, and follow local rules for solvent-soaked rags and waste.
Prepare the wood
Sand bare wood evenly, working through the grits appropriate to the project. For many furniture surfaces, finishing at 180 or 220 grit is enough; sanding much finer can burnish the wood and reduce absorption, especially with stain. Remove scratches from the previous grit before moving on. Vacuum dust, then wipe with a clean, dry cloth. Avoid a damp wipe unless the system calls for it, since water can raise grain or interfere with solvent finishes.
Check for glue spots, dents, and scratches under raking light. Sanding sealer will not hide these defects; it may make them more visible by changing the sheen and revealing uneven preparation.
Apply a thin coat
Stir or shake only as the label directs. Apply a thin, even coat with a compatible brush or spray setup. Do not flood corners, end grain, or joints, where sealer can pool. For spraying, follow the product’s recommended tip, pressure, and distance; those settings vary too much to assume one setup fits every product.
Let the coat dry for the time printed on the can, then check a discreet area before sanding. It should feel dry and sand to powder, not roll into gummy bits or load the paper immediately. If it gums up, wait longer. Sanding too early can tear the film and leave rough patches that show through the lacquer.
Sand, clean, and apply lacquer
Sand lightly with 320 grit, using a block on broad, flat areas and a light touch on edges. The goal is to knock down raised grain and dust nibs, not remove the sealer down to bare wood. Stop when the surface feels uniformly smooth. If you cut through on an edge, touch up that spot with sealer and let it dry before proceeding. Vacuum the dust and wipe gently with a clean cloth; aggressive wiping with a solvent can soften some sealers.
Apply lacquer according to its label, generally in several light coats rather than one heavy coat. Heavy application can sag, trap solvent, or wrinkle the layer below. Observe the specified flash time between coats and the recommended conditions for temperature and humidity. If the finish looks cloudy, rough, or unusually slow to dry, pause and diagnose the cause instead of adding more coats.
When to use it—and when to skip it
| Situation | Use sanding sealer? | Reason |
|---|---|---|
| Open-pored wood, such as oak | Often useful | Helps create a sandable base, though it is not a pore filler. |
| Small project or tight-grained maple | Optional | Lacquer alone may be smooth enough and saves a step. |
| Stained wood | Only after a compatibility test | Solvents may disturb stain, and a sealer can affect color or adhesion. |
| Piece exposed to heavy wear | Check the finish system | Some sealers sand easily but can reduce intercoat adhesion if overapplied or incompatible. |
One common failure is using too much sealer. A thick, slick coat can make later lacquer adhesion less reliable, while the stearate in some formulations may be a poor choice between coats if the maker does not recommend it. Another is treating sealer as a substitute for sanding or filling: it will not level deep scratches or fill wide pores. If the lacquer manufacturer says to apply lacquer directly to prepared wood, that cheaper, simpler route is often the right one.



0 Comments