What's inside
As an Amazon Associate I earn from qualifying purchases. This post may contain affiliate links at no extra cost to you.
Choosing sandpaper grit for bare hardwood is less about making the surface as smooth as possible and more about removing the right defect without creating a new one. Start too coarse and you can leave scratches that remain visible after stain or finish. Start too fine and you may polish the wood, close the surface, or spend a long time removing marks that a sharper abrasive would handle quickly.
As an Amazon Associate we earn from qualifying purchases at no extra cost to you.

Our Top Picks
What grit numbers mean
Lower numbers are coarser and remove material faster. Higher numbers remove less material but leave a finer scratch pattern. For most bare hardwood projects, the useful range is 60 to 180 grit, with 220 grit reserved mainly for light smoothing between finish coats or very careful final preparation.
Abrasive quality matters as much as the number. Cheap sheets are acceptable for a small hand-sanding job, but they load quickly on resinous wood and lose their cutting edge. For floors, tabletops, and large panels, use open-coat or stearated paper intended for wood, and replace it when it stops cutting. Pressing harder on a worn sheet creates heat and uneven spots rather than faster sanding.
Choose the starting grit
Inspect the wood under strong side lighting before sanding. The starting grit depends on whether you are removing old finish, leveling joints, or simply smoothing fresh boards.
| Condition of bare hardwood | Starting grit | Typical next steps |
|---|---|---|
| Freshly milled, already flat, minor roughness | 100 or 120 | 150, then 180 |
| Visible planer or jointer marks | 80 or 100 | 120, 150, then 180 |
| Uneven glued-up panel or light mill scale | 60 or 80 | 100, 120, 150, then 180 |
| Deep scratches, paint, or heavy finish residue | 40 or 60 | 80, 100, 120, then 150 or 180 |
Do not use 40 grit just because it removes material quickly. It can leave deep grooves that require several additional steps. On a flat hardwood panel, 80 grit is often the best aggressive starting point. Move to 60 grit only when 80 grit cannot remove the defects efficiently.
Useful grit sequences
For a good-quality board that only needs smoothing, use 120, 150, and 180 grit. For a rougher board, use 80, 120, 150, and 180. If you begin at 60 grit, follow with 80, 100, 120, 150, and 180 rather than jumping directly to 180.
Each grit should remove the scratches from the previous one. After sanding with 80 grit, inspect the entire surface for the coarse scratch pattern before moving on. A jump from 80 to 180 often leaves 80-grit scratches behind, especially near edges and in low spots.
You can use a mixed wood sandpaper grit pack for a small project, but buy extra sheets of the coarse grits if you are leveling a large surface. Fine paper is often sold in quantities you will not use as quickly as 80- or 120-grit paper.
Adjust for the wood species
Dense species such as hard maple, beech, and hickory can show sanding scratches clearly and may require more time at 120 and 150 grit. They also punish dull abrasives by generating heat and burnishing the surface. Use light pressure and keep the sander moving.
Open-grained species such as oak and ash can usually be prepared with the same grit sequence, but do not assume the pores are defects that sanding will remove. Sanding cannot flatten deep pore structure without removing excessive material. If you plan to fill the grain, stop at the grit recommended by the filler manufacturer, commonly 120 or 150.
Soft hardwoods such as poplar and alder can develop dips and rounded edges quickly. Start finer—often 120 grit on a reasonably flat board—and use a sanding block or random-orbit sander with minimal pressure. Cherry and walnut are moderately hard, but scratches and uneven sanding can become especially obvious under clear finish or stain.
Match the grit to the sanding method
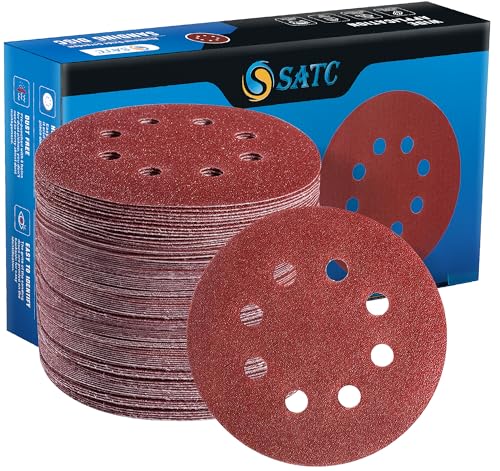
A random-orbit sander is efficient on broad, flat surfaces. Use a fresh 5-inch random-orbit sanding disc set and keep the pad flat. Do not tilt the tool to attack a spot; that can create a shallow circular depression.
Sand with the grain when using a finishing sander, sanding block, or by hand. A random-orbit sander can remove material in overlapping directions, but the final pass should still be controlled and thorough. Near edges, use a block or hand sanding because the machine can round over corners in seconds.
For hand sanding, a firm cork or rubber block is better than folding paper in your fingers. Folded paper concentrates pressure under your fingertips and can produce ripples. For profiles and moldings, use a flexible abrasive sponge or shaped block rather than forcing flat paper into a curve.
How fine should the final grit be?
For most clear finishes on bare hardwood, stop at 150 or 180 grit. Many floors and furniture pieces are finished at 120 or 150 grit because the finish bonds well and the surface still accepts coating evenly. Sanding to 220 grit is reasonable for a small, smooth project when applying a thin clear finish, but it is not automatically better.
If you are staining, follow the stain instructions and test on an offcut. Stopping at 180 or 220 can reduce stain absorption and produce a lighter or less even color than a 120- or 150-grit surface. Some woods, especially pine-like soft stock and blotch-prone species, may need conditioner or a washcoat rather than finer sanding.
After the final grit, vacuum thoroughly and wipe with a clean, dry cloth or the cleaner recommended for your finish. Avoid soaking bare wood with water unless you intentionally plan to raise the grain. If you do raise it, let the surface dry completely and lightly sand the whiskers with 180 or 220 grit.
Common sanding mistakes
The most common failure is stopping before the previous grit’s scratches are gone. Another is sanding only the center of a panel while missing its edges. Pencil scribbles across the surface help reveal untouched areas: sand until the marks disappear evenly, without leaning hard on the sander.
Do not skip more than one grit on a repair unless you have tested it under side lighting. Replace clogged paper, control dust with a sander dust collection setup, and inspect before applying stain or finish. A few extra minutes checking the surface costs far less than stripping a finished piece to remove visible sanding scratches.



0 Comments