What's inside
As an Amazon Associate I earn from qualifying purchases. This post may contain affiliate links at no extra cost to you.
Our Top Picks


Why preparation matters
New wood can look ready to stain and still be a poor surface for a solid-color finish. Sawmill glaze, dust, mill stamps, and moisture can keep stain from bonding evenly. The result may be lap marks, peeling, or patches that wear through early—especially on horizontal trim, railings, and end grain exposed to rain.
Solid-color exterior stain hides the wood’s appearance but does not behave like an unlimited-thickness paint film. It still needs a clean, sound surface, and it is not a substitute for sealing joints or correcting drainage. Before buying stain, check its label for approved wood types, required primer, application temperature, and moisture limits. “Solid-color stain” products vary; follow the directions for the exact product.
As an Amazon Associate we earn from qualifying purchases at no extra cost to you.
Let the wood dry
Keep new lumber off the ground and covered from rain, but allow air to circulate around it. After installation, give it time to dry if it was wet from rain or storage. A pin-type moisture meter is useful when timing is uncertain; many stain manufacturers call for wood moisture content below 15% or 16%, but the product label takes priority. Readings vary by species and meter, so check several boards, including shaded areas and end grain.
Do not assume a fixed waiting period makes every job ready. Drying can take days or weeks depending on weather, board thickness, species, and ventilation. Staining damp wood can trap moisture and lead to blistering or early peeling. If rain is forecast during the product’s stated drying or cure window, postpone the work.
Inspect and clean
Look for loose fibers, rough edges, raised grain, dirt, and mill stamps. Remove dirt with a stiff nylon brush and water, then let the wood dry fully. Use a wood cleaner only if needed for contamination; avoid harsh household cleaners that may leave residue. If you use a cleaner or brightener, follow its rinse instructions and allow the surface to dry before sanding or staining.
Check fasteners and joints while the surface is accessible. Set protruding nails or screws flush or slightly below the surface, without crushing the surrounding wood. Replace badly split boards and address sharp edges, open joints, and places where water sits. Stain will not make a loose board sound or stop water entering behind siding.
Sand only where needed
Sand rough spots, splinters, mill marks, and sharp edges with 80- to 120-grit abrasive, then remove dust with a brush or vacuum. The exact grit depends on the wood and product instructions. Avoid polishing the surface with very fine paper: a smooth, burnished face can reduce penetration and make adhesion less reliable. For large areas, an orbital sander saves time, but it is easy to leave swirl marks that show through a solid finish.
Some new lumber has a smooth, shiny surface known as mill glaze. If water beads on a clean, dry test area, that can signal a surface that needs abrasion, though water beading alone is not a definitive test. Sand a small patch and compare it with the surrounding wood. Do not sand every board automatically; if the surface is clean, matte, and the stain manufacturer allows application without sanding, extra sanding may add labor without improving the result.
For handrails and splinter-prone areas, a pack of medium-grit sanding sponges is inexpensive and easy to control around corners. For broad faces, ordinary sanding discs or sheets are usually cheaper per square foot.
Choose a preparation method
| Surface condition | Practical preparation | Main trade-off |
|---|---|---|
| Clean, dry, rough-sawn lumber | Brush off dust; spot-sand splinters | Less work, but check the stain label for rough-sawn coverage guidance |
| Smooth, shiny, or glazed lumber | Lightly sand, then remove dust | More labor; improves a surface that may otherwise resist coating |
| Dirty or weathered boards | Clean, rinse as directed, dry, and sand damaged fibers | Cleaning takes time and can delay staining while the wood dries |
| Wet, swollen, or still damp wood | Wait for suitable moisture content | Delays the job, but staining too soon risks failure |
Prime and seal correctly
Some solid-color stains are self-priming on bare wood; others specify a separate primer, especially for certain species, tannin-rich wood, or previously treated surfaces. Do not add primer by habit. A primer that is incompatible with the stain can cause poor adhesion, and some products are intended to penetrate bare wood rather than sit over a primer film. Check the technical sheet or label for the required system.
Pay special attention to end grain, which absorbs water readily. Apply the specified coating to exposed cut ends and allow it to dry as directed. If the stain system calls for back-brushing or two coats, follow its spread rate and recoat interval; a heavy coat is not a shortcut. Stain that sits in puddles or fails to dry can remain tacky and collect dirt.
Protect the work and apply
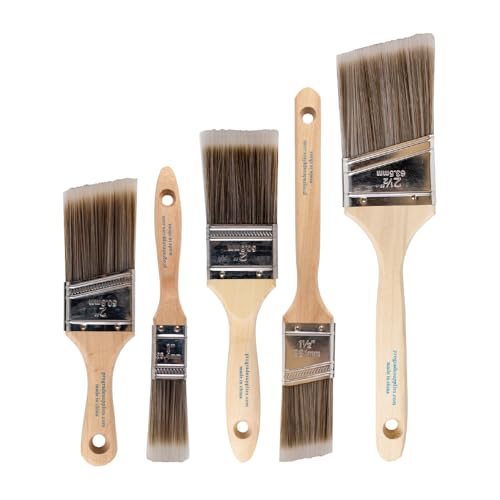
Mask nearby masonry, glass, and plants, and use drop cloths below the work. A quality exterior stain brush helps work product into rough grain and around edges; for broad, flat siding, a roller may be faster, but back-brush to even out the coating if the label permits. Spraying can be efficient on large areas, though it requires masking and usually still needs back-brushing for consistent coverage.
Apply only within the temperature and weather range on the label. Avoid hot boards in direct sun, strong wind that dries the coating too quickly, and rain or dew before the finish has had its required dry time. Work from one natural break to another, keeping a wet edge to reduce lap marks. Stir the container regularly, and do not thin the product unless the manufacturer allows it.
Check before coating
Before starting the full job, stain a small inconspicuous area using the intended preparation and number of coats. Let it dry for the full period stated by the manufacturer, then check color, sheen, tackiness, and adhesion. Confirm that the surface is clean, dry, and free of sanding dust before proceeding. If the test patch stays sticky, beads unevenly, or peels when lightly scraped after curing, stop and find the cause rather than covering the problem with another coat.



0 Comments