What's inside
As an Amazon Associate I earn from qualifying purchases. This post may contain affiliate links at no extra cost to you.
Our Top Picks
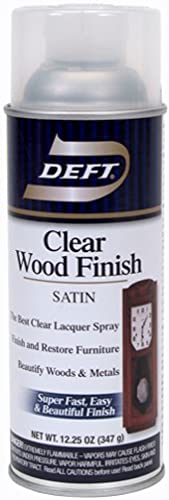 Deft Inc. Deft 037125017132 Interior Clear Wood Finish12.25 Ounce (Pack of 1)8 x 4 x 4 Inches0.1 poundsCheck on Amazon
 Wagner Spraytech Control Spray QX2 HVLP Stain SprayerQX26.25 x 8 x 11.5 inches3.4 poundsCheck on Amazon
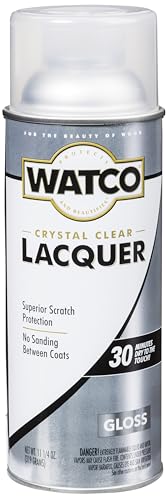 Watco Clear Gloss Lacquer Finish Spray0.09 Gallon (Pack of 1)2.69 x 2.69 x 7.88 inches0.9 PoundsCheck on Amazon
Why preparation matters
Spray lacquer dries quickly, which makes it convenient—and unforgiving. It can highlight scratches, glue smears, dents, and uneven sanding rather than hide them. A little dust left on the surface may become a bump in the finish. The goal is to get the wood clean, evenly sanded, and free of anything that could interfere with the lacquer.
Work in a well-ventilated area, away from flames, pilot lights, sparks, and heaters. Lacquer spray is highly flammable, and its fumes require more than an open window. Follow the product label for ventilation and respiratory protection; a properly fitted respirator with organic-vapor cartridges and suitable particulate filters is generally needed. Keep other people and pets out of the work area.
As an Amazon Associate we earn from qualifying purchases at no extra cost to you.
Check the wood before sanding
Look over the piece in bright, raking light. Mark dents, scratches, open joints, and glue residue with pencil. Check that fasteners are set below the surface. If the wood is oily, resinous, damp, or contaminated with furniture polish, address that before finishing. Lacquer is not a reliable way to seal in dirt or moisture.
For a small piece, make sure the wood is dry and stable. If you have a moisture meter, roughly 6–12% moisture content is a reasonable range for many indoor projects, though the right level depends on the location and the wood. Let newly purchased or recently moved lumber acclimate in the room where it will be used. Finishing wood that is still losing moisture can lead to cracks or joint movement.
Remove glue and repair defects
Glue smears are especially easy to miss on bare wood. Dried glue blocks stain and can also leave a visible difference under a clear lacquer finish. Scrape off raised glue carefully with a sharp chisel or cabinet scraper, then sand the area flush. To check for thin smears, wipe the wood with mineral spirits if appropriate for the species and project; the dampened surface often reveals spots that are hard to see when dry. Let the solvent evaporate completely before spraying.
Fill small defects only when necessary. A color-matched wood filler can work on a minor pinhole, but it may remain visible under clear lacquer because filler and wood absorb finish differently. For a prominent repair, a fitted wood patch is usually less noticeable. Avoid trying to fill a deep void with thick lacquer; it can shrink, remain uneven, or crack.
Sand to an even surface
Start with the finest abrasive that will remove the defects. On rough or machine-marked boards, that may mean 80 or 100 grit. On a clean, already smooth surface, start around 120 or 150. Sand with the grain, using a random-orbit sander on broad flat areas and a sanding block by hand near edges, corners, and profiles. Keep the sander moving and use light pressure to avoid swirl marks and dips.
Progress through the grits rather than jumping straight to a fine finish. A common sequence is 120, 150, then 180; begin at 80 only if the surface needs substantial leveling, and follow it with each step. For many spray-lacquer jobs, stopping at 180 grit is a good balance. Sanding bare wood much finer than 220 can burnish some species and reduce absorption, particularly if you plan to stain first. Always remove the scratches from the previous grit before moving on.
For a starter set, assorted 120-, 150-, and 180-grit sanding discs are more useful than relying on one grit. The cheaper paper is fine for a small project, but clogged or worn abrasive cuts poorly and can leave scratches. Replace discs when they stop cutting cleanly.
Decide whether to raise the grain
Water-based stain or a water-based first coat can raise the grain and leave a rough feel. If that is part of your finishing schedule, lightly dampen the sanded wood with a clean cloth, let it dry fully, then knock down the raised fibers with 220 grit. Do not soak the piece. This step is usually unnecessary when applying a solvent-based lacquer directly to dry bare wood.
Open-grained woods such as oak and ash will still show their pores beneath ordinary lacquer. That is a natural texture, not a preparation failure. If you want a glass-smooth surface, you will need a grain filler or additional build coats and sanding. Closed-grained woods such as maple generally look smoother with less work.
Remove dust without leaving residue
Vacuum the surface and nearby work area, then wipe the wood with a clean, lint-free cloth. Avoid a tack cloth unless you know it is compatible with your finish: some contain wax or resin that can cause adhesion or appearance problems. Compressed air can blow dust out of joints, but it may also spread dust around the room or introduce oil from the compressor. A vacuum with a clean brush attachment is often the simpler choice.
Use a solvent wipe only when there is a reason, such as suspected oily contamination or checking for glue spots. Test it in an inconspicuous area and let it evaporate fully. Do not use water, alcohol, or mineral spirits indiscriminately; the wrong cleaner can raise the grain, leave residue, or affect a stain or existing coating.
Compare common preparation choices
| Choice | Best for | Trade-off |
|---|---|---|
| Stop at 180 grit | Most bare wood receiving clear lacquer | Efficient, but scratches from coarse sanding must be removed first |
| Sand to 220 grit | Fine, smooth surfaces or a schedule that needs grain knockdown | More work; going finer can reduce stain uptake on some woods |
| Use a sanding sealer | Projects needing easier sanding or more even lacquer build | Adds a step and may change appearance; check lacquer compatibility |
| Apply lacquer directly | Clean, evenly sanded wood where a natural look is wanted | Does not hide defects or fill deep pores in one coat |
Test the finish and spray setup
Before committing to the whole piece, spray an offcut of the same wood—or a hidden area—using the complete finishing schedule. This shows how the lacquer affects color and grain, and whether a stain, sealer, or filler is compatible. If you plan to stain, let it dry for the time specified on its label before applying lacquer; trapped solvent can cause poor adhesion or a cloudy finish.
Shake the can for the label’s stated time, then spray a few test passes on scrap. Hold the can at the recommended distance, commonly about 8–12 inches, and keep it moving as you start and finish each pass. Heavy, slow passes can sag or puddle; very dry passes can feel rough and look uneven. Use compatible products from the same finishing system when possible. A clear spray lacquer intended for wood is the straightforward option for small projects, but the label—not a general rule—sets recoat times and sanding instructions.
Before spraying, inspect the wood once more under angled light. If you can see a sanding scratch, glue mark, or dust nib now, the clear finish is unlikely to improve it. Fix the surface, remove the dust, and only then apply lacquer.



0 Comments