What's inside
As an Amazon Associate I earn from qualifying purchases. This post may contain affiliate links at no extra cost to you.
A loose wood joint does not always require stripping, sanding, and refinishing the entire piece. In many cases, you can repair the joint locally, clean up the squeeze-out, and leave the surrounding finish intact. The key is to identify why the joint loosened, open it far enough to get adhesive into the joint, and avoid forcing glue into a space that is still packed with old debris.
As an Amazon Associate we earn from qualifying purchases at no extra cost to you.


Our Top Picks
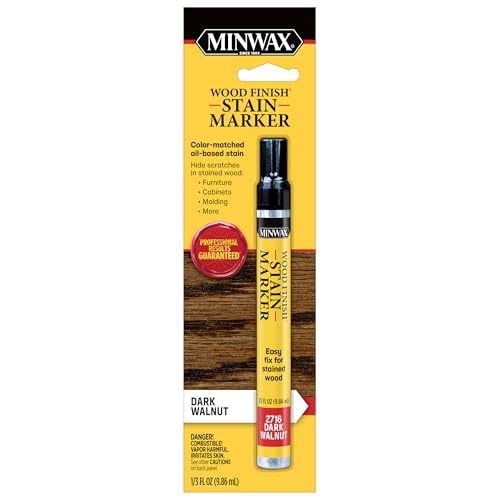 Minwax 63487000 Wood Finish Stain Marker for TouchPack of 1 (1/3 oz each)2.25 x 0.5 x 8.5 Inches0.02 poundsCheck on Amazon

Assess the Joint Before Buying Supplies
First, determine whether the joint is loose because the glue failed or because the wood itself is damaged. A clean separation along the original glue line is a good candidate for a local repair. If the tenon is cracked, a dowel is split, or the surrounding wood is crushed, glue alone may not hold.
Try moving the joint by hand. A small amount of movement with no creaking usually indicates a failed glue bond. A joint that opens several millimeters, has missing wood, or flexes under light pressure may need reinforcement. Check for hidden fasteners before forcing anything apart. Older furniture may contain nails, screws, brads, or metal corner blocks.
Protect the finish with painter’s tape. Put tape along both sides of the joint, leaving only a narrow strip exposed. This will not prevent every glue mark, but it gives you more time to wipe up squeeze-out before it dries.
Choose the Right Adhesive
For most indoor furniture made from sound wood, ordinary yellow or white woodworking glue is the best value. It is strong, inexpensive, and easier to clean than many specialty adhesives. Use a moisture-resistant version for kitchens, bathrooms, or pieces that may see occasional damp conditions. For outdoor furniture, use an adhesive specifically rated for exterior exposure; indoor wood glue is not a substitute.
| Adhesive | Best use | Advantages | Limitations |
|---|---|---|---|
| Wood glue | Clean, tight indoor joints | Low cost, easy cleanup, strong bond | Needs close-fitting surfaces; poor choice for large gaps |
| Polyurethane glue | Some damp or exterior repairs | Moisture resistant and gap-filling | Expands, is messy, and still needs clamping |
| Two-part epoxy | Gaps, damaged wood, mixed materials | Fills voids and bonds dissimilar surfaces | More expensive; difficult to remove and clean |
| Cyanoacrylate glue | Very small cracks or quick stops | Fast and useful in tight hairline cracks | Brittle, poor for structural joints, can mark finishes |
For a normal loose chair rung, drawer joint, or table apron, start with interior wood glue. Do not automatically reach for epoxy because it is marketed as stronger. Epoxy is useful when wood is missing or the joint has a persistent gap, but it is harder to reverse and can leave a visible, glossy repair.
Open and Clean the Joint
Remove only what is necessary. If the joint opens by hand, work it apart gently while supporting the surrounding parts. For a stubborn joint, tap the member with a rubber mallet and a scrap block. Strike the scrap, not the finished surface. Stop if the wood starts to split or the finish begins lifting.
Scrape old glue from the exposed surfaces with a sharp chisel held almost flat. A stiff brush, dental pick, or folded strip of medium-grit sandpaper can remove crumbs from a mortise or dowel hole. Avoid aggressive sanding on visible finished wood. Removing even 0.5 mm of material from a shoulder or tenon can create a permanent gap.
Do not wash a furniture joint with water. Water can swell the wood temporarily, distort the fit, and raise the grain around the repair. For stubborn residue, use a sharp scraper first. Solvent use is risky because it can soften lacquer, shellac, wax, or old painted finishes.
Test-Fit, Apply Glue, and Clamp
Dry-fit the joint before applying adhesive. It should seat fully with firm hand pressure or a few light mallet taps. If it stops early, find the obstruction instead of relying on the clamp to force it closed. A forced joint can split, squeeze out nearly all the glue, or push the assembly out of square.
Apply a thin, complete film to both mating surfaces. A small brush, glue spreader, or narrow stick works better than pouring glue into the opening. For dowels, coat the dowel and the inside of the hole, but do not fill the hole completely; trapped glue can act like a hydraulic plug and prevent the parts from seating.
Use a clamp that applies pressure directly across the joint. Protect finished surfaces with cork, leather, or folded cardboard under the clamp pads. Tighten only until the joint closes and a modest bead of glue appears. Excessive pressure can starve the joint of adhesive and crush soft species such as pine, cedar, or poplar.
For a small repair, quick-grip woodworking clamps are usually sufficient. For a chair or cabinet corner, a strap clamp or longer bar clamp may distribute pressure better. Measure the diagonals of a cabinet or frame before clamping and adjust until they match within about 3 mm.
Clean Squeeze-Out and Let It Cure
Wipe away squeeze-out with a damp cloth while the glue is still wet, but do not scrub across the finish. A plastic scraper is safer near a film finish. Remove painter’s tape while the glue is rubbery, usually after 10 to 20 minutes, so it does not pull up a dried ridge.
Leave the clamp in place for the adhesive’s stated clamp time, commonly 30 minutes to 2 hours for wood glue. Avoid stressing the joint for at least 24 hours. Cold temperatures, oily woods, thick glue films, and poor-fitting joints can extend that time. Do not judge strength by removing the clamp early and testing the repair.
Handle Gaps and Finish Damage
A gap wider than about 1 mm deserves attention. Wood glue is not a reliable filler for a large void. Use a properly fitted wood sliver for a structural gap, or use epoxy when the missing material cannot be replaced cleanly. Tinting epoxy can make it less conspicuous, but it rarely disappears completely under a clear finish.
If a tiny amount of finish chips during the repair, let the joint cure first. Then lightly level the damaged spot with 400- to 600-grit abrasive wrapped around a small block. Touch up only that spot with a compatible stain, paint, lacquer, shellac, or clear coat. Test the product on an unseen area first; water-based and solvent-based finishes can react differently with an older coating.
For touch-up work, wood finish touch-up markers are acceptable for small scratches, especially on stained furniture. They are not a substitute for matching the existing finish on a broad repair. If the wood is structurally split, badly contaminated with oil, or missing a substantial section, stop trying to preserve the original surface and plan for a more extensive rebuild and refinishing job.



0 Comments