What's inside
As an Amazon Associate I earn from qualifying purchases. This post may contain affiliate links at no extra cost to you.
Stained wood makes nail holes harder to hide than painted trim. Paint forms an opaque film, so filler color matters less. Stain soaks into the surrounding wood, while most fillers absorb it differently—or not at all. The result is often a pale, dark, or shiny dot that remains visible from across the room.
The most reliable method is to fill the hole with a stainable material, sand it flush without enlarging the spot, and test the stain on scrap before touching the finished piece. For the least visible repair, use matching wood from the same species when the hole is prominent or the finish is dark and clear.
As an Amazon Associate we earn from qualifying purchases at no extra cost to you.


Our Top Picks
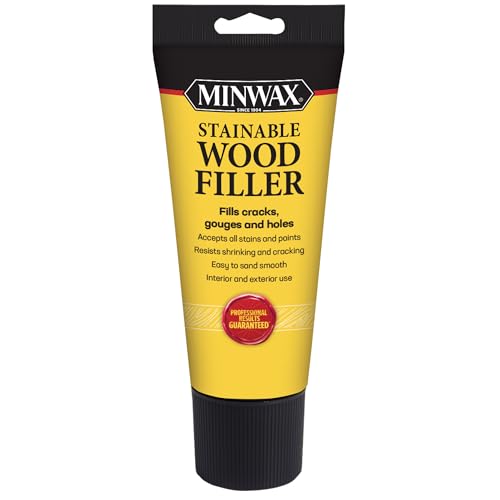
Choose the Right Filler
First identify the job. A tiny hole in open-grained oak is more forgiving than a row of holes in smooth maple. A countersunk nail hole 1/16 to 1/8 inch deep needs a different approach from a crushed or torn hole around a nail head.
| Filler type | Best use | Stain behavior | Main drawback |
|---|---|---|---|
| Stainable water-based wood filler | Small holes in trim and furniture | Usually accepts stain, but often lighter than wood | Can show as a flat-colored patch |
| Wax filler stick | Finished wood and final touch-ups | Available in many colors; does not absorb stain | Can smear or melt if overworked |
| Wood glue and fine sanding dust | Matching repairs in unfinished wood | Often blends better than commercial filler | Glue can seal the area and cause a dark or light spot |
| Matching wood sliver or plug | Large, deep, or highly visible holes | Finishes like real wood when grain is oriented correctly | More labor and may require careful trimming |
For ordinary unfinished pine, poplar, oak, or fir trim, a stainable wood filler is the sensible starting point. Buy a small container rather than a large tub if you only have a few repairs; filler can dry out before the next project.
Prepare the Hole Without Making It Bigger
Remove loose fibers with a sharp utility knife or the edge of a small chisel. Do not automatically drill out every hole. Enlarging a 1/16-inch nail hole to 1/4 inch creates a larger color problem and removes original grain that could have helped disguise the repair.
If the nail is still present, drive it slightly below the surface using a nail set. For typical trim, a depression about 1/16 inch deep is enough. A deeper cavity requires more filler and is more likely to shrink or show a different color.
Brush or vacuum away dust. Avoid soaking the spot with water, especially on veneer or end grain. Water can raise the surrounding fibers and leave a halo that is difficult to sand away.
Fill and Sand Carefully
Press filler into the hole with a flexible putty knife or fingertip, forcing it all the way to the bottom. Leave the filler slightly proud—about 1/32 inch—because many products shrink as they dry. For a hole deeper than 1/8 inch, apply two thin layers instead of one thick blob. Follow the container’s drying time; rushing this step causes soft filler to tear out during sanding.
Once hard, sand only the repair with 180- or 220-grit paper wrapped around a small, flat block. Use light strokes with the grain. Do not rub a fingertip over the area, because the soft finger pressure creates a shallow dish around the filler. Stop as soon as the surface is flush. Finish with 240- or 320-grit paper if the surrounding wood has already been sanded that smooth.
Vacuum the dust, then wipe with a clean, dry cloth. Tack cloths can leave waxy residue, and damp rags can raise grain. If the wood feels rough around the hole, let it dry fully and sand those lifted fibers lightly before staining.
Test the Stain Before Applying It
Never judge the repair from its dry filler color. Stain a piece of the same wood with the same filler, sanding schedule, stain, and topcoat. A sample made on pine will not reliably predict results on oak, maple, or walnut.
Apply stain to the whole board or trim section rather than dabbing only at the hole. Spot-staining usually creates a dark ring because the fresh filler and newly sanded area absorb differently. Keep the stain wet for the manufacturer’s stated time, then wipe it evenly. A thin coat is easier to control than a heavy application.
If the filled spot is too light, a second stain coat may help, but it will not make a non-absorbing filler behave like wood. For small finished repairs, a wood touch-up wax stick set can provide a closer color match than trying to stain a pale patch. Choose a color slightly lighter than the surrounding wood, then blend in a darker tone if needed.
Use Wood Dust Only in the Right Situation
Mixing fine sanding dust from the same wood with a small amount of wood glue can produce a convincing filler for small holes in unfinished wood. The dust should come from the visible face of the same board, not from unrelated sawdust. Aim for a thick paste, roughly the consistency of peanut butter.
Use very little glue. Too much creates a clear, sealed spot that may reflect light differently and resist stain. This method works best under a clear finish or with a light stain. It is less dependable under dark stain because the glue line often remains visible. If you try it, make a test patch and allow it to dry completely before deciding.
Repair Large or Highly Visible Holes
For holes larger than about 1/4 inch, chipped edges, or repairs in figured wood, filler alone is usually the wrong choice. Cut a small sliver or plug from matching wood, orient its grain in the same direction, and glue it into the cavity. Once dry, trim it nearly flush with a sharp chisel and sand it level.
On veneer, do not drill deeply or use aggressive sanding. A thin veneer can be removed in seconds. For these surfaces, use a color-matched wax repair after the finish is applied, or replace the damaged section if the hole is conspicuous.
Finish and Check the Repair
Apply the same sealer or topcoat used on the surrounding wood. The finish can change both the filler color and its sheen. Inspect the repair under side lighting after the first coat dries. Gloss differences often reveal a patch that looked acceptable when the surface was raw.
Common failures have simple causes: a halo means the surrounding area was over-sanded; a dark ring often means excess stain pooled at the edge; a sunken spot means the filler shrank or was not packed firmly; and a pale dot usually means the filler did not absorb stain like the wood. If the repair is still visible, do not keep sanding the whole board. Rework the spot with a matching wax or wood-toned artist’s color, then apply a thin finish coat.
For a small row of nail holes in ordinary stained trim, the economical sequence is stainable filler, careful 220-grit sanding, and an even coat of stain. Spend more time—or use matching wood—when the piece is close-grained, dark, glossy, veneered, or viewed at eye level.



0 Comments