What's inside
- Top 3 Picks
- Quick Comparison
- How We Chose
- 1. Motovera Green Cross Line Laser with Tripod – Best for Bright Rooms and Tripod Work
- 2. PREXISO Multi Surface Laser Level – Best for Straightforward Everyday Leveling
- 3. Standard Cross Line Laser Kit with Metric Rulers – Best for Occasional Picture Hanging
- 4. PREXISO 2-in-1 Stud Finder with Laser Level – Best for Mounting to Studs
- 5. RockSeed Cross Line Laser, Rotatable 360 Degree – Best for Handheld Leveling with a Pouch
- 6. Fanttik D2 Pocket Green Laser Level – Best for Picture Hanging and Everyday DIY
- 7. Alloyman Laser Level with Tripod – Best for Multi-Line Room Layouts
- 8. RockSeed Dual Modules Line Laser with 47 Inch Tripod – Best for Whole-Room Layout
- 9. ASOBRIS Green Cross Line Laser with Tripod – Best for Floors and Construction-Style Layouts
- How to Choose a Laser Level for Home Projects
- Frequently Asked Questions
- Our Recommendation by Situation
- Top 3 Picks
- Quick Comparison
- How We Chose
- 1. Motovera Green Cross Line Laser with Tripod – Best for Bright Rooms and Tripod Work
- 2. PREXISO Multi Surface Laser Level – Best for Straightforward Everyday Leveling
- 3. Standard Cross Line Laser Kit with Metric Rulers – Best for Occasional Picture Hanging
- 4. PREXISO 2-in-1 Stud Finder with Laser Level – Best for Mounting to Studs
- 5. RockSeed Cross Line Laser, Rotatable 360 Degree – Best for Handheld Leveling with a Pouch
- 6. Fanttik D2 Pocket Green Laser Level – Best for Picture Hanging and Everyday DIY
- 7. Alloyman Laser Level with Tripod – Best for Multi-Line Room Layouts
- 8. RockSeed Dual Modules Line Laser with 47 Inch Tripod – Best for Whole-Room Layout
- 9. ASOBRIS Green Cross Line Laser with Tripod – Best for Floors and Construction-Style Layouts
- How to Choose a Laser Level for Home Projects
- Frequently Asked Questions
- Our Recommendation by Situation
As an Amazon Associate I earn from qualifying purchases. This post may contain affiliate links at no extra cost to you.
For most households, the Fanttik D2 Pocket Green Laser Level is the best laser level for home projects. It is small enough to live in a junk drawer, projects a bright green cross line that stays visible in a lit room, levels itself within a few degrees of tilt, and attaches to a metal surface or a standard tripod thread when you need it to. That covers the jobs most homeowners tackle: gallery walls, floating shelves, cabinet rails, tile layouts, and straight backsplashes. If you plan to work across a whole room, such as laying out a ceiling grid, running a chair-rail line, or aligning a long row of cabinets, a tripod-mounted model like the RockSeed Dual Modules kit or the ASOBRIS green cross-line kit gives you the stable, adjustable height that a pocket unit cannot. Shoppers who only need a simple, inexpensive tool for the occasional picture frame can look at the standard cross-line kit with metric rulers, while anyone who also hunts for studs will like the PREXISO 2-in-1. This guide covers nine laser levels and shows how to match one to your job.
Top 3 Picks
Best overall: Fanttik D2 Pocket Green Laser Level. A pocket-size green cross-line laser with a magnetic mount and a tripod thread. Manufacturer information describes a self-leveling range of roughly 4 degrees, a rechargeable battery, and a pulse mode for use with a detector. It is the most balanced choice for picture hanging, shelving, and general home DIY.
Best for value and room-scale work: ASOBRIS Green Cross Line Laser with Tripod. The listing pairs a green cross-line beam with a tripod and self-leveling, which is what you need for floors, tile layouts, and long wall lines. You get the height adjustment of a tripod without stepping up to a professional rotary system.
Best for larger layouts: RockSeed Dual Modules Line Laser with 47 inch Tripod. The listing describes a horizontal line plus a 150-degree vertical green beam, a 47-inch iron tripod, and two AA batteries. The wide vertical fan and taller tripod make it the most capable option here for whole-room alignment, door and window framing, and long cabinet runs.
Quick Comparison
| Product | Best for | Key specs (from listing) |
|---|---|---|
| Motovera Green Cross Line Laser with Tripod | Outdoor-leaning or bright-room work with a tripod | Green cross line, 100 ft range, tripod included, 4 brightness modes, pulse function, manual and self-leveling modes |
| PREXISO Multi Surface Laser Level | Simple everyday leveling on walls and shelves | Cross-line laser, LED light vial, multi-surface design |
| Standard Cross Line Laser Kit with Metric Rulers | Occasional picture hanging on a tight budget | Cross-line beam, 8 ft / 2.5 m metric ruler, multipurpose kit |
| PREXISO 2-in-1 Stud Finder with Laser Level | Hanging items on studs, shelving, TV mounts | Stud finder plus cross-line laser, rechargeable |
| RockSeed Cross Line Laser, Rotatable 360 | Handheld leveling with a carrying pouch | Self-leveling, vertical and horizontal lines, rotatable 360 degrees, battery included, pouch |
| Fanttik D2 Pocket Green Laser Level | Picture hanging and general home DIY | Green cross line, pocket size, magnetic bracket, rechargeable, pulse mode |
| Alloyman Laser Level with Tripod | Multi-line room layouts with a tripod | Self-leveling, 360-degree wording, tripod included |
| RockSeed Dual Modules Line Laser with Tripod | Whole-room layout and long runs | Horizontal plus 150-degree vertical green beam, 47 inch iron tripod, 2 AA batteries, self-leveling |
| ASOBRIS Green Cross Line Laser with Tripod | Floors, tile, and construction-style layouts | Green cross line, tripod, self-leveling |
How We Chose
We did not bench these tools. Instead, we compared the nine listings against criteria that matter for home projects and cross-checked manufacturer descriptions with well-established facts about cross-line lasers. First, beam color and brightness: green diode lasers are generally easier to see indoors than red, which matters in a sunlit living room. Second, leveling method: self-leveling pendulums are faster and more forgiving than bubble-vial-only designs. Third, mounting: a magnetic base, a tripod thread, or a bundled tripod decides whether you can use the tool on drywall, a stud, or open floor space. Fourth, power: rechargeable batteries are convenient, while AA cells are easy to swap mid-project. Fifth, line coverage: a wider vertical fan helps with corners and door frames. Finally, we weighed how clearly each listing explains its specs, and we flag anywhere you should confirm details on the product page before buying.
1. Motovera Green Cross Line Laser with Tripod – Best for Bright Rooms and Tripod Work
As an Amazon Associate we earn from qualifying purchases at no extra cost to you.

The Motovera listing leads with a feature set that is rare at this level: a green cross-line beam, a 100-foot stated range, a bundled tripod, four brightness modes, a pulse function, and both manual and self-leveling modes. In plain terms, that means you can use it on a tripod in a hallway, switch to manual mode when you intentionally want a sloped line (for example along a staircase stringer), and turn up the brightness when sunlight washes out the beam. The pulse function is meant for use with a separate laser detector, which extends visibility outdoors, so it is more of a bonus than a daily feature for most homeowners.
This model suits the person who has a few mid-size projects on the calendar: a basement finishing job, a deck ledger line, a fence layout, or a whole-wall tile pattern. The tripod is the real value here. A handheld laser is only as stable as your hand or the surface you set it on, whereas a tripod lets you raise the line to eye level or to the exact height of a countertop and walk around without bumping it.
Key specs from the listing
- Green cross-line laser (one horizontal and one vertical line)
- Stated range of 100 feet; confirm whether that applies with or without a detector
- Tripod included
- Four brightness modes and a pulse function
- Self-leveling plus manual lock mode
Strengths
Brightness control is the quiet hero. At full brightness the green line carries across a room; dialed down, it is gentler on your eyes when you are working up close and it saves battery. Having both self-leveling and manual modes means the tool can handle both plumb-and-level jobs and angled marking. The bundled tripod also removes the common upgrade cost and the compatibility guesswork that comes with buying a separate stand.
Pros
- Green beam is easier to see than red in lit rooms
- Tripod included for hands-free height adjustment
- Four brightness settings to suit indoor and bright conditions
- Manual mode for intentionally angled lines
Cons
- Pulse mode only helps if you own a compatible detector
- The bundled tripod is typically a lightweight design; check its stated height and stability before relying on it outdoors in wind
- Bulkier than a pocket laser, so it is overkill for a single picture frame
How it compares
Against the ASOBRIS tripod kit, the Motovera lists more control features (brightness modes and a pulse function), so it is the more flexible choice if you expect to work in changing light. The ASOBRIS is the simpler pick when you only want a green line on a stand. Against the Fanttik D2, which is built for convenience and portability, the Motovera trades pocketability for a stand and a longer stated reach. If your projects rarely leave a single wall, the Fanttik is the easier tool to live with; if you regularly work across a floor or through several rooms, the Motovera makes more sense.
Before buying, confirm the battery type, runtime, and the accuracy figure on the product page, since the listing name does not spell them out. As with any laser tool, never point the beam at people or pets, and avoid looking into the aperture.
2. PREXISO Multi Surface Laser Level – Best for Straightforward Everyday Leveling
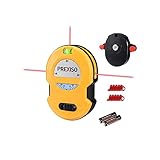
The PREXISO Multi Surface Laser Level is described as a cross-line laser with an LED light vial. A light vial is a bubble level you can see in dim conditions because it is illuminated, which is useful when you are working in a closet, under a cabinet, or in a basement corner. The “multi surface” name points to the way it can sit or mount on different surfaces; the listing wording suggests flexible placement, but check the product page for the exact base, magnet, or bracket arrangement included.
This is the tool for a homeowner who wants a no-fuss laser for shelves, picture frames, curtain rods, and basic wall layouts. Cross-line lasers like this one project a horizontal and a vertical line that intersect, which is enough to square up a shelf bracket, line up a row of cabinets, or establish a plumb reference for wallpaper.
Key specs from the listing
- Cross-line laser (horizontal and vertical)
- LED light vial for visual level checks
- Multi-surface use per the product name
Strengths
The illuminated vial is a thoughtful feature. Many compact lasers rely only on the pendulum to self-level, and you simply trust the line. Having a vial gives you a second visual reference, so you can quickly confirm the tool itself is sitting level before you trust the beam. That second check is valuable when you are marking a long line where small errors add up. A multi-surface design also means you can set the tool on a shelf, a stepladder platform, or a floor without improvising stacks of books.
It also works as a gentle introduction to laser leveling. Controls on tools in this class are typically a single switch and a lock, so there is little to learn, and the learning curve is mostly about positioning the intersection where you want it.
Pros
- Illuminated vial gives a visual second check
- Simple operation suited to beginners
- Flexible placement across surfaces
- Good fit for shelves, frames, and rod installs
Cons
- The listing name does not state beam color, range, or accuracy, so confirm these on the product page
- No tripod is mentioned, which limits height adjustment
- May be hard to see in bright sunlight if the beam is red
How it compares
Next to the PREXISO 2-in-1 Stud Finder, this model is the pure leveling tool; the 2-in-1 adds stud detection but spreads the design across two jobs. Compared with the standard cross-line kit with metric rulers, the PREXISO leans on the vial and a stated multi-surface design instead of bundled rulers. If you are choosing between the two for a first purchase, the PREXISO is a slightly more feature-oriented step up, while the ruler kit is aimed squarely at picture hanging.
Whenever you use a self-leveling laser, remember that the pendulum has a limited tilt range. If the line blinks or flashes, the tool is outside that range and the line is not reliable until you reposition it.
3. Standard Cross Line Laser Kit with Metric Rulers – Best for Occasional Picture Hanging
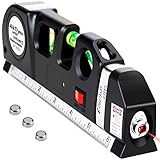
This multipurpose kit is built around a simple idea: give a homeowner a cross-line laser and an 8-foot (2.5-meter) metric ruler so they can hang pictures, mirrors, and shelves with fewer steps. The listing positions it for picture hanging and general home tasks, and the included ruler lets you measure and level without hunting for a tape measure. It is the most basic model in this guide, and that is its appeal.
It suits someone who will use a level a handful of times a year. If your last project was a gallery wall and your next one is a set of floating shelves, you do not need a tripod, a pulse mode, or a built-in battery system. You need a visible line, a stable way to place it, and a way to measure spacing. This kit leans into exactly that.
Key specs from the listing
- Standard cross-line laser beam
- 8 ft / 2.5 m ruler marked in metric
- Marketed for picture hanging and multipurpose home use
Strengths
The kit approach reduces the number of tools you need on the wall. With a bundled ruler you can set the vertical line over your first mark, measure along it, and place your second anchor with confidence. For tasks like centering a mirror over a sink or spacing frames evenly along a hallway, that pairing speeds up the work. The simplicity is also a safety advantage: fewer modes and fewer accessories mean fewer opportunities for an error.
Because the listing says “metric rulers,” US homeowners who think in inches should plan on using the ruler’s centimeter scale, or simply rely on the laser and a separate tape measure. Metric markings are not a flaw, but it is worth knowing before you expect inch graduations.
Pros
- Ruler included for quick measuring
- Straightforward cross-line operation
- Well suited to picture frames and light shelving
- Low complexity for first-time users
Cons
- Ruler is metric, so US users may prefer a separate inch tape
- Beam color and visibility in bright rooms are not stated in the listing name; confirm on the product page
- No tripod or advanced mounting is named, limiting use on open floors
How it compares
Its closest rival is the PREXISO Multi Surface Laser Level. The PREXISO adds an illuminated vial; this kit adds a ruler. The Fanttik D2 sits a tier above both, with a green beam, a magnetic bracket, and a rechargeable battery for a more refined experience. If you only hang pictures occasionally and want to keep the tool simple, this kit is perfectly reasonable. If you expect to tackle shelving walls, cabinets, or tile, step up to a green beam with better mounting.
For safety, treat any laser as a tool, not a toy. Keep it away from children, do not shine it toward windows where neighbors or drivers could be affected, and store it with the switch locked when the pendulum is not in use.
4. PREXISO 2-in-1 Stud Finder with Laser Level – Best for Mounting to Studs

The PREXISO 2-in-1 combines a stud finder with a rechargeable cross-line laser. That pairing targets a very specific home project pattern: you need to find a stud, then place something level on it. TV mounts, heavy mirrors, floating shelves, and wall-hung cabinets all follow that sequence. Having both functions in a single handheld device means you can scan for studs, mark them, and project a level line without switching tools.
Stud finders work by sensing changes in wall density or capacitance, and no handheld model is perfect across every wall type. Plaster-and-lath, thick tile, foil-backed insulation, and plumbing or wiring runs can confuse a sensor. Treat a stud finder as a guide, then confirm with a small test hole or a finish-nail probe in an inconspicuous spot, particularly before drilling near where electrical wires may run.
Key specs from the listing
- Stud finder and laser level combined
- Cross-line laser projection
- Rechargeable battery
Strengths
The biggest benefit is workflow. Instead of finding a stud with one tool, setting that tool aside, and rebuilding your level line with another, you can stay in one process. A rechargeable battery also means no hunting for AA cells in a drawer, although you should plan to top it up before a big weekend. For small homes or renters, a single combined tool is easier to store than two separate devices.
Check the product page for which materials the stud function is intended to detect, how deep it senses, and whether it flags live AC wiring. If wiring detection is not clearly stated, do not rely on the tool to find wires; shut off power or use a dedicated detector before drilling.
Pros
- Two jobs in a single rechargeable tool
- Natural fit for TV mounts, shelves, and cabinets
- Compact enough for a drawer or tool bag
- Reduces the number of devices to charge and store
Cons
- Combination tools often compromise on one function; confirm both capabilities on the product page
- Stud detection is never foolproof, so verify before drilling
- No tripod mount or extended-range feature is stated in the listing name
Using it well
A practical routine looks like this. Scan the wall slowly in one direction, mark both edges of the detected stud, then repeat from the opposite direction and compare. The midpoint between the edges is your drilling target. Standard wall studs are spaced 16 inches on center in many US homes, with 24 inches common in some framing, so once you find one stud you can predict where the next should be and confirm with a second scan. Next, switch on the laser, line the vertical beam up with your stud mark, and use the horizontal line to set the height of a bracket or a French cleat. Because the same device does both tasks, the offset between your stud mark and your level line is easy to keep consistent.
Keep in mind that a rechargeable combo tool is only helpful if it is charged when you need it. Top it up after each big project, and store it somewhere dry. If the beam seems dim or the stud sensor behaves erratically, charge it fully before blaming the tool.
How it compares
Against the standard PREXISO Multi Surface model, the 2-in-1 is the better choice for wall-mounted loads, while the single-purpose model focuses purely on leveling. Against the Fanttik D2, the 2-in-1 gives you stud finding but not the pocket green-beam polish. If your tasks regularly involve fastening into studs, the 2-in-1 saves time; if your tasks are mostly marking lines on open walls and floors, a dedicated green laser is the stronger tool.
5. RockSeed Cross Line Laser, Rotatable 360 Degree – Best for Handheld Leveling with a Pouch

The RockSeed Cross Line Laser is described as self-leveling with vertical and horizontal lines, a rotatable 360-degree design, a carrying pouch, and a battery included. “Rotatable 360 degrees” in this kind of product usually refers to a base that rotates so you can aim the cross-line in any direction without moving the whole unit. That is handy when you are working in a corner and want to swing the line toward an adjacent wall.
It suits the homeowner who wants a solid all-rounder without paying for tripod hardware. A pouch and an included battery mean the tool is ready to use out of the box and is easy to store in a toolbox or closet. For hanging wall art, installing shelves, aligning tile edges, and checking that a countertop run is straight, a tool like this does the job.
Key specs from the listing
- Self-leveling cross-line laser
- Vertical and horizontal lines
- Rotatable 360-degree base
- Carrying pouch and battery included
Strengths
The rotating base is the standout. When you are leveling around a room, being able to turn the line instead of repositioning the entire tool saves time and reduces the chance of knocking the setup out of alignment. A pouch protects the pendulum mechanism, which is the most delicate part of any self-leveling laser. Dropping a pocket laser into a toolbox with hammers and drills is a common way to throw off its accuracy, so a case is a meaningful accessory, not just packaging.
Because the listing does not state the beam color in its name, check whether the beam is red or green. Green is easier to see in bright rooms; red is perfectly fine in dim spaces and is often the less expensive diode.
Pros
- Rotating base for flexible aiming
- Battery included for immediate use
- Carrying pouch protects the leveling mechanism
- Both vertical and horizontal lines
Cons
- Range, accuracy, and beam color are not in the listing name
- No tripod is named, so height is limited by whatever surface you use
- Battery type and runtime should be confirmed before long jobs
How it compares
It is the natural sibling to the RockSeed Dual Modules model, which adds a tripod and a wider vertical beam. If most of your work happens on walls within arm’s reach, the single-module tool is simpler and easier to carry. If you work on floors or at ceiling height, the Dual Modules kit is the better pick. Compared with the Fanttik D2, the RockSeed offers a rotating base and a pouch while the Fanttik leans on its magnetic bracket and a compact, rechargeable design.
Always turn the transport lock on before putting the tool back in its pouch. That lock secures the pendulum so it is not damaged in transit.
6. Fanttik D2 Pocket Green Laser Level – Best for Picture Hanging and Everyday DIY

The Fanttik D2 is the pick for homeowners who want one small tool that handles most jobs. It is a pocket-size green cross-line laser aimed squarely at picture hanging and home DIY. Manufacturer information for the D2 describes a stated range of about 100 feet, a self-leveling range of roughly 4 degrees, a manual mode, a pulse mode for detector use, a magnetic bracket that rotates, a quarter-inch tripod thread, USB-C charging, and a stated accuracy of about one-eighth inch at 30 feet. Confirm the exact numbers on the product page, as variants of the D2 line exist with different features.
The reason it ranks first is balance. Many compact lasers cut corners on mounting and battery; the D2 tries to do both well. A magnetic bracket lets you stick it to a steel stud, a metal door frame, or a ladder, and the tripod thread lets you move to a stand when you need to raise the line.
Key specs
| Feature | What the manufacturer states |
|---|---|
| Beam | Green cross line (horizontal and vertical) |
| Self-leveling range | About 4 degrees, with a manual mode |
| Mounting | 360-degree magnetic bracket, 1/4-inch tripod thread |
| Power | Built-in rechargeable battery, USB-C |
| Extras | Pulse mode, carrying pouch |
Strengths
Size and visibility. A 0.5-pound-class tool is easy to hold overhead while you adjust, and a green diode gives you a line you can see in a daylit room. The self-leveling flash warning, where the beam blinks when it is out of range, protects you from trusting a bad line. USB-C charging means you can top it up from the same cable you use for a phone.
Pros
- Pocket-size and easy to store
- Bright green line for indoor visibility
- Magnetic bracket plus tripod thread
- USB-C rechargeable
- Pulse mode for detector use
Cons
- No tripod included in this listing
- Vertical and horizontal spread is limited compared with larger kits
- Built-in battery means you cannot swap in spares mid-job
Where it fits in a real project
Picture a typical Saturday: you want three floating shelves centered on a living room wall, spaced evenly, with a picture ledge above the sofa. Stick the D2 to a metal bracket or set it on a stepladder platform, snap the horizontal line at the height of the lowest shelf, and mark each bracket location along the beam. Move it up, repeat for the next shelf, and use the vertical line to confirm that the brackets stack in a clean column. The whole job takes a fraction of the time that a bubble level and pencil would, and the marks stay consistent because the line does not drift as you move along the wall.
The compact format also makes it a good second tool even if you already own a bigger kit. Many people keep a tripod laser for large layouts and a pocket unit for quick checks, because grabbing a pocket model for a two-minute job is easier than setting up a stand. Check the product page for the current battery capacity and charge time, and recharge before a long day of work.
How it compares
Against the ASOBRIS and Motovera tripod kits, the D2 is more portable but less ready for floor-level layout. Against the PREXISO 2-in-1, it is the stronger pure leveler but offers no stud detection. Against the basic ruler kit, it is a clear step up in beam visibility and mounting. For most buyers, the D2 hits the sweet spot between simplicity and capability, which is why it takes the top slot.
7. Alloyman Laser Level with Tripod – Best for Multi-Line Room Layouts
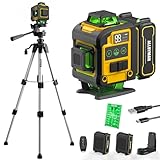
The Alloyman listing pairs a tripod with a self-leveling laser whose name includes “4” and “360 degrees.” Those figures hint at a multi-line or multi-plane projection, which would be helpful for wrapping a room with a level reference, but the listing name alone does not tell us exactly how many lines it projects. Confirm the line count, beam color, and range on the product page before you decide.
If the unit does project multiple planes, the benefits are real. A room-wrapping line lets you set a consistent chair-rail height, align a row of upper cabinets around a corner, or position a tile course continuously from one wall to the next without moving the tool. Less repositioning also reduces accumulated error.
Key specs from the listing
- Self-leveling operation
- Tripod included
- 360-degree wording in the product name
Strengths
The tripod, again, is the headline. A stand lets you adjust height and keep the tool steady while you mark. For people who tackle multi-day projects, such as finishing a basement or installing wainscoting, the ability to return to the same tripod height and re-establish a line is a real convenience.
Multi-line tools can also be tiring on the eyes because several lines are visible at once. If the tool offers a way to switch individual lines on or off, use it to keep only the lines you need during each task.
Pros
- Tripod included for hands-free setup
- Self-leveling for faster alignment
- Potentially wider line coverage for whole-room work
Cons
- The listing name does not spell out line count, color, or range
- Larger than a pocket laser, so less convenient for quick tasks
- Check the power source and runtime before long sessions
Setting up a multi-line tool
Whatever the final line count turns out to be, the setup logic is the same. Place the tripod on the most solid, level patch of floor, extend the legs evenly, and lock them before attaching the laser. Raise the center column to the height you need, then switch the tool on and let the pendulum settle. If the beam flashes, adjust the legs until the unit is within its self-leveling range. Mark the reference point where the line meets the wall, then rotate or move the tool and check that the same line meets your mark again; that quick closure check catches a sagging tripod or a setting that has shifted.
For a continuous chair rail, for example, you would set the horizontal line at 36 inches above the floor, mark it at each corner of the room, and connect the marks with a chalk line or painter’s tape. Because the laser projects the same height across every wall, the finished rail looks level even when the floor itself slopes, which is common in older houses.
How it compares
Against the Motovera and ASOBRIS kits, the Alloyman is the one to examine if you want broader line coverage rather than a classic two-line cross pattern. Against the RockSeed Dual Modules kit, which spells out a horizontal line plus a 150-degree vertical fan, the Alloyman is less clearly specified in its listing name, so the RockSeed is easier to evaluate from the information available. If clarity of specs matters to you, treat the Alloyman as a candidate that requires a few minutes of product page reading.
When using any tripod-mounted laser, make sure the legs are locked, set the tool on a firm surface, and keep cords and walking paths clear so no one bumps the setup.
8. RockSeed Dual Modules Line Laser with 47 Inch Tripod – Best for Whole-Room Layout

The RockSeed Dual Modules Line Laser is the most fully described tripod kit in this list. The listing names a 47-inch iron tripod, self-leveling operation, a horizontal beam plus a 150-degree vertical green beam, and two AA batteries. The wide vertical fan is helpful for plumb lines on doorframes, window openings, and tall cabinet runs, because a wider beam covers more of the wall without moving the tool.
It suits the homeowner who frequently undertakes larger jobs: finishing a basement, installing an entire wall of cabinets, laying out a kitchen backsplash, or squaring a deck frame. Forty-seven inches of tripod height puts the line at a comfortable working level for many tasks. Always confirm whether the 47-inch figure is the maximum extension and whether the tripod uses a standard thread.
Key specs from the listing
| Feature | Listing detail |
|---|---|
| Beam | Horizontal line plus 150-degree vertical green beam |
| Leveling | Self-leveling |
| Tripod | 47 inch iron tripod |
| Power | 2 AA batteries |
Strengths
Two AA cells are easy to replace, so a dead battery never ends your afternoon. The sturdy metal tripod gives a more stable platform than lightweight plastic stands, and stability is what keeps a line from drifting during long marking sessions. The wide vertical spread reduces the number of times you reposition the tool.
Pros
- Clearly stated beam layout and tripod
- Wide vertical fan for doors, windows, and cabinets
- Replaceable AA batteries
- Metal tripod adds stability
Cons
- An iron tripod adds weight and bulk to carry
- Range and accuracy figures are not in the listing name
- Overkill for hanging a single picture
Working with the wide vertical beam
A vertical fan of about 150 degrees is useful because it spreads the plumb line across a wide arc, so a single setup can mark the vertical edges of a door, the sides of a window, and the end of a cabinet run. To use it well, place the tripod roughly in the middle of the room, aim the vertical line at the first wall, and mark the top and bottom of the line. Rotate the tripod head to the next surface and repeat. Because both lines originate from the same point, the marks relate to each other correctly, which is how you keep cabinet doors and window trim visually consistent.
The iron tripod is heavier than plastic or aluminum designs, which is both a drawback and a strength. It resists tipping when you brush against it, but it is less pleasant to carry up and down basement stairs. If you routinely work upstairs, consider where the tripod will live between sessions so that you do not have to move it more than necessary.
How it compares
Against the ASOBRIS kit, the RockSeed Dual Modules has the clearer, wider vertical coverage and AA power. Against the Fanttik D2, it is heavier and slower to set up but far more capable on large layouts. If you expect to work across rooms, it is the stronger purchase; if you mostly work at one wall, the D2 is quicker. Always replace both AA cells together and remove them when the tool will sit for months.
9. ASOBRIS Green Cross Line Laser with Tripod – Best for Floors and Construction-Style Layouts

The ASOBRIS kit is a green cross-line laser with a tripod, aimed at picture hanging, construction, and floor work according to the listing. It is self-leveling, which means a small pendulum aligns the lines to horizontal and vertical when the tool is set within its tilt range. This is a straightforward, practical choice if you want a green line on a stand and do not need extras.
Floor work is where tripod lasers earn their keep. Marking the edges of a tile layout, checking floor flatness before installing laminate, or setting reference lines for baseboards are all tasks where holding a handheld unit is awkward. With the tripod, the line is steady at the height you choose.
Key specs from the listing
- Green cross-line laser
- Tripod included
- Self-leveling
- Marketed for picture hanging and construction or floor tasks
Strengths
Simplicity and versatility. It can serve as a wall tool for frames and shelves and then as a floor tool for tile, which makes it a good all-purpose kit for a household with varied projects. A green beam also makes the lines easier to see on lighter surfaces.
Pros
- Green beam with a bundled tripod
- Self-leveling for fast setup
- Handles both wall and floor tasks
Cons
- Range, accuracy, and power details are not in the listing name
- Tripod stability varies by design; check height and leg lock details
- No extras like a pulse mode are mentioned
Floor and tile layouts
A common tile approach is to snap a reference line through the center of the room, then dry-fit tiles outward from that line so cuts at the walls are balanced. A tripod laser makes the center reference easy: set the unit near the middle of the floor, project the cross line, and mark where it hits each wall. For a room measuring 12 feet by 15 feet, the center marks fall at 6 feet and 7.5 feet respectively, and the laser lets you transfer those numbers to the floor without chalk-line gymnastics. After the first row of tile is set, you can raise the tool and use the horizontal beam to check that wall tile courses will land at a consistent height.
Because a green beam can be seen on pale surfaces, you will not need to dim the lights as often. Still, bright sunlight from a window can wash out the line on a floor, so close blinds or shift your work to the shaded part of the day if the line fades.
How it compares
Next to the Motovera, the ASOBRIS is the stripped-down option, while the Motovera lists brightness modes and a pulse function. Next to the RockSeed Dual Modules, the ASOBRIS names a classic cross line, whereas the RockSeed adds a wider vertical spread. Choose the ASOBRIS if you want a solid, no-frills green tripod kit.
How to Choose a Laser Level for Home Projects
Start with the job, not the gadget. The two biggest questions are where you will use it and how far the line has to travel. A tool that is perfect for hanging a mirror may be hopeless for tiling a floor, and the reverse is also true.
Beam color: green versus red
Green diodes appear several times brighter to the human eye than red at similar power, because our eyes are more sensitive to green wavelengths. Manufacturers often claim two to four times brighter, though claims vary by listing. In a lit room, a green line is the difference between seeing the mark across the room and squinting. Red is perfectly workable in a basement or at night. If most of your work is in daylight, choose green.
Self-leveling versus manual
Self-leveling lasers use a pendulum. Within the tilt range, often a few degrees, the lines automatically settle to true level and plumb. Outside that range the beam typically flashes to warn you. A manual or lock mode disables the pendulum so you can project an intentionally sloped line, useful for stair rails or drainage slopes. For normal home projects, self-leveling plus a lock is the right mix.
Accuracy: a worked example
Accuracy is usually quoted as a fraction of an inch over a distance. Take a stated accuracy of 1/8 inch at 30 feet. That is 0.125 inches over 360 inches, or about 0.035 percent. Now suppose you are marking a 12-foot shelf run (144 inches). The worst-case error is 0.125 multiplied by 144 divided by 360, which equals 0.05 inches, about 1/20 of an inch. That is invisible on a shelf. Over 60 feet outdoors, the same ratio gives 0.25 inches, still reasonable for a fence line but noticeable for finish carpentry. The lesson: home-scale jobs rarely demand more than a typical consumer laser can deliver, so prioritize visibility and mounting over pursuing tighter numbers.
Mounting options
Mounting decides how useful a tool is in practice. A magnetic bracket works on steel studs, door frames, and ladders. A quarter-inch tripod thread lets you add any standard camera or laser tripod. A bundled tripod saves you from shopping for compatibility. Pocket lasers that sit on a shelf can work for frames but struggle with floors and ceilings.
Power
Rechargeable lithium batteries are convenient, but you cannot swap them in the field. AA batteries are bulkier but easy to replace. If your projects last a full weekend, AA cells or a unit with a stated runtime of several hours are safer. Charge lithium tools with the supplied or a reputable cable, do not leave them charging unattended, and stop using any battery that swells or overheats.
Decision matrix
| Your situation | Best match |
|---|---|
| Hang art, mirrors, and a few shelves | Fanttik D2 or the ruler kit |
| Mount a TV or heavy shelving to studs | PREXISO 2-in-1 |
| Tile, laminate, or floor layout | ASOBRIS or Motovera with tripod |
| Whole-room cabinets or basement finishing | RockSeed Dual Modules |
| Handheld, rotating, with a pouch | RockSeed Cross Line Laser |
| Dim spaces and closets | PREXISO Multi Surface (light vial) |
| Multi-line wraparound | Alloyman (confirm line count) |
Laser safety
Most consumer cross-line lasers are sold as Class 2 devices, which rely on the blink reflex for eye protection, but confirm the class on the label. Never look into the beam, never aim it at people, pets, or windows, and keep the tool away from children. Do not use reflective surfaces carelessly, and store the tool with the lock engaged.
Common mistakes
- Trusting a line that is blinking, which signals it is out of self-leveling range
- Setting the tool on a springy shelf or a wobbly ladder, which shifts the line as you move
- Marking from the thick center of the beam on one pass and the edge on another, which introduces a small error; always mark the same side of the line
- Forgetting that a laser line becomes wider and fuzzier at long distances
Care and maintenance
Engage the pendulum lock before travel, keep the lens clean with a soft cloth, and store the tool in its pouch. If you drop the unit, check it against a known level surface before trusting it: set it on a flat table, mark the line on a wall, rotate the tool 180 degrees, and mark again. If the marks differ by more than the stated accuracy, stop using it for precision work.
Frequently Asked Questions
Is a green laser level really better than red?
For indoor work in lit rooms, usually yes. Human eyes are more sensitive to green light, so a green line looks brighter and is easier to follow. Red lasers still work well in dim spaces and are often more affordable, so choose based on your lighting.
Do I need a tripod for home projects?
Not always. For hanging frames and mounting shelves on a wall, a magnetic bracket or a flat surface is enough. For floors, ceilings, and long runs, a tripod keeps the tool steady at the right height and saves time.
How accurate does a laser level need to be for hanging pictures?
Very little precision is required. An error of 1/8 inch over 30 feet is far beyond what the eye can detect on a wall-hung frame. Visibility and stability matter more than the last decimal of accuracy.
Can I use a laser level outdoors?
Most lines wash out in direct sunlight. Green beams help, and some tools offer a pulse mode that works with a separate detector to extend range. Use shade or work at dawn and dusk, and confirm the tool’s water and dust protection before outdoor use.
What does self-leveling range mean?
It is the maximum tilt, often around 3 to 4 degrees, within which an internal pendulum can settle the lines to level and plumb. If the tool sits at a steeper angle, the beam usually flashes to tell you the line is not reliable.
How do I check if my laser level is still accurate?
Place it on a flat surface about 10 feet from a wall, mark the horizontal line, rotate the tool 180 degrees, and mark again. If the marks do not match within the stated accuracy, the tool needs service or replacement for precision work.
Is it safe to use a laser level around kids and pets?
Treat it with the same caution as a laser pointer. Keep it out of reach of children, avoid pointing it toward anyone’s eyes, and switch it off when you are not actively marking.
Can a stud finder in a combo tool replace a dedicated detector?
It can help locate studs, but no handheld device is perfect across all walls. Confirm with a small probe hole, and use a dedicated wire detector or shut off power before drilling near possible wiring.
Our Recommendation by Situation
If you want one tool that covers frames, shelves, and light layout work, choose the Fanttik D2. If your weekends involve tile, floors, or long wall runs, step up to a tripod kit: the ASOBRIS for a simple setup, the Motovera if you value brightness control, or the RockSeed Dual Modules for the widest vertical coverage. For mounting heavy items to studs, the PREXISO 2-in-1 simplifies the workflow. For the occasional picture, the standard ruler kit is enough. Whatever you pick, read the product page for beam color, accuracy, and power details, and set aside a minute to check the tool against a known level surface before the first big project.

0 Comments