What's inside
As an Amazon Associate I earn from qualifying purchases. This post may contain affiliate links at no extra cost to you.
The best belt and disc sander combos for small workshops
For a tight workshop, the best belt and disc sander combo is usually a compact 4-by-36-inch belt and 6-inch disc model: it handles most small-shop edge and end-grain work without taking up the space or demanding the power of a larger machine. Choose a 6-by-48-inch belt and 9-inch disc if you regularly sand wider or heavier stock and can spare the bench area; prioritize tilting cast-iron tables when accurate bevels matter more than minimum weight.
Compare the common sizes before choosing
Combo sanders vary less in appearance than in working capacity. Belt width affects how much surface you can sand in one pass, while belt length affects tracking, heat buildup, and the range of replacement belts. A larger disc offers more support for broad workpieces, but it also needs more clearance and typically comes on a heavier machine.
As an Amazon Associate we earn from qualifying purchases at no extra cost to you.

| Typical configuration | Disc diameter | Common motor range | Typical footprint and weight | Best suited to |
|---|---|---|---|---|
| Compact benchtop | 6 in. | About 1/3–1/2 hp | Roughly 18–22 in. long; 20–35 lb. | Small parts, occasional use, limited bench space |
| Mid-size benchtop | 8 in. | About 3/4–1 hp | Roughly 22–27 in. long; 35–55 lb. | Frequent hobby work and larger parts |
| Large benchtop or shop model | 9 in. | About 3/4–1 hp | Often 25 in. or longer; 50 lb. and up | Heavier stock, longer sanding sessions, dedicated bench space |
These are common size and weight bands, not specifications for every model. Check the manufacturer’s dimensions, motor rating, and required working clearance before ordering. A machine that fits on a 20-inch bench may still need several inches behind or beside it for the belt to tilt and for long workpieces to pass safely.
Choose by the work you actually do
- Small parts and occasional repairs: A 4-by-36-inch belt with a 6-inch disc is a sensible starting point. It is easier to store, move, and clamp down, and its capacity is sufficient for many craft pieces, model components, and small furniture parts.
- Furniture components and regular shop use: Consider a 6-by-48-inch belt and an 8- or 9-inch disc. The wider belt supports larger edges, and the longer abrasive path can be more comfortable for repeated work. Allow room for the larger housing and greater weight.
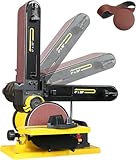
- Frequent bevel and angle work: Look for a sturdy tilting belt table, a tilting disc table, or both, with clear angle markings and positive locking knobs. Cast iron resists vibration and stays rigid, but increases weight; it is a good trade if the machine will remain in one place.
- Shared or temporary workspace: A lighter benchtop model may be preferable if you can bolt or clamp it securely when in use. A portable sander that is not anchored can shift under pressure, reducing control and accuracy.
Useful models to compare
These established product lines illustrate the main trade-offs. Exact configurations and specifications can vary by version or market, so verify the model number and manufacturer’s current listing before purchase.
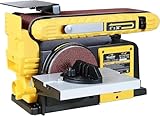
- WEN 4-by-36-inch belt and 6-inch disc sanders: Compact, budget-oriented options for light-duty work. They make sense when price and storage space are priorities, but check table size, belt-tilt range, and how easily the machine can be secured to your bench.
- RYOBI BD4601G: A 4-by-36-inch belt and 6-inch disc format aimed at home-shop use. It is a practical size to compare if you want a familiar benchtop layout without moving up to a larger machine.
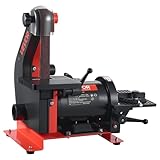
- JET J-4002: A 1-by-42-inch belt paired with an 8-inch disc. Its narrow belt is better for smaller edges and detail work than for broad surfaces, while the larger disc provides a useful sanding face. It is a specialist choice, not a direct substitute for a 4-inch-wide belt.
- Grizzly G1014Z: A larger 6-by-48-inch belt and 9-inch disc combination. It suits a more permanent shop setup and heavier work better than a compact benchtop unit, but demands more floor or bench space and is less convenient to put away.
Horsepower is only one part of the comparison. A larger motor can help a machine maintain speed under load, but a poorly supported table or flexible housing can still compromise accuracy. For a small shop, a rigid machine that fits the work and can be anchored securely is often more useful than a bigger motor you cannot use comfortably.
Check fit, dust collection, and tables before buying
Measure the machine’s full footprint, then add room for the stock you expect to sand. If a belt tilts vertically, confirm that the table and workpiece have clearance throughout the adjustment range. For disc sanding, the table should lock firmly and sit close to the disc without rubbing. A cast-iron table feels stable and resists flex, but may be more cumbersome to reposition than a lighter table.
Dust collection matters in a compact shop, where fine sanding dust quickly spreads across nearby tools. Check whether the sander has separate belt and disc ports, and note their diameters; some setups need an adapter or a splitter to connect both outlets to one collector. Even with collection connected, wear a suitable dust mask and keep the work area clean. Do not sand material with an unknown coating or potentially hazardous dust unless you have identified and planned for the risk.
Also check abrasive availability. A machine with an unusual belt size can become frustrating if replacement belts are hard to source locally. For discs, find out whether the machine uses pressure-sensitive adhesive or hook-and-loop abrasives. PSA discs can be inexpensive, but removing old adhesive takes time; hook-and-loop discs are easier to change but may cost more.
Setup and ownership details that affect accuracy
Before first use, mount the sander firmly, inspect the belt tracking, and check that both tables are square to the sanding surface. Use a reliable square rather than assuming the factory scale is exact. A small error can make a whole batch of parts consistently out of square. Unplug the machine before adjustments, belt changes, or cleaning.
Use the belt for shaping edges and sanding longer surfaces; use the disc for short ends and small parts that can be supported securely against the table. On a disc sander, work on the side moving down toward the table, not the side that lifts the workpiece. Keep the piece moving to avoid grooves, heat marks, and uneven wear. Do not force stock into the abrasive: excess pressure strains the motor and can make a small machine bog down.
Abrasives are the main recurring cost. Fine dust and pitch clog belts and discs, reducing cutting speed and encouraging users to press harder. Clean suitable abrasives with a sanding-belt cleaning stick when the machine is off, and replace worn or damaged abrasives rather than compensating with pressure. Keep vents and dust ports clear; buildup can impair collection and contribute to overheating.
Bottom line
For most small workshops, a 4-by-36-inch belt and 6-inch disc combo offers the best balance of capacity, cost, and footprint. Move to a wider belt and larger disc if your work regularly exceeds that capacity, and choose cast-iron tilting tables when stable angle work is central to your projects. Before settling on any combination belt and disc sander, verify its actual dimensions, belt availability, table adjustments, and dust-port arrangement—not just its advertised horsepower.
0 Comments