What's inside
As an Amazon Associate I earn from qualifying purchases. This post may contain affiliate links at no extra cost to you.
Bondo wood filler is a strong choice for larger, rigid repairs that need to be shaped and painted, but its short working window and hard, inflexible cure make it a poor fit for joints or wood that moves. It is a two-part polyester filler, typically mixed with a small amount of cream hardener. Choose it for missing corners, deep gouges, and damaged trim; choose a flexible or wood-specific filler when the repair must accommodate seasonal movement or remain visible as natural wood.
As an Amazon Associate we earn from qualifying purchases at no extra cost to you.


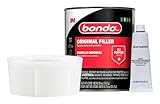
Where Bondo makes sense—and where it doesn’t
The main advantage is that the cured filler can be shaped and sanded rather than simply left as a soft surface patch. That makes it useful for rebuilding a profile or filling a substantial defect before priming and painting. It can also save time compared with making a small replacement part, provided the surrounding wood is sound and the repair is rigidly supported.
- Good fit: exterior or interior painted trim, door and window frames, furniture with a stable painted finish, and larger dents or voids in solid wood.
- Use caution: repairs in thin wood, near end grain, or in a location that flexes. A rigid filler can crack or pull away if the wood moves.
- Usually the wrong choice: open seams, moving joints, large structural losses, or repairs where the finished surface will be stained and expected to look like natural grain.
Bondo is a filler, not a replacement for sound wood or a structural splice. Remove loose, rotten, or delaminated material first. If the defect extends into a load-bearing part, replace or reinforce the wood rather than relying on filler alone.
Mix ratio and working time: follow the product label
“Bondo” covers more than one product, so the exact mix ratio and cure schedule depend on the specific wood filler and hardener package. Follow the current label for that product—not a ratio remembered from automotive filler or another formulation. The amounts are small, and even a modest mismatch can leave filler soft, make it cure unusually fast, or cause an unreliable repair.
As a practical planning guide, expect a short pot life measured in minutes, not a leisurely session. Temperature, batch size, and the amount of hardener affect how quickly the mix becomes unworkable. Prepare the surface, gather a spreader and sanding tools, and portion only what you can apply promptly. Mix on a clean, non-porous surface, scraping and folding until the color and texture look uniform, without whipping in air.
| Decision point | Practical expectation | What to do |
|---|---|---|
| Mix ratio | Set by the specific filler label; do not assume all Bondo products use the same ratio | Measure the filler and hardener as directed and mix thoroughly |
| Working window | Only a few minutes for many two-part polyester fillers; temperature and batch size matter | Prepare the repair first and mix a small batch |
| Initial sanding | Often possible after the mix has cured, commonly within roughly 15–30 minutes under favorable conditions | Use the label’s cure time; do not sand material that still gums up the abrasive |
| Typical abrasive progression | About 80–120 grit for shaping, then 150–220 grit for refinement | Use a firm block on broad faces and lighter pressure near edges |
| Paint preparation | Cured filler is sandable and paintable, but the surrounding substrate still needs preparation | Remove dust, prime as appropriate, and check the finish under side lighting |
Those sanding and timing ranges are working estimates, not substitutes for the package instructions. A cold workspace can slow cure; heat or a large batch can shorten the time available. Avoid adding extra hardener to “make sure” it cures: too much can make the mix set too quickly and complicate application.
Application sequence for a clean, durable repair
- Expose sound wood. Remove loose paint, fibers, rot, and debris. A filler patch cannot anchor reliably to a weak surface. Let damp wood dry before filling.
- Plan the shape. For a deep void or missing corner, use a backing or staged applications if needed. Trying to fill an unsupported cavity in one heavy mound can make shaping harder and leave a weak repair.
- Mix a small batch. Use the specified ratio and blend until the color is even. Keep the spreader ready; once the reaction starts, there is little time to correct a poorly prepared setup.
- Apply slightly proud of the surface. Press the filler firmly into the defect, then leave a small excess for sanding. Avoid smearing it over a large area of surrounding wood, where cleanup and blending become unnecessary work.
- Let it cure, then shape it. Start with a coarse abrasive only when the filler sands to dry dust rather than clogging or dragging. A sanding block helps keep flats flat; use controlled strokes to avoid cutting a hollow into the wood around the patch.
- Refine and inspect. Move to finer grit, brush or vacuum away dust, and inspect from several angles. Pinholes or low spots may need another small application. Let that repair cure before sanding again.
- Prime and paint. Treat the filler as a surface that needs a compatible coating system, not as a finished wood surface. Primer helps even out the repair and reveal imperfections before the topcoat.
How it sands and takes paint
Once fully cured, Bondo-style polyester filler is generally hard enough to shape efficiently. That hardness is useful for rebuilding a crisp edge, but it also means the abrasive can remove surrounding wood quickly. Start with a block and moderate pressure rather than attacking the patch with a power sander. The filler and wood may sand at different rates, so check the profile often.
It is well suited to painted work. After sanding and dust removal, prime the repair using a primer appropriate for the coating and substrate. A thin coat of primer can expose pinholes, ridges, or a visible boundary between filler and wood. Correct those before painting. For a stained finish, the filler is typically a poor visual match: it does not reproduce wood grain, and stain may color it differently from the surrounding timber.
When a different filler is the better buy
| Repair situation | Better starting choice | Reason |
|---|---|---|
| Large void in rigid, painted trim | Two-part polyester filler such as Bondo wood filler | It can be built up, shaped, and sanded for a painted repair |
| Small nail holes or shallow dents | Ready-mixed wood filler or spackling-type repair compound suited to the location | Less mixing and waste; a short cure window is unnecessary for minor defects |
| Exterior seam or joint subject to movement | Paintable flexible sealant or another product specified for joints | A flexible product can tolerate movement better than a rigid filler |
| Natural, stained wood where appearance matters | Matched wood insert, dutchman patch, or grain-matched repair | A filler patch may remain visible after staining |
| Rot or major structural damage | Wood replacement or a repair system specifically rated for the job | Filler alone does not restore the strength of missing or unsound wood |
For a flexible alternative, look for a paintable sealant or filler whose label explicitly allows the intended joint or substrate. Flexible caulk is useful for seams, but it is not a substitute for a sandable compound when you need to recreate a crisp, solid profile. Match the product to the job rather than expecting one filler to handle both tasks.
Ownership realities and common mistakes
The hardener is a consumable, and the mixed material cannot be saved for later. Plan batches around the repair, close containers promptly, and keep tools clean before material cures on them. Avoid mixing on a porous surface that absorbs resin or makes scraping difficult. Because the working time is short, having the repair cleaned and tools ready is more important than buying a larger container than the job requires.
- Too much hardener: shortens working time and can make application stressful; use the stated ratio.
- Too large a batch: can heat and set rapidly. Mix only a manageable amount.
- Filling over weak or damp wood: undermines adhesion. Repair the substrate first.
- Expecting flexibility: the cured patch is rigid. Keep it out of moving joints and flexible assemblies.
- Over-sanding: can dish the softer surrounding wood. Use a block and check the profile frequently.
Bottom line: Buy Bondo wood filler when the repair is substantial, stable, and headed for paint—and when you can work quickly and shape a hard cure. For a tiny blemish, a flexible seam, a stained surface, or damaged wood that still moves, a different repair method will usually produce a more dependable result.
0 Comments