What's inside
- Quick Answer: How Can I Stain or Darken Wood That Has Lacquer on It?
- Identify the Existing Finish First
- Darkening Lacquered Wood: What Each Existing Finish Allows
- Choose the Right Darkening Method
- Clean and Dull the Existing Coat
- Apply the Darkening Color
- Build Color Gradually
- Seal the New Color
- Gel Stain and Prep Picks for Darkening Over an Existing Finish
- Avoid the Common Failures
- Choosing the Color: Match the Undertone, Not the Label
- Troubleshooting Table: Problems When Darkening Over Lacquer
- Is Darkening Over the Existing Finish Better Than Stripping?
- Frequently Asked Questions
- Safety, Cleanup and Drying Times When Darkening Lacquered Furniture
- Related Guides
As an Amazon Associate I earn from qualifying purchases. This post may contain affiliate links at no extra cost to you.
Darkening wood without stripping the existing finish is possible, but the new color must bond to the old surface rather than soak deeply into bare wood. That changes the process. You are adding a compatible colored layer, not applying ordinary penetrating stain to unfinished timber.
The most reliable approach is to clean the finish, lightly abrade it, apply a compatible gel stain or glaze, and protect the result with a clear topcoat. On furniture with an intact film finish, this is usually faster and less destructive than stripping. It also gives you better control over the color.
Updated October 2026 – checked against current manufacturer guidance for gel stains, glazes and topcoats.
Our Top Picks
 Polyurethane Wood Finish Water Based Polyurethane Clear Gloss100 ml1.6 x 1.6 x 4.7 inchesCheck on Amazon
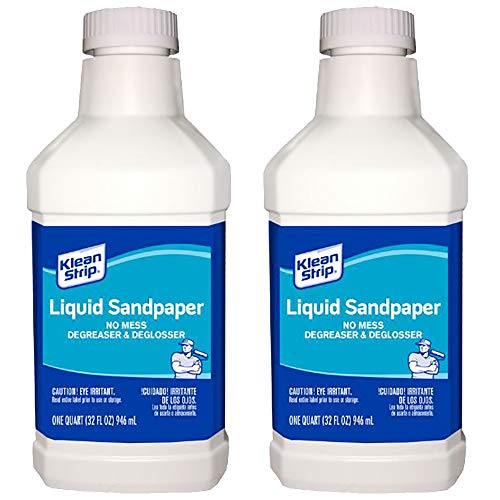 Klean-Strip 2-Pack Quart Easy Liquid Sander Deglosser32 Fl Oz (Pack of 2)7 x 7 x 8 inches2 PoundsCheck on Amazon


Quick Answer: How Can I Stain or Darken Wood That Has Lacquer on It?
To stain or darken wood that has lacquer on it, clean off wax and grease, scuff the lacquer with 320-grit paper until the gloss is gone, wipe on a thin coat of gel stain or glaze, and seal it with a compatible clear coat. Ordinary penetrating stain will not soak through an intact lacquer film.
- Best color product: a brown or walnut gel stain applied in two thin coats.
- Best prep: degrease, then dull the surface; never skip the hidden-spot trial.
- Best topcoat: a clear polyurethane that suits the old coating and the new color layer.
- Not possible: going lighter. Lightening means stripping to bare wood.
Identify the Existing Finish First
Do not skip this step. Wax, silicone polish, oil residue, and some factory finishes can prevent a new coating from sticking.
In an inconspicuous spot, rub the surface with a cotton swab dampened with denatured alcohol. If the finish softens or transfers, it may be shellac. Lacquer thinner can soften lacquer, though it is aggressive and should be used carefully with ventilation. If neither has much effect, the coating may be varnish, polyurethane, or a water-based finish.
You do not need a perfect identification to proceed, but you do need a test area. Apply your proposed cleaner, color product, and topcoat to the underside or another hidden section. Let it dry for at least 24 hours, then scratch it lightly with a fingernail. Peeling, wrinkling, cloudiness, or a soft surface means the combination is unsuitable.
Darkening Lacquered Wood: What Each Existing Finish Allows
Lacquer is a thin film that sits on the wood, so a pigmented layer can grip it once the gloss is removed. The finish underneath changes how much preparation you need and which products behave well.
| Existing finish | Can you darken over it? | Prep that matters most | Watch for |
|---|---|---|---|
| Nitrocellulose lacquer | Yes, with gel stain or glaze | Degrease, then scuff with 320-grit | Strong solvents can soften or wrinkle the film |
| Shellac | Yes, with gel stain or glaze | Wash gently; avoid alcohol-based cleaners | Alcohol dissolves it and smears the color |
| Oil-based polyurethane or varnish | Yes, with oil-based gel stain | Dull fully; hard films resist grip | Slow drying over a glossy film |
| Water-based finish | Yes, with a compatible gel stain | Dull and wipe clean of dust | Solvent-heavy products can cloud it |
| Worn or flaking finish | Rarely | Repair or strip the damaged areas | Patchy color where the film is gone |
If the surface has bare patches, worn arms, or a rough, alligatored film, a pigment layer will highlight the damage rather than hide it. In that case, plan on local repair or full stripping.
How Dark Can You Realistically Go?
Gel stain only moves a piece darker. Expect the old finish color to show through, so a golden oak piece covered with walnut gel stain ends up a warmer brown than the label swatch. A piece that is already medium brown can reach a deep espresso look in two or three thin coats. Lighter, grayer or whitewashed results are not realistic without stripping.
Choose the Right Darkening Method
| Method | Best use | Main advantage | Main risk |
|---|---|---|---|
| Gel stain | Darkening furniture with an intact finish | Builds color without heavy soaking or runs | Can look streaky if overworked |
| Glaze | Adding brown tone or emphasizing detail | Excellent control over color and shading | Usually needs a clear protective coat |
| Tinted clear coat | Small, even color adjustment | Preserves the existing finish beneath | Uneven overlap marks are hard to correct |
| Penetrating stain | Bare or sanded wood | Natural-looking color on exposed fibers | Usually fails to bond or color evenly over finish |
For most projects, a brown or walnut gel stain for furniture is the economical choice. A small container is enough for several chairs or a dresser, and you can apply thin coats. If you only want to shift a pale finish slightly darker, use a tinted water-based or oil-based clear coat instead. That option is less forgiving: every brush stroke adds color.
Clean and Dull the Existing Coat
Remove hardware, drawers, and anything you do not want colored. Wash the surface with a mild degreaser or a suitable furniture cleaner, then rinse with a damp cloth. Avoid soaking veneer, end grain, or joints. Let the piece dry completely.
For waxy or heavily polished furniture, use a stronger solvent-based cleaner according to its label. Work in a ventilated area and keep solvents away from flames. A cleaner that leaves an oily residue is counterproductive.
Once clean, scuff the finish with 320-grit sandpaper or a fine synthetic abrasive pad. Sand just enough to remove gloss. You are not trying to reach bare wood. On flat surfaces, use a sanding block and light pressure; on profiles, a pad follows the shape better. Stop when the surface has an evenly dull appearance.
Wipe away dust with a vacuum and a clean, slightly damp microfiber cloth. Do not use tack cloths containing wax or resin unless the label confirms they are compatible with your coating.
Apply the Darkening Color
Stir the product slowly. Shaking can introduce bubbles. Apply a thin coat with a lint-free cloth, foam brush, or the applicator recommended on the label. Work in manageable sections and keep a wet edge.
Gel stain is usually wiped on, allowed to sit for several minutes, and then wiped back. A longer dwell time produces more color, but it also increases the chance of lap marks. Do not leave thick pools in corners, around moldings, or along panel edges. Those areas may remain soft or wrinkle under the topcoat.
Glaze gives more working time and is useful for darkening routed details, oak pores, and carved areas. It can also create an aged effect, but wiping too aggressively may remove nearly all the color. Use a separate clean cloth for final blending.
Let the first coat dry fully before judging the color. Oil-based products may need 24 to 48 hours; water-based products often dry faster, but follow the label rather than relying on room temperature alone. If it is still cool, tacky, or strongly scented, it is not ready for another coat.
Build Color Gradually
Two thin coats are safer than one heavy coat. The first coat may look uneven while wet and then even out as it dries. Test the second coat on a hidden area before covering the entire piece.
If the color is too warm, a small amount of neutral brown or a cooler dark tone may correct it. Do not attempt major color correction by adding a very dark coat. Dark pigment hides grain and can make the surface look painted. On figured veneer, excessive color can also flatten the visual depth that makes the wood attractive.
For a slightly darker result, a tinted clear wood finish can work over a compatible scuffed surface. Apply it in long, continuous passes and avoid going back over areas that have started to set. This method is best on simple, flat pieces rather than tables with large visible tops.
Seal the New Color
Once the color coat has dried, protect it with a clear finish that is compatible with both the old coating and the new color layer. Water-based polyurethane dries clear and adds little ambering. Oil-based polyurethane adds warmth and can deepen brown tones, but it may yellow lighter colors over time.
Apply two or three thin coats rather than one thick coat. Lightly scuff between coats with 400-grit paper only after the finish has cured enough to sand without dragging. Remove dust before recoating. A water-based clear polyurethane is often the cheaper and cleaner choice for indoor furniture, while oil-based finish remains useful when extra warmth and slightly longer open time are desirable.
Gel Stain and Prep Picks for Darkening Over an Existing Finish
These picks cover the common cases. The two gel stains are thick, pigmented products meant to be wiped or brushed on in thin coats. Confirm the label says it can be used over a prepared, finished surface before you buy.
Minwax Gel Stain, Walnut – Best for a Widely Available Oil-Based Gel
As an Amazon Associate we earn from qualifying purchases at no extra cost to you.
A familiar oil-based gel that suits dressers, chairs and doors where you want a medium-to-dark brown. Its thick body stays put on vertical surfaces and gives you time to wipe back to the depth you want.
- Size: 1 quart
- Color: Walnut
- Type: oil-based gel stain
- Application: wipe or brush on thin, then wipe back
Pros: easy to control; forgiving on vertical surfaces; simple to find. Cons: oil-based drying is slow; strong odor indoors. Skip it if you need a water-based system or very fast recoat times.
General Finishes Oil Base Gel Stain, Antique Walnut – Best for a Richer, Deeper Brown

A professional-leaning gel with strong pigment load, popular for refinishing furniture and cabinets without stripping. It darkens an intact finish noticeably in a single thin coat, which helps when the old color is orange or yellow.
- Size: 1 quart
- Color: Antique Walnut
- Type: oil-based gel stain
- Use: sealed or finished wood, topcoat afterward
Pros: high pigment; good coverage from a small amount; deep color. Cons: costs more per quart; dark pigment hides grain if overapplied. Skip it if you only want a slight shift in tone.
Klean-Strip Easy Liquid Sander Deglosser – Best for Dulling Without Sanding Every Curve
A liquid deglosser is a wipe-on chemical dulling agent. It suits chair spindles, turned legs and carved trim where sandpaper is awkward, and it can follow a light scuff on flat areas. It does not replace degreasing, so wash waxy furniture first.
- Pack: two quart containers
- Type: liquid sander and deglosser, wiped on and wiped off
- Use: remove sheen from varnish, lacquer and enamel before recoating
- Follow the label for ventilation and wipe-off timing
Pros: reaches profiles and tight corners; fast; no sanding dust on detail. Cons: strong fumes; does not smooth scratches or fix peeling areas. Skip it if the piece is thin veneer you are worried about soaking, where a light hand scuff is safer.
Avoid the Common Failures
If the new finish beads up, the surface still has wax, silicone, or grease. Clean it again and lightly abrade it. If the coating wrinkles, the lower layer was not cured or the solvents are incompatible. Stop, let it dry, and test a different product system.
Peeling usually means the surface was too glossy or contaminated. Streaks generally come from applying too much color, working past the product’s open time, or failing to maintain a wet edge. Uneven darkening over veneer can also indicate that the old finish is damaged in some places. In that situation, a localized repair or complete stripping may be the only way to produce a uniform result.
Give the finished piece several days before heavy use. A surface can feel dry while remaining soft underneath. Avoid placing hot dishes, rubber feet, or damp objects on it until the coating has fully cured.
Choosing the Color: Match the Undertone, Not the Label
The old finish acts as a base color under the new layer. Pick the stain by what it does to that base.
- Orange or golden oak: a cool brown or walnut gel calms the orange. Red mahogany shades will turn it redder.
- Red cherry tones: expect them to stay warm; a dark walnut or espresso gel is the way to reduce red.
- Medium brown: any brown gel works; use dark walnut for a much deeper result.
- Pale maple or birch finish: use a tinted glaze or a thin coat of a medium brown to avoid a muddy, blotchy look.
Always place a trial swatch on an underside or back panel and let it dry fully before judging the color. Wet gel stain always looks darker than it will dry.
Troubleshooting Table: Problems When Darkening Over Lacquer
| Symptom | Likely cause | Fix |
|---|---|---|
| Color beads up or crawls | Wax, silicone or oil residue | Wipe with a degreaser, rescuff, reapply thinly |
| Stain wipes off completely | Surface still too glossy | Dull again with 320-grit or deglosser |
| Sticky after a day | Coat too heavy or cool, humid room | Wait longer; wipe back excess early next time |
| Wrinkles or lifts | Solvent attacked the old film | Let it cure, sand smooth, switch product system |
| Streaks and lap marks | Working past open time | Apply a thin second coat, then blend with a clean cloth |
| Color too light | Wiped back too soon | Add another thin coat after full drying |
Is Darkening Over the Existing Finish Better Than Stripping?
For an intact film, usually yes. Stripping a cabinet or dresser takes hours, produces hazardous waste and may expose veneer. Darkening over the old coat takes a weekend of mostly drying time. Strip instead when the finish is cracked, peeling, sticky, or when you want a lighter or natural-wood color.
Frequently Asked Questions
Can you put gel stain over lacquer?
Yes. Clean and dull the lacquer first, then apply thin coats of gel stain and protect it with a compatible clear coat.
Do I need to sand lacquer before staining?
You need to remove the gloss. A scuff with 320-grit paper or a liquid deglosser is enough; reaching bare wood is not necessary.
Will regular wood stain work over lacquer?
No. Penetrating stain needs open wood fibers, so it sits unevenly or wipes off a sealed lacquer film.
How many coats of gel stain does it take to darken wood?
Usually two thin coats. Allow each to dry fully before judging the color or adding another.
Do I need a topcoat over gel stain?
For furniture that sees use, yes. Seal it with polyurethane once the color coat has cured so it does not rub off.
Can I make lacquered wood lighter without stripping?
No. Pigment layers can only add color. A lighter result needs stripping or sanding back to bare wood.
How long should I wait before using the piece?
Allow several days for the topcoat to harden, and avoid heat, damp items and heavy loads for about two weeks to be safe.
Safety, Cleanup and Drying Times When Darkening Lacquered Furniture
Gel stains and deglossers contain solvents, so work with open windows or a fan moving air out of the room, and keep ignition sources away. Wear nitrile gloves and a respirator rated for organic vapors when the label calls for one. Rags soaked with oil-based stain can heat as they dry, so lay them flat outdoors or soak them in water in a sealed metal container before disposal.
Cure time matters as much as application. A surface can be dry to the touch in a day yet stay soft for longer, and pressing on it early leaves fingerprints or permanent dents in the topcoat. Use this pattern as a planning guide, then defer to the product label:
- Day one: clean, dull and apply the first thin coat of gel stain.
- Day two: judge the dried color, then add a second thin coat only if needed.
- Day three or four: apply the first clear coat once the color layer is fully dry.
- Following days: add one or two more thin clear coats, scuffing lightly between them.
- After about a week: light use. Treat it gently until the finish has had time to harden fully.
Cool or humid rooms slow every step, so stretch the schedule rather than rushing a second coat over a tacky one.


0 Comments