What's inside
As an Amazon Associate I earn from qualifying purchases. This post may contain affiliate links at no extra cost to you.
Milk paint can produce a flat, softly aged finish, but it behaves differently from many modern paints. On bare wood, it can soak in and bond without a separate primer. On an old varnished or painted surface, it may bead, scratch off, or chip unpredictably unless you prepare for that. The right approach depends on what is already on the wood and whether you want a durable, even finish or visible wear.
As an Amazon Associate we earn from qualifying purchases at no extra cost to you.

Our Top Picks

Check the existing finish
Start by identifying whether the wood is bare, coated, oily, or contaminated. Look at an unfinished edge or the back of a board. Bare wood usually has a dry, open-grained look; a glossy surface, water beading, or a smooth plastic-like feel suggests a coating. If you cannot tell, test a hidden spot: lightly sand it and see whether dust forms, or dab on a little water. Water that beads is a sign the surface is sealed.
Check old paint for lead if the piece was made before 1978, especially before sanding or scraping. Use an appropriate lead test or hire a qualified professional. Avoid creating dust until you know what you are dealing with. Also look for wax, polish, grease, and silicone. These can cause fish-eye-like bare spots even when the surface appears clean.
Choose how much to remove
You do not always need to strip furniture down to bare wood. If the existing coating is sound, a thorough clean and a light scuff may be enough for a milk-paint-over-finish project. If it is peeling, cracked, or lifting, remove the loose material; paint applied over it will fail with it. For an opaque finish, patchy old color may be acceptable, but a translucent or intentionally worn result will make differences in the substrate more visible.
For a water-based cleaning step, use a mild detergent solution or a dedicated wood-cleaning product, then wipe with clean water and let the piece dry fully. Do not soak veneer, joints, or end grain. A wood cleaner and degreaser is useful for grimy furniture, but an ordinary mild household detergent is often sufficient for lightly soiled wood. Avoid wax-containing furniture sprays, which leave residue.
Prepare bare wood
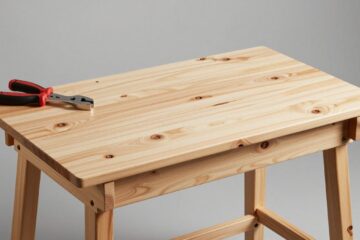
Sand bare wood with the grain, starting with 120- to 150-grit paper for rough boards or mill marks. Move to 180 grit for most furniture surfaces. Going much finer can burnish some woods and reduce absorption, though it may still be suitable if you want a smoother, more even finish. Remove dust with a vacuum and a clean, lint-free cloth; a tack cloth can leave residue on some surfaces, so test it first.
Inspect for glue squeeze-out, especially around joints. Dried glue resists paint and can show up as pale patches. Scrape it away carefully, then sand the area to blend it. If you plan to distress the finish, remember that soft earlywood and hard latewood absorb paint differently, and sanding will not make that natural variation disappear. Pine, oak, and other open-grained species may show texture through thin coats.
Prepare painted or varnished wood
First make sure the old finish is firmly attached. Scrape off loose flakes and sand sharp edges until they taper smoothly into the surrounding surface. For sound paint or varnish, scuff-sand with 180- to 220-grit paper until the gloss is gone. You are creating a mechanical key, not trying to remove every trace of the coating. Vacuum the dust and wipe the surface clean.
Milk paint may bond directly to some prepared finishes, but adhesion is less predictable than on bare wood. If the piece will see regular handling, use a compatible bonding agent or primer according to the paint maker’s instructions, or test the paint system on a hidden area. A milk-paint bonding agent can reduce unintended chipping on slick surfaces. If you want controlled, dramatic chipping, skip it only when the paint maker allows that approach—and test first. Deliberate chipping is hard to reverse without sanding and repainting.
Choose a preparation method
| Surface condition | Preparation | Trade-off |
|---|---|---|
| Clean bare wood | Sand to about 150–180 grit; remove dust | Fast and usually gives the most reliable bond; grain and color variation remain visible. |
| Sound, glossy finish | Clean, scuff-sand to a dull surface, then test adhesion | Less work than stripping, but direct bonding can be less dependable. |
| Peeling or cracked coating | Remove loose finish, feather edges, and stabilize the surface | More labor; painting over loose layers invites peeling. |
| Waxed, greasy, or polished wood | Remove contamination with a suitable cleaner; test before painting | Cleaning may take several rounds. Persistent residue can cause bare spots. |
Fill gaps and protect problem areas
Fill dents and nail holes if you want a smooth, furniture-grade surface. Use a paintable wood filler, let it dry as directed, then sand it flush. Filler may absorb milk paint differently from the surrounding wood, so test it or accept a slight difference in color and texture. For a rustic finish, filling every dent can make the piece look less convincing; deal with structural defects, but leave sound wear marks if you like them.
Knots and resinous areas can bleed through water-based paint. On pine, inspect knots for sticky resin and consider sealing them with a compatible knot sealer before painting. Tannins in woods such as oak can also discolor pale paint, especially when damp. A stain-blocking primer or sealer is the safer choice when a clean, uniform light color matters, though it adds a layer and changes the traditional bare-wood look.
Test before painting
Make a small test patch on the underside or another hidden area, using the same preparation and paint mixture planned for the whole piece. Let it dry for at least 24 hours, then scratch lightly with a fingernail and press adhesive tape onto it and pull the tape back. This is a practical screening test, not a formal coating test, but it can reveal obvious adhesion problems before you commit.
Milk paint is commonly mixed from powder with water. Measure the ratio according to the package and mix thoroughly; lumps and inconsistent batches create a blotchy finish. Let the paint stand for the time the manufacturer recommends, stir again, and keep mixing during use because solids can settle. Once preparation is done, paint a thin test coat and check for beading, crawling, or uneven absorption. If it fails, stop and address the surface rather than adding more coats.

0 Comments