What's inside
As an Amazon Associate I earn from qualifying purchases. This post may contain affiliate links at no extra cost to you.
Our Top Picks
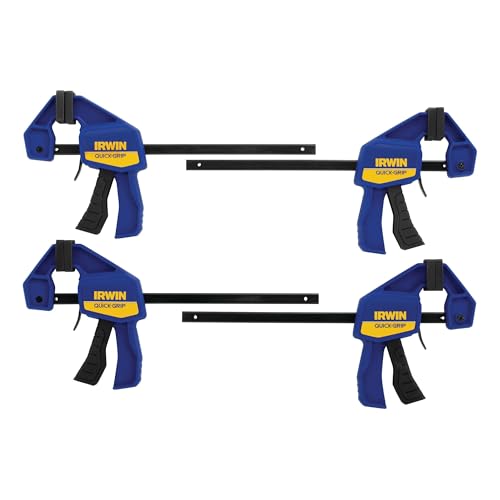 IRWIN Quick-Grip 1964758 One-Handed Mini Bar Clamp 44 Count (Pack of 1)21 x 8 x 2.5 Inches1 poundsCheck on Amazon

What Open Time Means When Gluing Wood Panels
Open time is the period after glue is spread during which you can still assemble, align, and clamp the parts effectively. It is not the same as the product’s total curing time. A wood glue may remain workable for 5 to 10 minutes, then require 30 minutes in clamps and 24 hours before heavy use.
Panel glue-ups are especially sensitive to open time because a wide panel may require several clamps, cauls, biscuits, or alignment adjustments. If the glue skins over before the boards meet, it may not bond properly. If you choose an unnecessarily slow adhesive, the glue can run, the boards can slide, and the project spends longer under pressure.
As an Amazon Associate we earn from qualifying purchases at no extra cost to you.
Choose open time based on the panel’s size, the number of joints, shop temperature, and how quickly you can apply pressure—not simply on the label’s advertised clamp time.
Estimate How Much Time You Need
Start with a dry run. Arrange the boards, check their order, position the clamps, and practice tightening them. Time yourself from the moment glue application begins until the last joint is fully seated and the clamps are applying even pressure. Add a safety margin of at least 50 percent.
For example, if a four-board panel takes you 7 minutes to spread glue and assemble, a product with a 10-minute open time may be marginal. A glue offering 15 to 20 minutes of working time gives you room to correct a bowed board or replace a clamp.
Keep in mind that manufacturers may report open time under controlled conditions. A thin film on well-fitted edges may remain workable longer than a thick bead, but a warm, dry shop can shorten the useful time significantly. Glue spread on end grain also disappears faster than glue spread on long-grain edges.
Account for Temperature, Humidity, and Wood Moisture
Most PVA wood glues work best between roughly 55 and 75 degrees Fahrenheit. At 80 degrees or higher, water evaporates faster and the glue can become tacky before the panel is assembled. At temperatures near 50 degrees, curing slows and some adhesives may not form a dependable bond.
Low humidity speeds drying, while high humidity usually extends it. Wood that has just come from a damp garage may also take longer to release moisture from the glue line. For interior furniture, aim for wood moisture content around 6 to 8 percent, or close to the moisture level the finished piece will experience.
If conditions are hot or dry, use a slower-setting formulation, prepare smaller sections, or have another person help with assembly. Do not thin ordinary wood glue with water to extend open time; that changes the adhesive’s solids content and can weaken the joint.
Match Glue Type to the Panel
| Glue category | Typical working behavior | Best use | Main trade-off |
|---|---|---|---|
| Standard PVA wood glue | Short to moderate open time; often about 5–10 minutes | Indoor furniture and ordinary hardwood or softwood panels | Affordable, but less forgiving during large glue-ups |
| Extended-time PVA | Often about 10–20 minutes, depending on conditions | Wide panels, many joints, and complex clamp setups | Longer clamp time and more sliding are possible |
| Polyurethane glue | Generally longer working time; moisture-activated | Some exterior work and difficult-to-bond materials | Foams, requires careful cleanup, and is not automatically stronger |
| Epoxy | Available from very fast to several-hour working times | Gaps, oily woods, repairs, and special moisture exposure | More expensive, messier, and usually unnecessary for a normal edge joint |
For most indoor edge-glued panels, a standard PVA such as interior wood glue is the sensible starting point. The cheaper option is fine when the panel is narrow, the edges fit well, and you can clamp it in a few minutes.
Choose an extended open-time wood glue when the panel is wide, the boards are difficult to align, or you are working alone. It does not compensate for poor joinery, but it reduces the risk of a partially assembled panel with dry or skinned-over glue.
Let Panel Size Determine the Schedule
A small two-board panel may be assembled with standard glue in under three minutes. A large tabletop, door, or multi-board countertop can take 10 minutes or more, especially when it needs cauls to keep the faces flush. The more joints you have, the more valuable open time becomes.
For panels wider than about 24 inches, divide the work mentally into stages. Prepare every clamp and caul first. Mark the board order with pencil triangles. Set clamps to the approximate spacing—usually 6 to 12 inches apart—and protect the surfaces with packing tape or waxed paper where squeeze-out may contact them.
If the entire panel cannot be assembled inside the glue’s working window, use a faster assembly method rather than simply applying more glue. Apply a thin, even coat with a roller, glue spreader, or small notched applicator. Excess glue adds slide and cleanup without adding useful strength.
Open Time Cannot Fix Bad Edges
Panel edges should meet continuously without visible gaps. A typical edge joint should need only light to moderate clamp pressure. If you must force a large gap closed, the boards may spring apart after curing, regardless of the adhesive’s open time.
Mill or joint the edges cleanly, then remove dust with a dry brush or vacuum. Avoid soaking the edges with water. Sanding end-grain or joint edges aggressively can round them over and create a weaker glue line. For most machined edges, a fresh blade or jointer cut is better than heavy sanding.
Dense or oily species such as teak, ipe, and some rosewoods may require a glue specifically suited to oily wood, along with solvent wiping immediately before assembly if the adhesive manufacturer permits it. Test first: some solvents can drive oils deeper into the surface or leave contamination behind.
Use Clamps Before the Glue Skins Over
Apply enough pressure to close the joints, but do not crush soft wood or squeeze out nearly all the adhesive. A thin, continuous squeeze-out line is a useful sign. If glue is already rubbery when the boards meet, the joint may be weak; scrape it off, clean the surfaces, and start again rather than relying on extra clamp pressure.
Common failures include glue drying on one edge while the rest of the panel is assembled, boards sliding out of alignment, and clamps bowing the panel because pressure is applied only from one side. Alternate clamps above and below the panel, or use cauls across the face. For a glue-up that repeatedly outruns your schedule, use a slower PVA, recruit a helper, or assemble fewer boards at a time.
Test the Glue Before the Final Panel
Before committing expensive lumber, make a small test using the same species, edge preparation, shop temperature, and application method. Spread glue on a scrap joint and check when it becomes tacky or develops a skin. That practical working time is more useful than a label tested in a different climate.
Keep the glue container closed between applications, buy a fresh bottle, and follow the manufacturer’s clamp-time instructions. For a normal interior panel, the best choice is usually the least expensive PVA that gives you enough assembly time with a comfortable margin. Pay extra for extended open time only when your panel size, clamp layout, or working conditions genuinely demand it.

0 Comments