What's inside
As an Amazon Associate I earn from qualifying purchases. This post may contain affiliate links at no extra cost to you.
Pale woods such as maple, ash, birch, white oak, and holly can change dramatically under a clear finish. The wrong product can add a yellow or amber cast, make the grain look muddy, or darken end grain more than the surrounding surface. If you want the wood to stay close to its raw color, product choice and surface preparation matter more than applying a thick coat.
Choose the Right Finish
For the least color change, start with a water-based clear finish labeled “crystal clear,” “non-yellowing,” or “water clear.” Water-based polyurethane and acrylic finishes usually preserve pale wood better than oil-based polyurethane, varnish, or penetrating oils. They dry quickly, have low odor, and clean up with water, although they can raise the grain on the first coat.
Oil-based finishes are easy to apply and often produce a smooth, durable surface, but they add a warm amber tone immediately and continue to yellow with age. That look is attractive on walnut, cherry, and many pine projects. It is usually a poor choice when the goal is to keep maple or birch nearly white.
| Finish type | Effect on pale wood | Best use | Main drawback |
|---|---|---|---|
| Water-based polyurethane | Low color change | Tables, cabinets, trim, furniture | Can raise grain and look slightly bluish or plastic on some woods |
| Water-based acrylic | Very low color change | Decorative projects and light-duty surfaces | May be less resistant to wear than a quality polyurethane |
| Dewaxed clear shellac | Slight warmth; more than water-based finish | Sealing resinous or uneven wood before a topcoat | Alcohol-sensitive and less durable by itself |
| Oil-based polyurethane or varnish | Noticeable ambering | Projects where warmth is welcome | Darkens pale wood and dries slowly |
A product described as “clear” is not automatically colorless. Read the technical sheet if possible, and test the actual finish on an offcut. “Clear” may mean clear after drying compared with an amber alternative, not invisible on white wood.
Prepare and Test the Wood
Sand the surface evenly rather than chasing the highest possible grit. For most furniture, sand through 120, 150, and 180 grit. Stop at 180 or 220 unless the finish manufacturer recommends otherwise. Sanding too fine can burnish the fibers and reduce absorption, while uneven sanding leaves visible patches after the finish wets the wood.
Remove dust with a vacuum and a clean, dry microfiber cloth. Avoid soaking pale wood with a wet rag immediately before finishing. Water can raise the grain, leave mineral marks, or create uneven moisture that affects the first coat. If you use a tack cloth, choose one intended for water-based finishes; some solvent-heavy tack cloths can leave residue.
Make a sample board from the same species and, if possible, include both face grain and end grain. Apply the exact number of coats you plan to use. Compare it with unfinished wood in daylight and under the room’s artificial lighting. This test reveals color change, sheen, grain raising, lap marks, and compatibility problems before they affect the project.
Apply a Water-Based Clear Finish
Use a quality synthetic-bristle brush, a short-nap microfiber roller, or a spray setup. Natural-bristle brushes can become limp in water-based products. Stir slowly; do not shake the can, because bubbles are difficult to remove from a clear coating.
Apply a thin, wet coat with the grain. Do not keep brushing an area after it starts to set. Most water-based finishes need roughly 2 to 4 hours before recoating, but temperature, humidity, and film thickness change that time. Follow the label rather than recoating by the clock alone.
After the first coat dries, lightly sand with 220 or 320 grit to remove raised fibers and dust nibs. Use light pressure—just enough to dull roughness. Sanding through the coating, especially on corners and edges, creates uneven sheen and weak spots. Vacuum the dust, wipe gently, and apply two or three additional thin coats.
For a tabletop or other heavily handled surface, three or four thin coats are generally safer than one or two heavy coats. More finish does not make a poor application better; thick coats sag, trap bubbles, dry slowly, and can look cloudy. Allow the final coat to cure for the label’s stated period before regular use. A finish can feel dry while remaining soft underneath.
Use a Sealer Only When It Solves a Problem
A clear sealer is not required under every water-based topcoat. On clean, sanded maple or ash, applying the finish directly usually gives the least complicated result. A separate sealer can add color, create adhesion issues, and increase the chance of witness lines between coats.
Dewaxed shellac is useful when the wood contains knots, resin, silicone contamination, or unevenly absorbent areas. It can also isolate a questionable old coating. Apply one thin coat, let it dry, and sand lightly before the compatible topcoat. Shellac adds some warmth, so it is not the first choice for keeping nearly white wood completely neutral. If you need this category, compare dewaxed clear shellac sealers.
Do not use an oil-based sanding sealer simply because it sands easily. Its oil content can darken pale wood before the final finish is applied. Likewise, avoid applying water-based finish over wax, uncured oil, or an unknown polish without testing adhesion.
Clear Finishes Ranked by How Much They Change Pale Wood
“Clear” covers a wide range of products, and they do not all behave the same on maple, birch, ash, or white oak. The list below runs roughly from the least color change to the most. Exact results vary by brand and formula, so treat it as a starting point for your sample board rather than a guarantee.
| Finish | Initial color on pale wood | Color change with age | Practical notes |
|---|---|---|---|
| Water-white (CAB-acrylic) lacquer | Almost none | Very low | Solvent-based and usually sprayed; strong fumes, needs real ventilation |
| Pure water-based acrylic | Almost none | Very low | Good on light-use pieces; softer than polyurethane |
| Water-based polyurethane (acrylic-urethane) | Very slight | Low | Best balance of clarity and wear resistance for tables and cabinets |
| Oil-modified water-based polyurethane | Slight warmth | Low to moderate | Marketed for an “oil look”; adds a mild amber tone on purpose |
| Super blond or dewaxed clear shellac | Slight warmth | Low | Useful as a thin sealer; avoid amber shellac on white woods |
| Nitrocellulose lacquer | Slight | Moderate to noticeable | Clear at first but tends to yellow over the years |
| Hardwax oil, Danish oil, linseed or tung oil | Noticeable darkening | Moderate | Wets the fibers and deepens color; some “raw” hardwax versions contain white pigment to offset this |
| Oil-based polyurethane or varnish | Clear amber cast | High | Keeps getting warmer; best saved for darker species |
Two details are easy to miss. First, a water-based product labeled “oil-modified” or “oil-enriched” will look warmer than a standard water-based polyurethane, even though it cleans up with water. Second, any finish that soaks deeply into the wood tends to darken it more than a thin film sitting on top, because it makes the fibers more translucent. That is why a penetrating oil can make maple look a full shade darker before it has even cured.
For most furniture and cabinet work in pale species, a non-yellowing water-based polyurethane in satin is the practical middle ground: it stays close to the raw color, resists everyday wear better than a straight acrylic, and a satin sheen hides minor dust nibs better than gloss.
As an Amazon Associate we earn from qualifying purchases at no extra cost to you.

Why Some Water-Based Finishes Look Cold or Gray
Because water-based finishes add almost no color, some people find that maple or birch looks slightly flat, gray, or “plastic” under them, especially in gloss. Wood normally gets a little depth from the finish, and a truly colorless film removes that. If the result looks lifeless on your sample board, there are three mild fixes: switch to satin or matte, which softens the plastic look; apply one very thin coat of super blond dewaxed shellac first, which adds a hint of warmth without real ambering; or choose a “natural” or “raw wood” water-based finish, which some makers tint very slightly so the surface looks unfinished. Test each option next to raw wood before committing.
Avoid Common Failures
Amber color is usually caused by oil-based resin, oil, or an amber-tinted sealer—not by the wood mysteriously “absorbing too much finish.” Cloudiness usually comes from applying too heavily, working in cold or humid conditions, or using a product outside its recommended temperature range. White patches can indicate moisture trapped in the film.
Raised grain is normal on the first water-based coat and is fixed by light sanding. Brush marks come from overworking, a dry brush, or a finish that is too thick. If the product drags, work in smaller sections and maintain a wet edge instead of adding solvent or water unless the manufacturer specifically allows it.
For a practical buying starting point, look at non-yellowing water-based polyurethane. For a small decorative project with limited wear, a cheaper water-based acrylic can be perfectly adequate. Spend more on a tougher polyurethane for a desk, dining table, cabinet door, or floor-level item where abrasion and spills matter.
Finally, dispose of rags and sanding dust responsibly, and provide ventilation even with water-based products. The safest route to a pale, natural-looking result is simple: sand evenly, test first, apply thin coats, and choose a genuinely non-yellowing finish rather than trying to correct ambering after it happens.
Keeping Pale Wood Light Over Time
Even a perfectly clear finish cannot stop the wood underneath from changing. Light and air slowly alter the lignin and natural extractives in the wood itself. Hard maple and birch drift toward a soft honey tone over the years, pine and spruce yellow noticeably, and white oak and ash warm slightly. The finish only controls the color it adds; the wood still ages on its own.
You can slow the change, but not eliminate it:
- Limit direct sunlight. Ultraviolet light drives most of the change. A piece beside a sunny window will shift faster than one in an interior room.
- Look for UV absorbers. Some premium interior finishes and most exterior finishes include UV-absorbing additives. They reduce the rate of change in the wood under the film, although they do not make the color permanent.
- Avoid amber sealers underneath. A yellow first layer is locked in for the life of the finish, even if the topcoat stays clear.
- Keep the finish intact. Worn spots on tabletops and handles take in dirt and skin oils, which darken bare fibers much faster than light does.
Species Notes for a Natural Look
- Maple and birch: Closed-grain and very sensitive to oil-based finishes. Use water-based polyurethane or acrylic directly on bare wood, and sand evenly, since blotchy absorption shows clearly on these pale surfaces.
- Ash and white oak: Open pores can hold extra finish and look darker than the surrounding wood. Thin first coats help. For a pale, “unfinished” Scandinavian look, a lightly white-tinted raw-wood finish usually works better than a perfectly clear one.
- Pine, spruce, and fir: These yellow on their own over time, so even a water-based finish will not keep them bright forever. Seal knots with dewaxed shellac if resin bleed is a concern.
- Basswood, holly, and poplar: Very pale and soft. Water-based finishes keep them light but raise the grain noticeably, so plan on light sanding after the first coat.
Spray Options for Small Projects
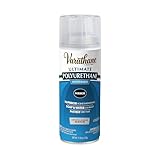
For boxes, picture frames, toys, and turned pieces, an aerosol water-based polyurethane is often easier than a brush. Several light passes from roughly 8 to 12 inches away build a thin, even film without brush marks. Spray in a warm, ventilated area, keep the can moving, and stop before the surface looks wet enough to run. Aerosols cost more per square foot than canned finish, so they make the most sense for small items rather than tabletops.
Frequently Asked Questions
Which clear finish doesn’t yellow?
Water-based acrylic and water-based polyurethane finishes labeled “non-yellowing” or “crystal clear” change pale wood the least, and they stay close to that color as they age. Water-white CAB-acrylic lacquer is similarly clear but is a solvent product usually applied by spraying. Oil-based polyurethane, varnish, and nitrocellulose lacquer all yellow to some degree. Keep in mind that the wood itself can still warm slightly with light exposure.
Does water-based polyurethane darken wood?
Only slightly. Any liquid deepens wood color a little because it makes the surface fibers more translucent, so even water-based polyurethane looks a touch richer than raw wood. The difference is small compared with oil-based finishes, which add an amber tint on top of that wetting effect. A test on an offcut of the same species shows exactly how much change to expect.
How do you keep maple white when finishing?
Sand evenly to 180 or 220 grit, skip any oil-based sealer or stain, and apply a non-yellowing water-based finish directly to the bare wood in thin coats. Choose satin rather than gloss for a more natural look. To keep it pale long term, keep the piece out of strong direct sunlight, because maple slowly turns honey-colored with light exposure regardless of the finish.
Can you put water-based polyurethane over an oil-based stain or finish?
Often, yes, but only after the oil-based product has fully cured, which can take several days or longer depending on the product and conditions. Clean and scuff-sand the surface for adhesion, and test a small area first. The oil-based layer underneath will already have added amber color, so a water-based topcoat will not make the piece any lighter.
Is shellac or water-based polyurethane better for light wood?
For keeping light wood as pale as possible, water-based polyurethane is usually the better choice. Super blond or dewaxed clear shellac adds a slight warm tone and is less resistant to heat, water, and alcohol. Shellac works well as a thin sealer over knots or contaminated wood, with water-based polyurethane on top as the protective layer.
How many coats of clear finish does pale wood need?
Decorative pieces and shelves usually look and perform fine with two or three thin coats. Tabletops, desks, and cabinet doors that get handled daily benefit from three or four thin coats of water-based polyurethane. Thin coats keep the film clear; heavy coats are more likely to look cloudy, trap bubbles, or show a faint milky tint on light wood.



0 Comments