What's inside
- Quick picks by driving situation
- How the leading LED headlight bulb designs compare
- Beam pattern matters more than the lumen label
- Brightness, color temperature and real visibility
- Heat management: the hidden performance limit
- Installation clearance and vehicle compatibility
- Installation steps that prevent the most common problems
- Which is the best LED headlight bulb for you?
- Quick picks by driving situation
- How the leading LED headlight bulb designs compare
- Beam pattern matters more than the lumen label
- Brightness, color temperature and real visibility
- Heat management: the hidden performance limit
- Installation clearance and vehicle compatibility
- Installation steps that prevent the most common problems
- Which is the best LED headlight bulb for you?
As an Amazon Associate I earn from qualifying purchases. This post may contain affiliate links at no extra cost to you.
The best LED headlight bulbs are the ones that produce a controlled beam in your particular reflector or projector, not simply the bulbs with the highest advertised lumen number. For most drivers, the best starting points are a road-legal, vehicle-listed bulb such as the Philips Ultinon Pro6000 Boost or OSRAM Night Breaker LED; for vehicles with limited rear clearance, a compact fanless bulb is usually the safer fit, while high-output fan-cooled bulbs suit drivers who need maximum performance and can tolerate installation complexity.
As an Amazon Associate we earn from qualifying purchases at no extra cost to you.

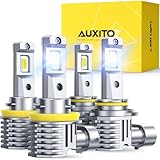

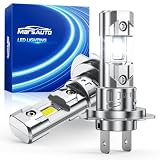
Quick picks by driving situation
| Situation | Best bulb type | Why it fits | What to check first |
|---|---|---|---|
| Legal road use and OEM-style beam | Vehicle-approved LED replacement | Better documentation, controlled color and more predictable optics | Exact vehicle, headlamp approval and bulb designation |
| Small headlamp housing | Compact fanless LED | Fewer moving parts and less rear clearance required | Heat-sink diameter, dust-cap clearance and thermal derating |
| Maximum brightness on dark rural roads | Fan-cooled high-output LED | Larger thermal system can sustain higher power | Fan noise, controller location and weather protection |
| Older car with bulb warnings | CANbus-compatible LED or separate decoder | Reduces flicker and dashboard error messages | Whether the decoder is approved for enclosed engine-bay use |
| Frequent long-distance driving | Durable branded bulb with replaceable or protected electronics | Better heat management and more consistent output over time | Warranty, thermal protection and replacement availability |
How the leading LED headlight bulb designs compare
Popular road-oriented choices include the Philips Ultinon Pro6000 Boost, OSRAM Night Breaker LED and compact fanless replacement bulbs from established automotive-lighting manufacturers. These products should be compared by design rather than by marketing lumens alone. A bulb rated at 6,000 raw lumens does not necessarily illuminate the road better than one rated at 4,000 lumens if its LED chips sit in the wrong position or its reflector creates glare.
| Bulb design | Typical measured priorities | Color temperature | Cooling | Rear clearance | Noise |
|---|---|---|---|---|---|
| Vehicle-approved premium LED | Beam control first; useful hotspot commonly about 1.3–2.0 times a worn halogen in a suitable housing | About 5,800–6,500 K | Passive heat sink or compact fan | Typically 35–60 mm, depending on cap and adapter | Silent to low |
| Compact fanless LED | Often strong center illumination but more output loss as temperature rises | About 6,000–6,500 K | Aluminum heat sink or braided copper straps | Often 25–45 mm | Silent |
| High-output fan-cooled LED | Potentially the highest sustained lux when the fan has unobstructed airflow | About 5,500–6,500 K | Fan and finned heat sink | Often 45–75 mm, plus controller space | Low hum; may be audible at idle |
| Oversized “maximum lumen” bulb | High raw output but inconsistent beam and greater glare risk | Often 6,000–6,500 K | Large fan or heat sink | 60–90 mm or more | Moderate to noticeable |
These figures are useful comparison ranges, not a guarantee for every bulb or vehicle. Road illumination should be measured at the same wall distance and mounting height, with the cutoff and hotspot recorded separately. A simple lux reading at the brightest point can hide excessive foreground light, dark shoulders or glare above the cutoff.
Beam pattern matters more than the lumen label
Halogen headlamps position a small filament at a precise focal point. An LED replacement must imitate that geometry with narrow chips placed at the correct height and orientation. If the chips are too thick, too far apart or rotated incorrectly, the reflector may create a fuzzy cutoff and bright patches in oncoming drivers’ eyes.
For a useful comparison, park on level ground facing a wall 7.5 metres away. Mark the headlamp centerlines and measure the cutoff height before changing bulbs. After installation, the beam should retain a sharp horizontal cutoff, with the appropriate upsweep for the side of the road on which you drive. If the new bulb produces scattered light above the cutoff, do not solve the problem by aiming the headlamps downward; refit, rotate or replace the bulb.
Brightness, color temperature and real visibility
Most modern LED headlight bulbs use a cool-white color around 5,700–6,500 K. This can look brighter than a 3,200 K halogen, but a bluer bulb is not automatically better in rain, fog or snow. Very high color temperatures can produce more distracting reflections from wet pavement and airborne moisture.
For normal mixed driving, approximately 5,500–6,000 K is a sensible compromise. Measure usable illumination at several points rather than relying on a single peak: directly ahead, near the cutoff, at the road edges and 25–50 metres down the lane. A bulb that increases the center reading by 50 percent but loses the shoulder may be less useful on an unlit bend.
Heat management: the hidden performance limit
LEDs are efficient, but they still convert substantial electrical energy into heat at the circuit board and emitter. That heat must move through the bulb body into the surrounding air. In a sealed headlamp, a fanless bulb can become thermally limited, reducing output after several minutes. A fan-cooled design may maintain brightness better, but only if its intake is not blocked by the dust cap.
- Passive aluminum heat sinks: silent and reliable, but they need open space and airflow.
- Braided copper straps: compact and flexible, although they can be difficult to position without touching wiring or the dust cap.
- Fans: useful for sustained output, but vulnerable to dust, moisture and bearing wear.
- Thermal throttling: a desirable safety feature that lowers output rather than allowing damaging temperatures.
The component most likely to wear first in a fan-cooled bulb is usually the small fan bearing, not the LED emitter. A buzzing fan, intermittent start-up or output that falls after warm-up indicates a cooling problem. Keep the original dust cap installed whenever possible; removing it may improve airflow briefly but allows moisture and contamination into the optical chamber.
Installation clearance and vehicle compatibility
Before buying, identify the exact socket: common examples include H4, H7, H11, 9005 and 9006. The socket alone is not enough. Some vehicles use a retaining wire, others use a twist-lock adapter, and some require an external CANbus decoder. Projector and reflector headlamps also respond differently to the same bulb.
Measure the available space from the bulb mounting face to the dust-cap interior. Then allow room for the connector and any driver module. For example, if the measured depth is 52 mm and the bulb plus connector requires 48 mm, the nominal 4 mm clearance may not be adequate because vibration can force the connector into the cap. A practical target is at least 8–10 mm of free space around moving fan components and wiring.
Some vehicles monitor bulb current and report a failure when an LED draws less power than a halogen. A CANbus-ready bulb may prevent this, but no compatibility label guarantees that it will work on every model year. External resistors can generate considerable heat and should never be tucked against plastic, insulation or wiring.
Installation steps that prevent the most common problems
- Confirm legality and fitment. Check the vehicle-specific compatibility list and whether LED retrofits are permitted for the headlamp in your jurisdiction.
- Photograph the original beam. Record the cutoff and centerline on a wall before removing the halogen bulb.
- Inspect the adapter. The locking tabs must seat fully; a bulb that can rotate after installation will not produce a reliable beam.
- Orient the LED chips correctly. In many reflector applications, the emitting surfaces should face left and right, but follow the manufacturer’s instructions for the specific bulb.
- Protect the cooling system. Route the driver and wiring away from the fan intake, hot engine parts and moving belts.
- Recheck the beam after warm-up. Let the lights run for 10–15 minutes, then inspect for flicker, fan noise, thermal dimming and a changed cutoff.
- Aim the headlamps. Even a correctly installed bulb can require final adjustment after replacement.
Which is the best LED headlight bulb for you?
Choose a vehicle-approved premium bulb such as the Philips Ultinon Pro6000 Boost or OSRAM Night Breaker LED when beam control, documentation and dependable daily use matter most. Choose a compact fanless design when the dust cap is shallow or silence is essential, accepting that sustained output may be lower. Choose a fan-cooled high-output bulb only when the housing has sufficient clearance and you regularly drive on dark roads where its thermal advantage can be maintained.
Avoid choosing solely from the largest lumen claim. The better purchase is the bulb that fits without forcing the dust cap open, places its LEDs at the correct focal point, maintains a clean cutoff and remains compatible with the vehicle’s electrical monitoring. After installation, verify the beam on a wall and have the headlamp alignment checked if glare or uneven illumination remains.
0 Comments