What's inside
As an Amazon Associate I earn from qualifying purchases. This post may contain affiliate links at no extra cost to you.
The best bike power meter for most riders is a dual-sided pedal meter such as Favero Assioma DUO or Garmin Rally RS/XC/RK, while a crank-arm meter is the better-value choice for riders who want simple, low-cost training data and a spider meter is the strongest choice for consistent total-power measurement across hard efforts.
As an Amazon Associate we earn from qualifying purchases at no extra cost to you.


Quick picks by riding situation
| Rider situation | Best power-meter type | Why it fits | Typical market range in 2026 |
|---|---|---|---|
| Lowest sensible cost | Single-sided crank arm | Easy installation and long battery life; usually measures left-leg power and doubles it | $300–$500 |
| Several bikes or uncertain fit | Pedal | Moves between bikes in minutes and avoids crank, bottom-bracket, and chainring compatibility problems | $650–$1,100 |
| Best consistency for structured training | Spider | Measures power from both legs together at the drivetrain and is less affected by left-right imbalance | $500–$1,100 |
| Maximum drivetrain integration | Dual-sided crank | Clean installation and independent left/right data without pedal-stack changes | $700–$1,500 |
| Existing compatible wheel or older race bike | Hub | Historically robust and wheel-based, but modern replacement and service options are limited | $150–$600 used or legacy |
Crank, spider, pedal, or hub: what actually changes?
Crank-arm power meters
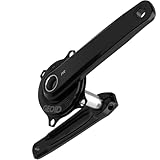
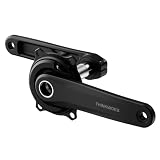
A crank-arm meter measures strain in one crank arm, normally the left, then estimates total power by doubling that reading. Models such as the 4iiii Precision 3+ and single-sided Stages units are compact and relatively affordable. Many use a replaceable coin cell or rechargeable battery, and advertised accuracy is commonly around ±1% to ±1.5% under suitable conditions.
The important limitation is the estimation method. If your left leg produces 48% of your total power, doubling the left side gives a result about 4% below your actual total. That difference may remain stable enough for tracking your own training, but it can make comparison with a smart trainer or another meter confusing. Single-sided meters are therefore best for riders who value trend data over laboratory-level left-right detail.
Installation is usually simple: remove the original crank arm, fit the instrumented arm, set the correct crank length in the head unit, and perform a zero offset. Check clearance around the frame and chainstay before buying.
Spider power meters
A spider meter sits between the crank and chainrings and measures torque transmitted through the drivetrain. Power2Max NG and NGeco, Quarq DZero, and SRAM Force AXS power-meter cranksets are examples of this approach. Because both legs contribute to the torque measured at the spider, a spider meter reports total drivetrain power without assuming a 50/50 split.
Spider meters are especially attractive for riders with one main bike, frequent interval sessions, or a need for repeatable numbers across left-right imbalances. Their weaknesses are installation and compatibility. You must match the crank interface, chainring bolt pattern or direct-mount standard, bottom-bracket configuration, chainline, and sometimes the number of speeds. Changing chainrings can also require buying a compatible ring or recalibrating the system.
Pedal power meters
Pedal meters place the strain gauges in the pedal axle or body. Favero Assioma UNO and DUO, Garmin Rally RS, RK, and XC families, and SRM X-Power are well-known examples. Their major advantage is portability: move the pedals to another bike, set the crank length, zero them, and ride.
Pedals also provide the clearest route to independent left-right measurement. Dual-sided models measure each pedal separately; single-sided versions estimate total power in much the same way as a single crank arm. Pedal systems can add height to the pedal stack, so your saddle may need a small adjustment. Their bodies, cleats, bearings, and impact surfaces are also exposed to more damage than an enclosed crank or spider sensor.
Hub power meters
Hub meters measure torque at the rear hub and were once a popular solution because the sensor was protected inside the wheel. PowerTap hubs are now primarily a legacy or second-hand consideration rather than the obvious modern purchase. A hub meter is tied to a wheel, and wheel choice affects its usefulness: a training wheel with a hub meter cannot automatically follow you onto every race bike.
Hub measurements also represent power after drivetrain losses. A hub reading can be a little lower than a crank or spider reading, so comparing different locations requires a consistent reference. Before buying a used hub, confirm replacement bearings, battery access, firmware support, freehub-body compatibility, and whether your head unit can still pair with its ANT+ or Bluetooth signal.
Head-to-head specifications
| Category | Representative example | Accuracy claim | Battery or runtime | Key ownership consideration |
|---|---|---|---|---|
| Single crank arm | 4iiii Precision 3+ | Up to approximately ±1% | Up to about 550 hours, depending on configuration | Very long battery life, but total power is estimated from one side |
| Dual crank arm | Stages Power LR-type system | Commonly around ±1.5% | Often about 200 hours on replaceable batteries | Requires exact crank and frame compatibility |
| Dual pedal | Favero Assioma DUO | Up to approximately ±1% | About 50 hours per charge | Moves easily between bikes; rechargeable batteries are integrated |
| Dual pedal | Garmin Rally RS/XC/RK family | Up to approximately ±1% | About 120 hours with replaceable batteries | Pedal-body and cleat system must suit your shoes |
| Spider | Power2Max NG | Typically around ±1% | Often hundreds of hours on a replaceable battery | Excellent total-power measurement, but model-specific fit is crucial |
| Hub | PowerTap G3, legacy | Historically around ±1.5% | Roughly 200 hours, depending on battery and condition | Service and firmware support may be harder to obtain |
These are representative manufacturer specifications, not a guarantee that every unit will achieve them in every temperature, cadence, or installation. A correctly installed meter with stable firmware is more valuable than a theoretical accuracy difference of a few tenths of a percent.
Accuracy, calibration, and left-right balance
All power meters need a zero offset, often called a calibration, before important testing or racing. Zeroing does not make the meter “learn” your FTP; it tells the sensor what no-load torque currently looks like. Unclip or stop pedaling, keep the crank in the manufacturer’s recommended position, and use the head unit’s calibration command. Do this after the bike has reached outdoor temperature, particularly when moving from a warm room into cold air.
Temperature compensation matters because strain gauges change behavior as they warm or cool. Most current meters compensate automatically, but a brief 10-minute ride before a maximal test is still sensible. Do not calibrate while leaning heavily on the bike, applying pressure to a pedal, or spinning the wheel on a repair stand unless the instructions specifically permit it.
For left-right balance, dual pedal and dual crank systems show separate contributions, but the numbers are not identical measurements of muscular strength. They can be influenced by pedal smoothness, phase timing, cleat position, and the way the meter divides force around the crank rotation. Use the balance field to identify repeatable changes, not to chase a perfect 50/50 display.
Compatibility checklist before purchase
- Crank length: set the exact length in the head unit. A 172.5 mm crank entered as 170 mm introduces a systematic error.
- Crank interface: check Shimano Hollowtech II, SRAM DUB, 30 mm, 24 mm, or proprietary interfaces before choosing a spider or crankset.
- Chainrings: verify BCD, direct-mount style, tooth count, speed, and whether the meter requires matched rings.
- Pedal clearance: measure possible contact with the crank, chainstay, frame, and shoe. Confirm the cleat standard, such as Look Kéo or Shimano SPD-SL.
- Head-unit support: ANT+ and Bluetooth support is common, but advanced cycling dynamics or balance fields may require a compatible computer.
- Charging and batteries: rechargeable pedals reduce coin-cell waste, while replaceable batteries are easier to revive during travel.
Installation and ownership realities
For a first power meter, pedals are usually the least disruptive installation: torque them correctly, enter crank length, zero offset, and check that the left and right pedals are assigned correctly. A crank-arm unit is also approachable, but incorrect bolt torque or a missing spacer can affect readings and create a safety problem. Spider and crankset meters are best fitted with the correct torque wrench and manufacturer instructions.
The parts that wear first are normally not the strain gauges. Pedal bearings, cleats, pedal bodies, crank bolts, chainrings, and batteries need attention. Keep pedal meters clean with a damp cloth rather than a pressure washer; water forced past seals can damage bearings and electronics. Replace cleats when release becomes inconsistent or excessive float develops. Inspect crank-arm clearance after changing wheels, tires, or bottom-bracket parts.
As a simple value calculation, a $750 pedal meter used for 150 rides per year over four years costs about $1.25 per ride before battery or cleat replacement. A $350 single-sided crank meter used on one bike may be the better purchase if you never change bikes; the cheaper purchase is not better if moving it would require a second crank or if your left-right balance changes substantially between easy and hard efforts.
Final recommendation
Choose a single-sided crank-arm meter for affordable, repeatable training trends on one compatible bike. Choose a dual-sided pedal meter when portability, easy installation, and left-right data matter most. Choose a spider meter for the most dependable total-power measurement and a permanent performance setup. A dual-sided crank meter makes sense when you want integrated hardware and already know your crank and bottom-bracket compatibility. Choose a hub meter only when its wheel-specific design solves a particular need and you have verified current service support.
0 Comments