What's inside
As an Amazon Associate I earn from qualifying purchases. This post may contain affiliate links at no extra cost to you.
Wood Putty vs. Wood Filler: The Quick Answer
Choose wood filler for repairs you need to sand, shape, or stain—especially indoors—and choose wood putty for small, finished-surface touch-ups where flexibility and easy application matter. For exterior repairs, use a product specifically labeled for outdoor exposure; “putty” or “filler” alone doesn’t guarantee weather resistance. If the damaged area may expand or shift, neither rigid product is ideal: use a paintable exterior sealant for a joint, or replace the damaged wood if it is structurally compromised.
The names aren’t used consistently across brands, so check the label for intended location, paintability, stainability, sanding instructions, and movement tolerance. The practical difference is usually that fillers cure hard and can be sanded, while many putties stay softer and are meant for filling small defects after finishing.
As an Amazon Associate we earn from qualifying purchases at no extra cost to you.


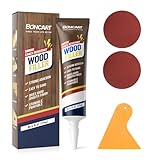
Wood Filler vs. Wood Putty: Head-to-Head
| Decision factor | Wood filler | Wood putty |
|---|---|---|
| Typical use | Holes, dents, chips, and defects that need shaping | Small nail holes and surface touch-ups, often after finishing |
| After application | Usually hardens; many types can be sanded | Often remains more pliable; many types are not designed for sanding |
| Staining | Some products accept stain, but color and absorption may differ from surrounding wood | Often sold in premixed colors for matching finished wood; usually not a stainable repair |
| Movement | Hard filler can crack or separate if the wood moves | Some putties tolerate minor movement better, but aren’t substitutes for joint sealant |
| Location | Depends on formulation; choose an exterior-rated type outdoors | Many are intended for interior furniture or trim; verify the label before outdoor use |
These are common tendencies, not universal rules. Water-based, solvent-based, two-part, and oil-based formulas behave differently, and a manufacturer’s instructions take precedence over the product category.
Choose by the Repair
For a repair you’ll sand or reshape: filler
Use a sandable wood filler for a dent in unfinished trim, a chipped edge, or a screw hole that needs to disappear under paint. Apply a little more than the surface requires if the label allows, let it cure fully, then sand it flush. A hard filler can be shaped, but it may not flex along with a moving board.
For deep voids, check the product’s maximum fill depth and whether it requires layering. A surface that feels dry can still be soft underneath, so sanding too early may pull the repair out or leave a dip.
For a small touch-up on finished wood: putty
Putty is often the convenient choice for pinholes in stained furniture or finished trim. Premixed shades can blend into the surface without sanding away the surrounding finish. It is best for shallow cosmetic defects, not a missing corner, a loose joint, or a large hole that needs rebuilding.
Because many putties remain soft, they can collect dust or smudge if handled before they set. Follow the label’s cleanup and cure guidance, and test the color in an inconspicuous spot: a close-looking color in the tub can look different against the actual finish.
For staining: test the repair before committing
If the wood will be stained, select a filler explicitly labeled stainable—but don’t expect an invisible match. Filler and solid wood absorb stain differently, and a filled patch may end up lighter, darker, or more uniform than the grain. Test on scrap from the same wood, or on a hidden section, using the same stain and finish schedule. For a prominent defect, a carefully fitted wood patch may blend better than filler.
For outdoor damage or a moving gap: choose by exposure and movement
Exterior-rated filler can work for a stable, localized defect, such as a small hole in sound wood, if it is protected with the specified primer and paint or other finish. It is not automatically suitable for a seam that opens and closes with seasonal movement. A rigid repair in a changing gap can crack and let water in.
For a joint between boards, use an exterior sealant intended to accommodate movement, not ordinary wood putty or a hard filler. If the wood is soft, rotten, or decayed, remove and replace the damaged material rather than covering it; filler cannot restore strength to unsound wood.
A Practical Buying Matrix
| Your situation | Best starting choice | Why |
|---|---|---|
| Indoor, unfinished wood; defect needs sanding | Sandable wood filler | It cures hard enough to level and shape |
| Finished furniture; tiny nail or pin hole | Color-matched wood putty | Allows a small cosmetic repair without sanding the finish |
| Stained project; visible repair | Stainable filler, tested on scrap | Gives you a chance to evaluate the color before applying it to the project |
| Exterior, stable hole in sound wood | Exterior-rated filler | Formulated for outdoor use when finished as directed |
| Exterior seam or gap that moves | Paintable flexible exterior sealant | Designed to stretch with a joint rather than remain rigid |
| Large missing section or rotted wood | Wood patch or replacement | A cosmetic filler is not a reliable structural repair |
How Much Does a Small Repair Really Use?
For a rough estimate, calculate the volume of a simple hole: width × height × depth. A hole 1 inch wide, 1 inch long, and 1/4 inch deep holds about 0.25 cubic inch of filler. Five holes of that size need about 1.25 cubic inches before allowing for waste, overfilling, or product shrinkage. This is only a planning estimate; irregular defects and deeper repairs use more, and package coverage varies by formula.
For occasional indoor touch-ups, a small tub or tube is usually easier to store than a large container that may dry out. For repeated repairs, compare the label’s coverage and storage instructions, not just the package size. Keep the rim clean and seal the container tightly: dried material around the lid can prevent a good seal and shorten the product’s usable life.
Application Details That Prevent Rework
- Start with sound, clean wood. Remove loose fibers, dust, grease, and flaking finish. Filler applied over dirt or weak paint may detach with the surface.
- Match the product to the finish plan. Decide whether you’ll paint, stain, or leave the wood finished before buying; products are not interchangeable on this point.
- Respect depth and cure time. Follow the label for maximum thickness, layering, drying conditions, and sanding. Cold, humidity, and a deep fill can extend the wait.
- Don’t force rigid filler into a working joint. If the gap changes width, a hard patch is likely to crack or pull away.
- Protect exterior repairs. Apply the recommended primer and topcoat, and address the source of moisture. A weather-rated product still needs the specified protection.
Bottom Line
Buy wood filler when you need a hard, sandable repair; buy wood putty for a small cosmetic touch-up on finished wood. For staining, choose a product labeled stainable and test it first. Outdoors, verify the rating and finish requirements—and for gaps that move, choose a flexible exterior sealant instead. The best answer to “wood putty vs wood filler” depends less on the name on the tub than on what the repair must do after it dries.
0 Comments