RP Woodworks

  • Home
  • Reviews
  • Projects
  • Tools
  • Woodworking Techniques
  • About

Sanding & Surface Prep

Sanding schedules, abrasives, grit choice and surface prep that decide how good a finish can look.

AI-generated editorial illustration of sandpaper
Sanding & Surface Prep

How to Choose Sandpaper Grit for Bare Hardwood

Choosing sandpaper grit for bare hardwood is less about making the surface as smooth as possible and more about removing the right defect without creating a new one. Start too coarse and you can leave scratches that remain visible after stain or finish. Start too fine and you may polish Read more

By , 1 weekSeptember 25, 2026 ago
AI-generated editorial illustration of sandpaper
Sanding & Surface Prep

How to Sand Wood Veneer Safely by Hand

Wood veneer is a thin layer of real wood, often less than 1 mm thick. That leaves very little room for aggressive sanding. A solid-wood panel can tolerate a missed spot or a deep scratch; veneer can expose its substrate in seconds. The safest approach is to use sanding mainly Read more

By , 1 weekSeptember 25, 2026 ago
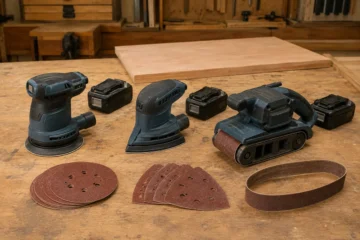
Editorial illustration: orbital, detail and belt sanders with matching abrasive shapes.
Sanding & Surface Prep

How to Sand Wood with a Detail Sander Without Gouging

A detail sander is useful for corners, profiles, small repairs, and furniture parts that a full-size random orbital sander cannot reach. Its small triangular pad also makes it easier to concentrate pressure in one spot, which is exactly why it can gouge wood. The safest approach is to use light Read more

By , 1 weekSeptember 25, 2026 ago
AI-generated editorial illustration of sandpaper
Sanding & Surface Prep

How to Repair Split End Grain Before Sanding

Split end grain is common on boards cut across the fibers, especially at the ends of shelves, legs, rails, and glued-up panels. The damage may look minor, but sanding over an open split usually makes it wider, rounds the edges, and leaves a visible dark line under stain or paint. Read more

By , 1 weekSeptember 25, 2026 ago
AI-generated editorial illustration: five wooden board samples showing different grain textures and colors.
Sanding & Surface Prep

How to Smooth Saw Marks on Rough-Sawn Lumber

What Causes Saw Marks on Rough-Sawn Lumber? Rough-sawn lumber comes directly from the sawmill, so its faces may have ridges, washboarding, torn grain, and shallow grooves left by the blade. These marks are often more pronounced near the board’s edges or where the saw fed unevenly. The wood species matters: Read more

By , 1 weekSeptember 25, 2026 ago
AI-generated editorial illustration: five wooden board samples showing different grain textures and colors.
Sanding & Surface Prep

How to Prepare Newly Milled Lumber for Indoor Finishing

Why Newly Milled Lumber Needs Preparation Newly milled lumber is not automatically ready for stain, paint, or clear finish. Even boards that look smooth may have planer marks, compressed fibers, torn grain, pitch, machining lubricant, or uneven moisture content. If you finish too soon, the boards can shrink, swell, twist, Read more

By , 1 weekSeptember 25, 2026 ago
AI-generated editorial illustration: five wooden board samples showing different grain textures and colors.
Sanding & Surface Prep

How to Remove Mill Marks from Hardwood Boards

Mill marks are the shallow ridges, scallops, and wavy lines left by planer knives, jointer knives, or a dull saw blade. They may be hard to see on bare wood, then become obvious after stain or finish darkens the grooves. The reliable fix is to flatten the surface first, then Read more

By , 2 weeksSeptember 25, 2026 ago
AI-generated editorial illustration: five wooden board samples showing different grain textures and colors.
Sanding & Surface Prep

How to Prepare Reclaimed Lumber with Embedded Fastener Marks

Reclaimed lumber with old nail and screw marks can make excellent shelves, tabletops, trim, and wall panels. Those holes are also where preparation goes wrong. A fastener mark may contain rust, grit, loose fibers, broken screw tips, or hidden nails that can damage planer knives and sanding discs. The goal Read more

By , 2 weeksSeptember 25, 2026 ago
AI-generated editorial illustration of sandpaper
Sanding & Surface Prep

How to Clean Wood After Sanding Without Raising Grain

After sanding, wood is covered with fine dust that can ruin stain, paint, and clear finishes. The safest cleaning method is mostly dry: remove the dust without adding water or aggressively rubbing the surface. Water is what raises the grain, especially on open-pored or porous species such as oak, ash, Read more

By , 2 weeksSeptember 25, 2026 ago
AI-generated editorial illustration of sandpaper
Sanding & Surface Prep

How to Prevent Sandpaper from Loading on Painted Wood

Sandpaper loads when paint, primer, or sanding dust fills the abrasive surface instead of cutting cleanly. The paper then feels slick, leaves shiny streaks, and generates more heat. On painted wood, loading is usually caused by soft or under-cured coating, sanding too aggressively, using too fine a grit too soon, Read more

By , 2 weeksSeptember 25, 2026 ago

Posts pagination

Previous 1 … 3 4 5 … 12 Next
Recent Posts
  • Best Woodworking Clamps: Which Types to Buy and How Many You Need
  • Best Pocket Hole Jigs in 2026: Kreg, Massca and Milescraft Compared
  • Best Dovetail Jigs: Fixed, Multi-Template and Variable-Spacing Options Explained
  • Best Compact Wood Routers: Corded vs Cordless Picks for Edge Work and Trimming
  • How to Repair a Wood Split Caused by a Screw (Even in Thin Teak)
Recent Comments
No comments to show.
Archives
  • October 2026
  • September 2026
Categories
  • Clear Coats & Topcoats
  • Finish Problems & Fixes
  • Gift Guides
  • Grain Filling & Sealing
  • Guides
  • Oils & Waxes
  • Painting & Priming
  • Sanding & Surface Prep
  • Shop Setup & Safety
  • Staining & Dyes
  • Tool Troubleshooting
  • Tools
  • Wood Finishing
  • Wood Species & Lumber
  • Woodworking Techniques
Hestia | Developed by ThemeIsle