What's inside
- Best Beginner Telescopes for Clear Night-Sky Views
- Quick comparison of strong beginner choices
- Which telescope matches your viewing situation?
- Aperture: how much difference does it make?
- Refractor versus reflector for a first telescope
- Mount stability and setup time matter more than expected
- Eyepieces and realistic magnification
- Ownership realities: what wears first?
- Final buying advice
- Best Beginner Telescopes for Clear Night-Sky Views
- Quick comparison of strong beginner choices
- Which telescope matches your viewing situation?
- Aperture: how much difference does it make?
- Refractor versus reflector for a first telescope
- Mount stability and setup time matter more than expected
- Eyepieces and realistic magnification
- Ownership realities: what wears first?
- Final buying advice
As an Amazon Associate I earn from qualifying purchases. This post may contain affiliate links at no extra cost to you.
Best Beginner Telescopes for Clear Night-Sky Views
The best beginner telescopes are usually a 70–130 mm refractor or reflector on a stable alt-azimuth mount: choose a compact 80 mm refractor for quick, low-maintenance viewing, a 114–130 mm tabletop reflector for the most light-gathering power per dollar, or a 130 mm reflector on a full-height mount if you want easier standing-height observing.
A telescope’s advertised magnification is less useful than its aperture and mount. Aperture determines how much light the telescope collects and how much detail it can theoretically resolve; the mount determines whether that detail remains visible when you touch the focus knob. Before buying, decide where the telescope will be stored, how far it must be carried, and whether you mainly want the Moon, planets, or faint deep-sky objects.
As an Amazon Associate we earn from qualifying purchases at no extra cost to you.


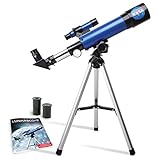

Quick comparison of strong beginner choices
| Telescope type or example | Aperture and optical design | Typical packed weight | Mount and setup | Best fit | General 2026 price range |
|---|---|---|---|---|---|
| 80 mm short-tube refractor, such as the Celestron StarSense Explorer LT 80AZ | 80 mm; achromatic refractor | About 4–6 kg | Manual alt-azimuth tripod; about 5–10 minutes | Moon, bright planets, landscapes, small storage spaces | About $150–$250 |
| 114–130 mm tabletop reflector, such as the Heritage 130P class | 114–130 mm; Newtonian reflector | About 6–9 kg including base | Dobsonian tabletop mount; about 5–10 minutes | Maximum visual reach on a modest budget | About $250–$400 |
| 130 mm full-height reflector, such as the Celestron StarSense Explorer DX 130AZ | 130 mm; Newtonian reflector | About 8–11 kg | Alt-azimuth tripod; about 10–15 minutes | Families and observers who prefer standing height | About $400–$550 |
| 150 mm tabletop Dobsonian | 150 mm; Newtonian reflector | About 12–18 kg | Large tabletop base; about 10 minutes | Deeper-sky viewing when storage and a sturdy table are available | About $350–$600 |
Weights and prices vary by package, retailer, accessories, and regional taxes. The figures above are useful for planning storage and transport rather than treating them as exact specifications.
Which telescope matches your viewing situation?
| Your situation | Recommended choice | Why | Compromise |
|---|---|---|---|
| You have a closet, balcony, or small apartment and want quick sessions | 70–80 mm refractor | Sealed tube, low maintenance, light tripod, fast setup | Less light and resolving power than a 130–150 mm reflector |
| You have a firm table and want the most capability for the money | 114–130 mm tabletop Dobsonian | Stable simple mount and substantially more light than a small refractor | Requires a table or dedicated observing platform |
| You want to observe from a yard and dislike kneeling or crouching | 130 mm reflector on a full-height alt-az mount | Good aperture with comfortable eyepiece height | Longer setup and more storage space |
| You regularly drive to darker skies | 130–150 mm collapsible or tabletop reflector | More light gathering per carrying kilogram | Open mirrors need occasional alignment and careful transport |
| You mainly want the Moon and bright planets with minimal maintenance | 80–100 mm refractor | Clean, high-contrast views and no routine mirror collimation | Bright objects can show purple-blue color fringing in inexpensive achromatic models |
Aperture: how much difference does it make?
Light-gathering area increases with the square of aperture. A 130 mm telescope has approximately (130 ÷ 80)2, or 2.64 times, the light-collecting area of an 80 mm telescope before accounting for optical losses. That does not make every view 2.64 times larger, but it can make faint star clusters, nebulae, and galaxies easier to detect.
For the Moon and planets, aperture also helps resolve fine features when the atmosphere is steady. However, a shaky 130 mm tripod can produce a less satisfying view than a well-supported 80 mm telescope. A useful rule is to prioritize aperture only after the mount, eyepieces, and storage plan are acceptable.
Refractor versus reflector for a first telescope
Refractors: simple and ready quickly
A refractor uses lenses at the front. The optical tube is enclosed, so dust and accidental fingerprints are less likely to affect the internal optics. Small refractors are good choices for children, casual observers, and anyone who wants to carry the telescope outside, point it at the Moon, and begin viewing within minutes.
Low-cost achromatic refractors can show chromatic aberration: bright objects may have a violet or blue edge at high magnification. This is normal for the design, not necessarily a defect. Do not choose a refractor solely because its tube is long or its packaging advertises extreme magnification.
Reflectors: more aperture for the money
A Newtonian reflector uses a primary mirror, so it usually provides more aperture at a given price. A tabletop Dobsonian mount is mechanically simple and often steadier than a lightweight camera-style tripod. The trade-offs are a larger footprint, a need to protect the open tube from dust, and occasional collimation, which is the process of aligning the mirrors.
Collimation is not a reason to avoid a reflector. Beginners can check alignment with a basic collimation cap or sight tube, and many telescopes hold alignment well during normal use. The first adjustment should be small; turning every adjustment screw aggressively is a common way to make the process harder.
Mount stability and setup time matter more than expected
At high magnification, the Moon can drift across the field of view quickly because Earth rotates. A stable mount lets you nudge the telescope smoothly and refocus without several seconds of vibration. Look for a mount with slow-motion controls or smooth altitude and azimuth movement, a solid spreader, and legs that do not flex when lightly pressed.
For a manual telescope, a practical setup sequence is:
- Place the mount on firm ground or a rigid table, away from a deck that transmits footsteps.
- Attach the optical tube and balance it before tightening the clamps.
- Insert the lowest-power eyepiece, usually the one with the largest focal-length number.
- Point at a bright, distant object and focus slowly.
- Increase magnification only after the target is centered and the image is steady.
If the telescope includes a phone-assisted finding system, use it as a locating aid rather than as a replacement for a stable mount. Calibrate the phone carefully, keep the screen dim, and remember that a phone holder adds weight and can shift the balance of a small instrument.
Eyepieces and realistic magnification
Most beginner telescopes work best with three useful magnification ranges: roughly 20–40× for locating objects, 50–100× for lunar and planetary viewing, and higher magnification only on steady nights. The approximate magnification is calculated by dividing the telescope’s focal length by the eyepiece focal length. For example, a 650 mm telescope with a 25 mm eyepiece gives 26×, while a 10 mm eyepiece gives 65×.
Atmospheric turbulence often limits useful magnification before the telescope’s theoretical limit does. Claims of 300× or more from a small beginner scope are therefore poor buying criteria. A sharp view at 65× is more valuable than a blurred view at an advertised maximum.
Ownership realities: what wears first?
- Tripod joints and mount clamps: repeated overtightening can strip threads or deform plastic parts. Tighten only until the tube is secure.
- Eyepiece barrels: dust and fingerprints reduce contrast. Use a blower and a proper optical brush; avoid household glass cleaner.
- Reflector mirrors: keep the dust cap on and let condensation evaporate before closing the tube for long-term storage. Frequent washing is unnecessary and increases risk.
- Battery-powered accessories: remove batteries during long storage to reduce leakage damage. Manual mounts avoid this maintenance issue.
- Collimation tools: a simple cap is inexpensive, while a laser collimator requires correct alignment itself. A poorly aligned tool can introduce errors.
For a rough value calculation, suppose a $300 telescope is used twice per month for three years. That is 72 sessions, or about $4.17 per session before accessories. A telescope that takes 30 minutes to assemble and carry outside may be used less often than a $200 model that is ready in five minutes, so convenience can matter more than an extra 20 mm of aperture.
Final buying advice
Choose the 70–80 mm refractor if storage space, low maintenance, and fast setup are your priorities. Choose a 114–130 mm tabletop reflector if you can provide a sturdy table and want the strongest deep-sky performance for the money. Choose a 130 mm full-height reflector if comfortable viewing position and shared family use outweigh compactness. Move to a 150 mm tabletop Dobsonian when you have reliable storage, a suitable platform, and a clear interest in seeing fainter objects.
Whichever design you select, budget for a red flashlight, a comfortable observing chair, and one useful low-power eyepiece before buying decorative accessories. A stable mount, realistic magnification, and a telescope you can carry outside regularly are the combination most likely to produce clear night-sky views.
0 Comments