What's inside
As an Amazon Associate I earn from qualifying purchases. This post may contain affiliate links at no extra cost to you.
Sanding wood with vacuum extraction is cleaner, safer, and usually faster than sanding without suction. The vacuum removes abrasive dust as it is produced instead of letting it settle on the workpiece, clog the abrasive, or enter your lungs. It also makes it easier to see scratches and uneven areas while you work.
A basic setup has four parts: a random-orbit sander or other dust-producing tool, a dust hose, a vacuum, and a filter or dust bag suited to fine wood dust. The quality of the connection matters, but technique matters just as much. Poor airflow, a clogged filter, or sanding with excessive pressure can still leave you with a dusty shop and a damaged surface.
As an Amazon Associate we earn from qualifying purchases at no extra cost to you.

Our Top Picks

Choose the Right Vacuum
A general wet/dry shop vacuum is adequate for occasional work, especially when sanding small projects, softwood, or construction lumber. Choose one with a hose that fits the sander and a filter rated for fine dust. A vacuum with a disposable collection bag is often cleaner and easier to empty than a bare canister.
For regular furniture work, cabinetmaking, or sanding indoors, a purpose-built woodworking dust extractor vacuum is a better choice. These machines generally provide steadier airflow, better filter systems, quieter operation, and automatic tool switching. That convenience is useful, but it is not essential for a one-off project.
| Vacuum type | Best use | Main limitation |
|---|---|---|
| Basic shop vacuum | Small projects and occasional sanding | Can clog quickly with fine dust |
| Shop vacuum with fine-dust bag and filter | Routine DIY sanding | Needs regular filter and bag maintenance |
| Dedicated dust extractor | Frequent indoor sanding and multiple tools | Higher purchase price |
| Cyclone separator plus vacuum | Large amounts of dust and longer filter life | Requires extra space and hose connections |
Do not rely on the vacuum filter alone. A HEPA shop vacuum filter can reduce the amount of fine dust exhausted back into the room, but it must be compatible with the vacuum. A filter that is overloaded or fitted incorrectly will not protect the air. Wear a properly fitted respirator rated for fine particulates when sanding, even with extraction.
Connect the Sander Correctly
Start with the shortest practical hose. A 1-1/4-inch hose is common for sanders, while larger hoses are better suited to routers, planers, and table saws. An adapter may be necessary, but avoid loose connections wrapped in tape. Leaks reduce suction at the sanding pad and allow dust to escape near your hands.
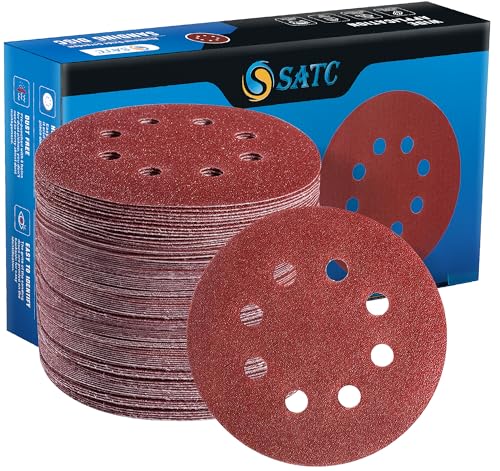
Before sanding, inspect the dust ports on the tool. Some ports become blocked by a small plug of dust, particularly when sanding paint, filler, or resin. Check that the holes in the sanding disc align with the holes in the pad. A solid disc on a perforated pad will greatly reduce extraction unless the tool is designed for that combination.
Keep the hose from dragging across the workpiece. Support it over your shoulder, hang it from a boom, or route it behind the bench. A hose pulling sideways can tilt a random-orbit sander and create uneven scratch patterns or rounded edges.
Prepare the Wood Before Sanding
Remove staples, screws, and grit before starting. A single embedded nail can tear an abrasive disc and score the wood. If you are sanding old painted or finished wood, test for lead before disturbing the coating. Vacuum extraction does not make lead dust safe to breathe.
Use the coarsest abrasive that will remove the defect without unnecessary damage. For many projects, 80 grit removes milling marks, 120 grit refines the surface, and 180 grit prepares it for stain or paint. Stop at 180 or 220 grit when using most stains; sanding much finer can close the surface and produce uneven color. Follow the coating manufacturer’s instructions when preparing for paint.
Use quality hook-and-loop random-orbit sanding discs with dust holes that match your sander. Cheap discs are acceptable for rough construction work, but they often shed grit, load faster, and leave inconsistent scratches on furniture-grade surfaces.
Sand With Steady, Light Pressure
Turn on the vacuum before the sander touches the wood. Keep the sander’s pad flat and move it slowly, roughly 1 to 2 inches per second. Let the abrasive cut rather than leaning heavily on the tool. Excess pressure slows the pad, reduces airflow through the holes, overheats the abrasive, and can leave swirl marks.
On a broad panel, make overlapping passes by about half the pad diameter. Work in a consistent pattern and finish each grit by making a light pass with the grain. A random-orbit sander can remove material in any direction, but final scratches running with the grain are less visible under finish.
Do not hold the sander in one place while the vacuum is running. The pad can create a shallow dish or visible circular mark in seconds, particularly on soft pine, cedar, and other low-density woods. Ease the sander onto the surface while it is running and lift it away before switching it off.
Manage Airflow and Dust
Vacuum performance is a balance between airflow and suction. A blocked filter, full bag, kinked hose, or clogged tool port can reduce extraction dramatically. If dust begins collecting around the pad, stop and check the system rather than sanding through it.
Fine dust can quickly cake a pleated filter. A disposable dust bag or pre-separator keeps more debris out of the main filter. A cyclone separator is particularly useful when sanding large panels or several doors, but it adds hose length and another container to empty.
Empty the vacuum outdoors when possible. Do not shake a dusty bag or blow a filter clean inside the shop. Compressed air simply puts the finest particles back into the air. For a filter that can be cleaned, follow its instructions; some filters should be tapped gently, while others can be washed and must dry completely before reuse.
Inspect Between Grits
Stop the vacuum and wipe the surface with a clean, dry cloth or use a soft brush. Do not use a damp rag if you plan to stain soon; water can raise the grain and change how the wood absorbs finish. Shine a work light across the surface at a low angle to reveal remaining mill marks and cross-grain scratches.
Vacuum extraction removes loose dust, but it cannot correct sanding mistakes. If a deep scratch remains from 80 grit, moving directly to 180 grit may not remove it. Step through the grits and sand until the previous scratch pattern is gone before advancing. Replace a disc when its cut rate drops, even if it looks usable. A dull abrasive encourages pressure and increases the chance of heat marks, unevenness, and swirl marks.
Finish the Surface Safely
After the final sanding, vacuum the project, bench, nearby walls, and the tool exterior. Allow airborne dust to settle, then vacuum again. For a clean surface before stain or clear finish, use a lint-free cloth appropriate to the coating rather than redistributing dust with a dirty rag.
If the wood will receive water-based stain, paint, or a clear coat, test the complete preparation and finishing schedule on scrap from the same board. Different species absorb finish differently, and extraction cannot compensate for uneven sanding, end-grain absorption, or glue squeeze-out. The smoothest result comes from combining good dust control with sharp abrasives, light pressure, and careful inspection.



0 Comments