

What's inside
As an Amazon Associate I earn from qualifying purchases. This post may contain affiliate links at no extra cost to you.
To build a floating shelf, make a hollow box or cut a solid board to slide over a hidden cleat or bracket, then fasten that support into wall studs and finish the surface. The secret to a sturdy shelf is the support, not the shelf board itself. Below is a simple method, a list of tools worth having, and the mistakes that cause drooping shelves.
| Pick | Best for | Key feature |
|---|---|---|
| Zircon StudSensor e50 | Finding studs reliably | Stud and live wire detection |
| Bosch GLL 30 Laser Level | Marking a level line on the wall | Self-leveling cross line |
| Minwax Polycrylic Protective Finish | A clear, durable top coat | Water-based, low odor formula |
| Minwax Wood Finish Stain | Adding color to the wood | Penetrating oil-based stain |
| Hillman Toggle Bolt Assortment | Anchoring where there is no stud | Strong hold in hollow drywall |
Our Top Picks
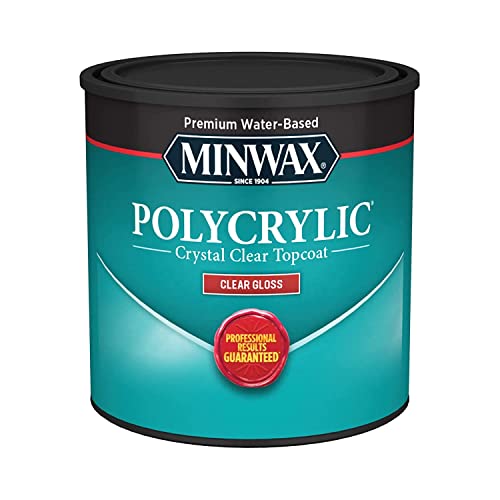 Minwax 1/2 pt 25555 Clear Polycrylic Water-Based Protective8 fl oz2.9 x 2.9 x 3 inches0.65 poundsCheck on Amazon

Choose a Shelf Style
There are two common ways to build a floating shelf. A hollow box shelf is a lightweight frame covered with a top, front, and bottom, which slides over a wooden cleat attached to the wall. It looks thick and substantial, but it is mostly air, so it is easy to build from thin boards or plywood. A solid shelf uses a thick board with holes or slots drilled into the back to accept hidden metal rods or a bracket.
For a first project, the hollow box with a cleat is simpler and cheaper. Plan the shelf for the load it will carry. Decorative items and a few books are fine on a typical shelf if it is anchored properly. A shelf holding heavy items, such as a stack of cookbooks, needs studs and a thicker cleat.
Tools and Supplies Worth Having
1. Zircon StudSensor e50
Finding studs is the key to a strong mount. A stud finder like the Zircon e50 detects studs and warns you about live wires. Calibrate it on a blank part of the wall, scan slowly, and mark the edges of the stud. Confirm by tapping or by driving a small finishing nail in the area where the shelf will be hidden. It is an inexpensive tool that you will use for many projects.
2. Bosch GLL 30 Laser Level
A level line keeps the shelf from looking crooked. The Bosch GLL 30 projects a self-leveling line on the wall, which you can follow with a pencil. It is more reliable than eyeballing, and it helps when you hang several shelves in a row. Laser lines can be hard to see in bright light, so work out of direct sun. A bubble level works too if you prefer.
3. Minwax Polycrylic Protective Finish
A shelf top takes a lot of wear. A water-based clear coat such as Minwax Polycrylic protects the surface from scratches and moisture, dries quickly, and has low odor. Apply thin coats with a quality brush, sanding lightly between coats. Avoid applying thick coats, which can run or bubble. It is a good choice over stain or natural wood.
Minwax Polycrylic Protective Finish
4. Minwax Wood Finish Stain
Stain adds color and highlights the grain. Minwax Wood Finish is a familiar oil-based option that comes in many shades. Test it on a scrap piece first, since color depends on the wood species. Wipe off the excess after a few minutes, and let it dry fully before applying a top coat. On pine and other soft woods, a pre-stain conditioner helps prevent blotching.
5. Hillman Toggle Bolt Assortment
If the shelf location does not line up with studs, toggle bolts can anchor a cleat in drywall for light loads. They spread the load behind the wall and offer more holding power than plastic anchors. Use them for decorative shelves only, and check the weight rating of the bolt. For anything heavy, move the shelf or add a stud-mounted cleat.
Hillman Toggle Bolt Assortment
Step-by-Step: Hollow Box Floating Shelf
- Cut the cleat. Rip a 2×2 or a piece of 1×3 to a length slightly shorter than the shelf. It should fit inside the box with a little clearance.
- Build the box. Cut a top, bottom, front, and two ends from thin boards or plywood. Glue and nail them together so the box has an open back.
- Mark the wall. Find the studs, draw a level line, and mark where the cleat will go.
- Mount the cleat. Drill pilot holes and screw the cleat to the studs with long screws. Check that it is level.
- Test fit. Slide the box over the cleat. It should fit snugly. Adjust by sanding if needed.
- Finish. Sand, stain, and apply a protective coat before mounting.
- Fasten. Slide the box on and secure it with small screws or nails through the top or bottom into the cleat.
Making It Strong
The cleat should be made from solid wood, not thin plywood, and it should be fastened into at least two studs. The longer the shelf, the more important it is to catch more studs. Use glue where the box meets the cleat for added stiffness. If you want the shelf to carry weight, make the cleat deeper so it fills more of the box.
Do not exceed the load capacity of your fasteners. When in doubt, test by pressing down on the installed shelf with moderate force, and check for movement. If there is flex, add another fastener or use a thicker cleat.
Style and Finish Ideas
Once the structure is sound, the shelf can match any room. A natural oak or walnut top looks warm in a living room, while painted pine suits a child’s bedroom. Rounded edges, softened with sandpaper or a roundover bit, make the shelf friendlier to touch. If you plan to hang several shelves, build them to the same depth and stagger the heights for a clean, intentional layout.
Think about the room’s lighting and the items the shelf will hold. A dark stain hides dust and shows off books, while a light finish reflects more light in a small space. Add a small lip or a groove at the back if you want to keep frames from sliding. For kitchens and bathrooms, choose a finish that tolerates moisture and clean it with a damp cloth rather than strong chemicals.
Common Mistakes
- Skipping the studs. Drywall anchors alone are not enough for heavy loads.
- Cutting the cleat too tight. A shelf that cannot slide on is frustrating.
- Not checking for level. A small error looks big on the wall.
- Ignoring wires and pipes. Use a detector before drilling.
- Applying finish after mounting. It is easier to finish on a bench.
Frequently Asked Questions
How much weight can a floating shelf hold?
It depends on the cleat, the fasteners, and whether you hit studs. A well-built shelf mounted to studs can hold a reasonable load, but check your design before loading it heavily.
What wood should I use?
Pine is inexpensive and easy to work. Oak and maple look elegant but cost more. For the cleat, use sturdy wood.
Can I build one without a stud?
You can for light decorative use with toggle bolts, but it is less secure.
How do I hide the screw holes?
Fill them with wood filler or put the fasteners on the underside, where they are less visible.
Conclusion
A floating shelf looks effortless, but a strong cleat and good anchors do the heavy lifting. Based on specifications and reviewer feedback, a stud finder, a level, and a decent finish are the helpers worth owning. Take your time, check for level, and enjoy a clean-looking shelf.
As an Amazon Associate we earn from qualifying purchases.
Related guides
More from Amazon
Programs that pair well with the guide above. Offers and eligibility are set by Amazon and may change.
A free business account with business pricing and bulk-buying tools for work, shop or home office.
Create a business accountFree shipping on eligible items, Prime Video and more. Eligible new members can start with a free trial.
Start a Prime free trialAudiobooks and podcasts to listen to on the go. Eligible new members can start with a free trial.
Try Audible freeAd-free music streaming. Eligible new subscribers can start with a free trial.
Try Music Unlimited freeAs an Amazon Associate we earn from qualifying purchases.




Write Your Review
No reviews yet. Be the first to share your experience!